


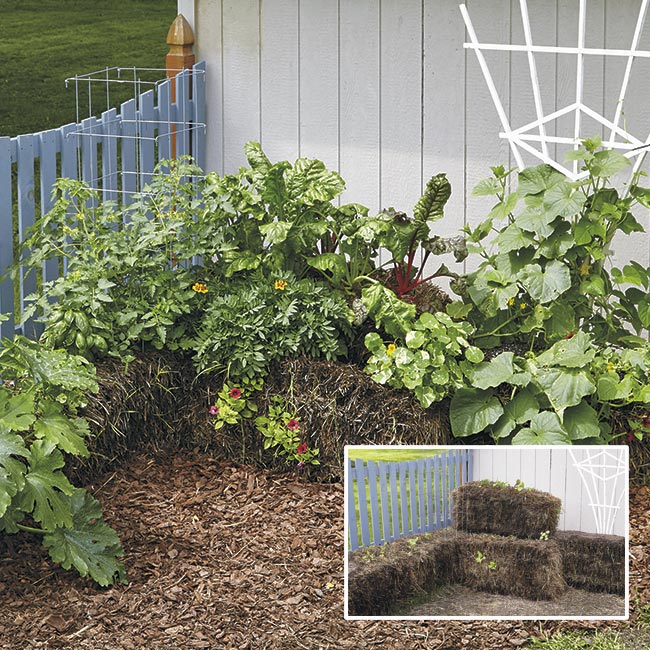
Try straw bale garden beds this year
Don’t let bad soil or bad knees keep you from gardening. Joel Karsten, author of Straw Bale Gardens Complete, has come up with a way to get all the benefits of a raised bed with considerably less effort and expense. Watch the video above to see the great results we got using his method in our test garden.
What is straw bale gardening?
In short, you add high nitrogen fertilizer and water to straw bales to start the decomposition process. This creates a well-drained, high nutrient environment for plants. Most annuals and vegetables thrive here but Joel has found sweet corn is too tall and the bales don’t last long enough for perennials, such as rhubarb. You can get started with your own straw bale garden in early spring using the materials below. And here's a quick tip: Place the straw bales so the twine is on the side, that helps them stay standing later in the season.
Materials for a straw bale garden:
- Straw bales (not hay, it won’t absorb enough water)
- 1 lb. of lawn fertilizer per bale (at least 20% nitrogen not slow-release)
- 1 cup of 10-10-10 garden fertilizer per bale
- Potting mix
Tools
- Trowel
- Measuring cups
- Digital soil thermometer
- Soaker hose with timer (optional)
How to plant a straw bale garden
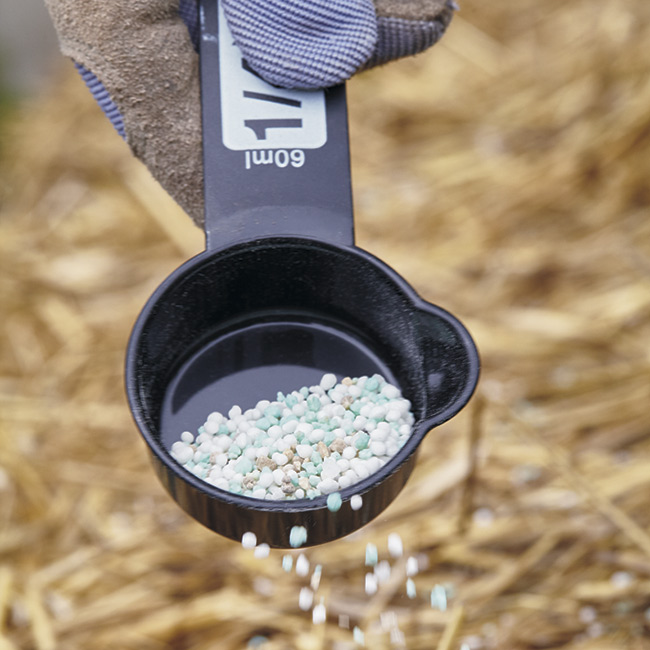
Step 1: Fertilize
When daytime temps are at least 45 degrees F follow the feeding schedule in the chart below and sprinkle the called-for amount evenly over the top of each straw bale. Cool weather slows bacteria growth so if it gets below 45 degrees F, skip that day and start up again when it warms up.
| Days to feed | How often to feed | What to feed |
|---|---|---|
| Days 1-6 | Every other day | 1/2 cup of lawn fertilizer |
| Days 7-9 | Daily | 1/4 cup of lawn fertilizer |
| Day 10 | Once at the end of the process | 1 cup of 10-10-10 fertilizer |
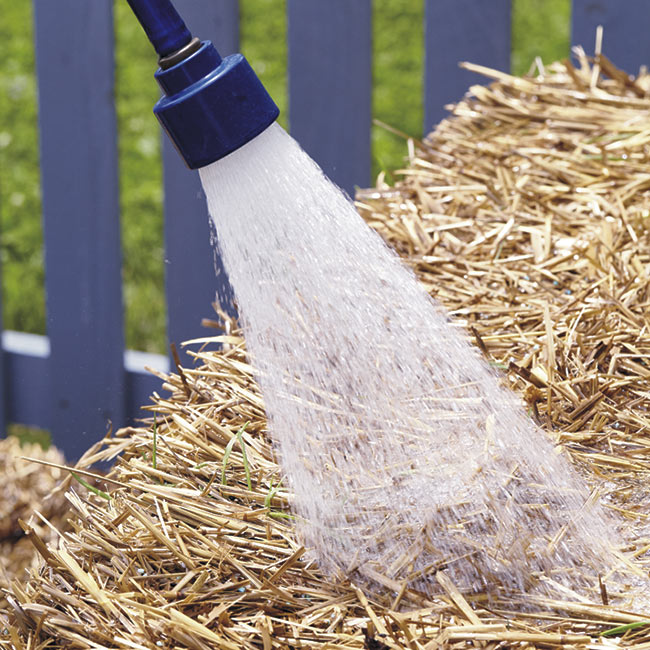
Step 2: Water the straw bales
After each application of fertilizer, water each straw bale until it’s running out the bottom. It usually takes longer to get them saturated the first couple of times. After that, about a gallon of water per bale will do it.
Watering tip
On chilly days, warm the water in a bucket in the sun for a few hours first to help the bacteria stay active.
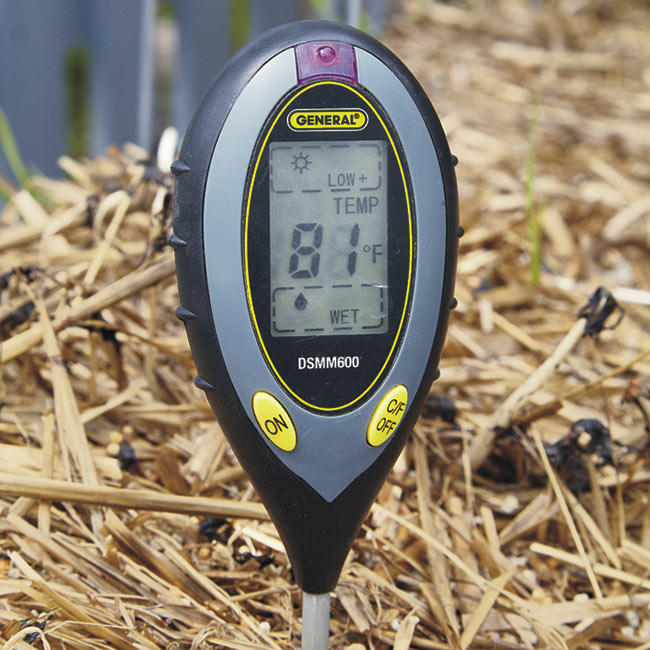
Step 3: Check the temperature
The last couple of days check the temperature inside the straw bales by inserting a soil thermometer 6 in. into the straw. If it’s over 100 degrees F, let it cool for a day or two before you put in seedlings. Seeds won’t be affected by the higher temperatures. There’s no need to remove mushrooms or mold growing on the bales. It’s all part of the decomposition process.
You Might Also Like:
Vegetable Garden with Curb Appeal
5 Great Reasons to Grow Peas
6 Plants Bees Love
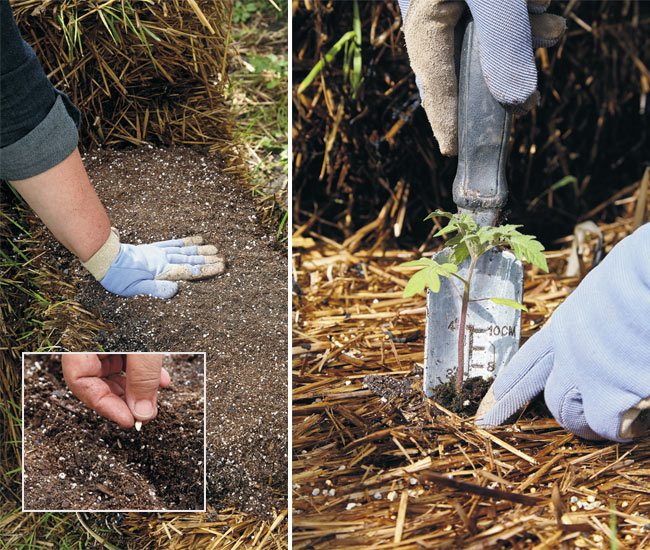
Step 4: Start planting into straw bales
There are two ways to plant up your straw bale garden: sow seeds or add potted plants. Either way, space them as you would if you were growing them in the ground, so the straw bales aren't too crowded.
-
Sow seeds Apply a 2-in. layer of potting mix on top of the straw bale as I did at left to provide a more moisture-retentive material for germination and initial growth. Then plant your seeds the depth suggested on the package.
-
Plant seedlings Make a home for seedlings, such as this tomato plug at right, by wedging the trowel between straw layers and pushing it back and forth. If the root ball is small like this one, add a bit of extra potting mix to help it hold additional moisture while the plant is getting established. Well-rooted plants in 4-in. pots shouldn’t need potting mix.
Step 5: Enjoy your harvest!
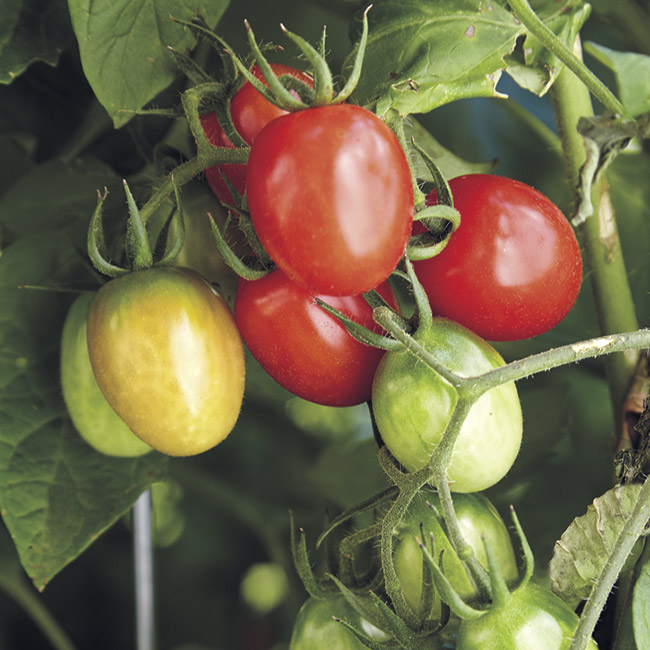
I tried Joel’s straw bale garden tips last summer and got a nice crop of vegetables, including the ‘Fantastico’ grape tomato above. One thing I did learn is that you’ll need to water straw bales more frequently than you do in-ground beds. A soaker hose with timer would make watering easier. In fall, till the partially broken-down straw into the soil or add it to your compost pile.
You Might Also Like:
7 Easy Plants to Start From Seed
Four Tomato Types for Your Garden
How to Grow Vegetables in a Galvanized Raised Garden Bed


