


Get a head start on seed-starting this winter when you plant in milk jugs!
How would you like to save money on plants? Start perennials from seed with this easy method: Sow your seeds in a milk jug, set it outdoors and let Mother Nature do the rest. This simple process relies on sun, snow and rain to do the work of breaking down the seed coat and getting the seeds to sprout. Below is everything you’ll need to get started, including a list of some of the best perennials. Then click through the slideshow for step-by-step instructions!
You Might Also Like:
7 Ways to Upcycle Plastic Bottles in the Garden
Easy Ways to Refill Bird Feeders
How to Start Seeds Indoors
Materials:
- Clean plastic milk jugs
- Plant tags
- Seeds
- Potting mix
Tools:
- Utility knife or scissors
- Hammer
- Screwdriver or awl
- Piece of scrap wood
- Packing tape or clear duct tape
Perennials that start easily with the milk jug method
- Black-eyed Susan (Rudbeckia fulgida)
- Butterfly weed (Asclepias tuberosa)
- Columbine (Aquilegia hybrids)
- Coneflower (Echinacea purpurea)
- Forget-me-not (Myosotis sylvatica)
- Foxglove (Digitalis hybrids)
- Poppy (Papaver hybrids)
- Shasta daisy (Leucanthemum hybrids)
- Tickseed (Coreopsis hybrids)
How to sow seeds in milk jugs outdoors in winter
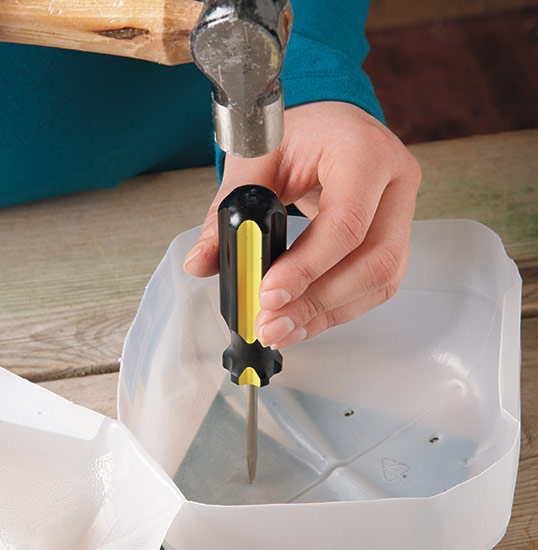
Step 1: Prepare the milk jug
Using a utility knife or scissors, make a cut at least 4 in. up from the bottom, going nearly all the way around. Leave a couple of inches uncut just below the handle to form a hinge.
You’ll need to add some holes for drainage, so use a hammer and a screwdriver or awl to pound 6 to 10 holes through the bottom of the jug. Place a scrap piece of wood underneath so you don’t damage your work surface.
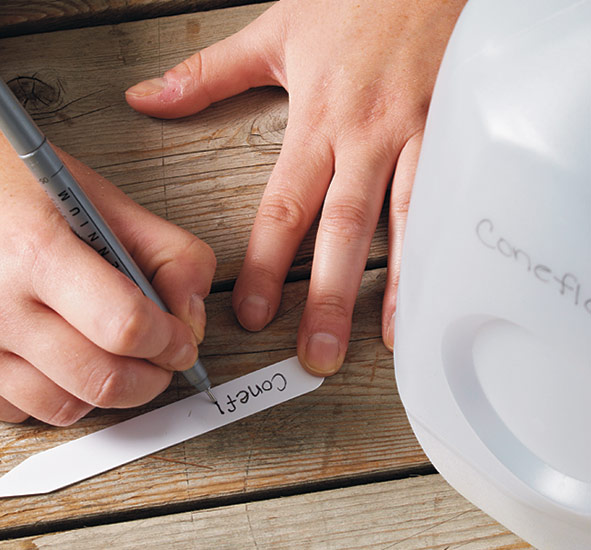
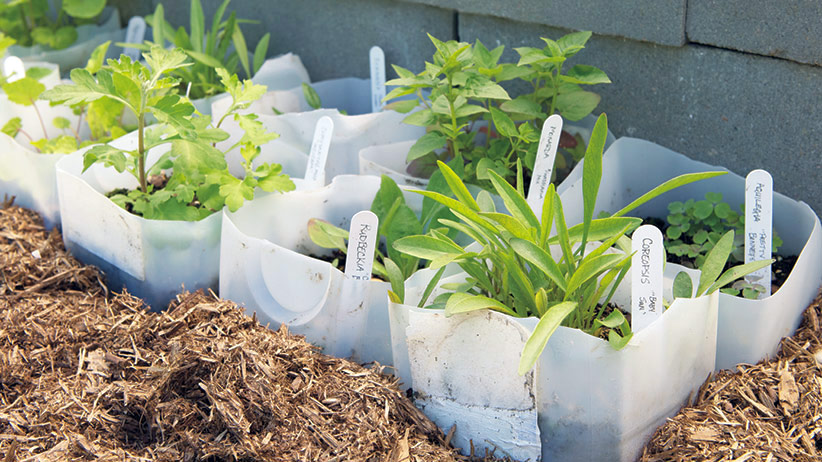
Step 2: Make plant labels
It’s hard to tell seedlings apart. So be sure to put a label in each milk jug with the name of the plant. This tag will help you tell plants apart after you’ve removed the top of the jug later in spring. You can label the outside of the jug, too.
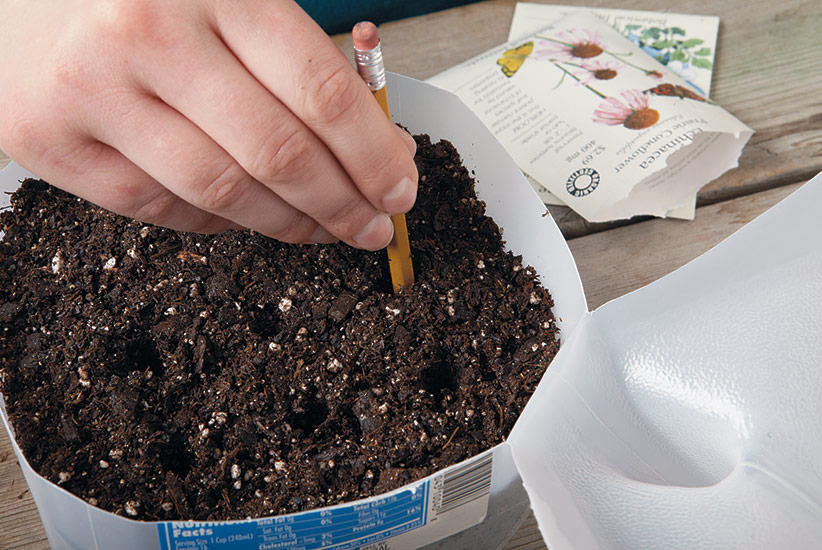
Step 3: Add potting mix and sow seeds to the milk jug
Fill the bottom half of the milk jug with premoistened potting mix to within an inch of the rim. The mix should be moist but not wet. A pencil point makes just the right size holes for seeds. Check the seed packet to see how deep to make the holes. Because you moistened the mix earlier, you don’t have to worry about watering right now.
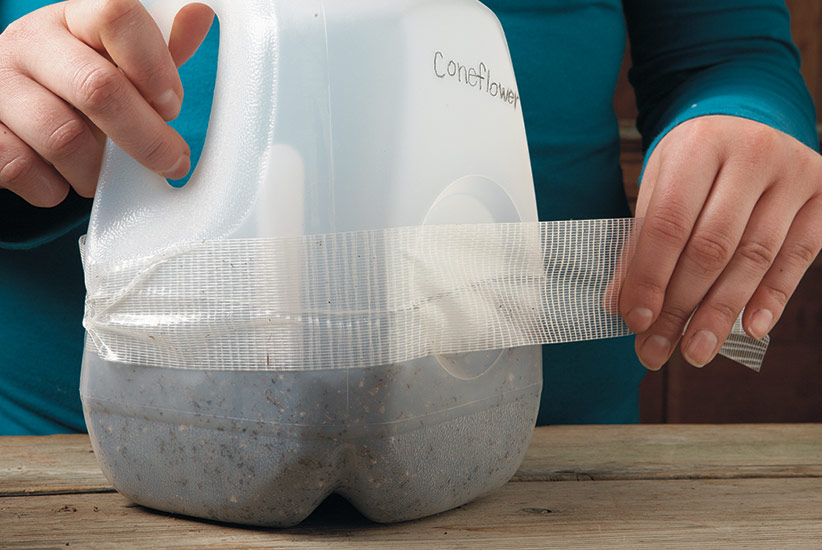
Step 4: Tape your milk jug planter closed
After you’ve planted the seeds, tape the top and bottom of the milk jug together. Use either the packing or clear duct tape — they both hold up just fine outside. You’ll be taking it off later in the season when the temperatures warm up.
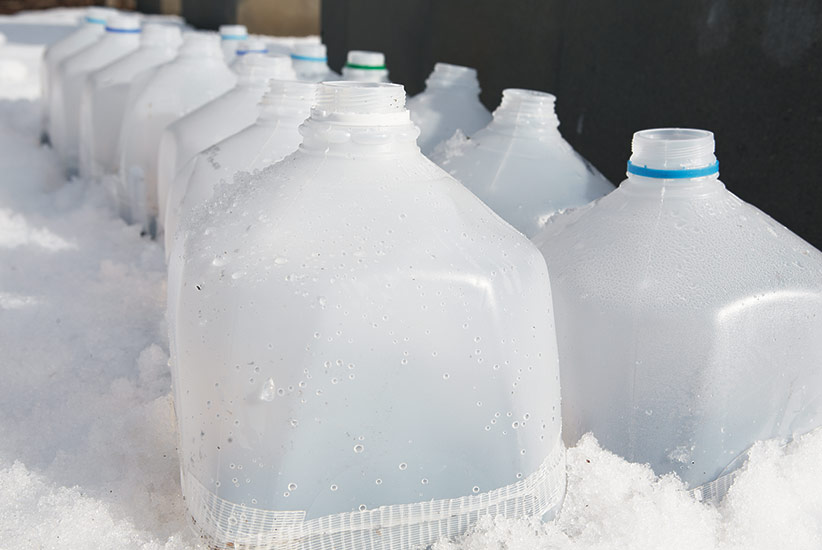
Step 5: Put planted milk jugs outside
Now your new plantings are ready for the great outdoors — even if it’s snowing! The plastic container acts like a greenhouse, keeping the seeds warm (but not too warm) and moist. Place them where they’ll get light and rain or snow (make sure the cap’s off the milk jug), but they won’t blow away. Snuggling them close together helps provide some stability. Plus they’re easier to keep track of this way. Avoid the north side of buildings — they won’t get enough sunlight there.
Step 6: Harden off young plants
As the weather warms up, flip back the tops on nice days, but close them again at night. When evening temperatures stay above freezing, you can leave them off permanently. You’ll need to keep a close eye on the milk jugs so the potting mix doesn’t dry out. If you have a warm spell in early spring, move the containers to a shady spot so they won’t get too dry.
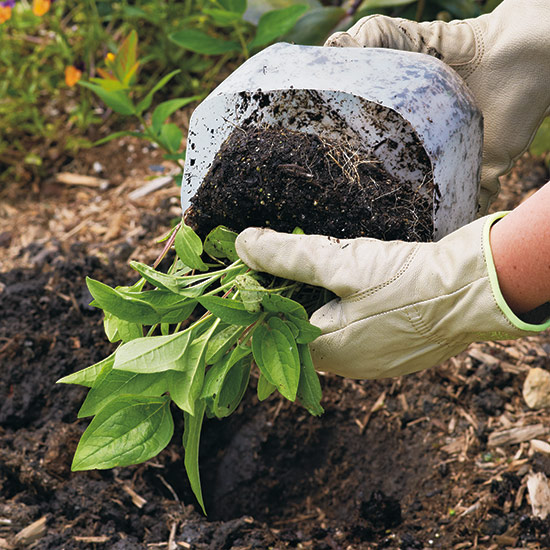
Step 7: Transplant into the garden
This coneflower we started in a milk jug over winter has developed a strong root system, so it’s time to transplant it. You may have to tease apart several plants if you sowed thickly.


