


What are bare-root plant?
Have you ever ordered a bunch of plants and then been surprised (and maybe a little disappointed) when you opened the box? You had visions of huge, blooming plants, and all you got were plastic bags with a few roots in peat moss. It’s easy to overlook the words “shipped bare root” in the tiny type when you’re caught up in the catalog pictures. Well, bare root isn’t a bad thing. It's an economical way to buy plants and you can often find varieties that are hard to find locally. Here’s how to get them off to a great start.
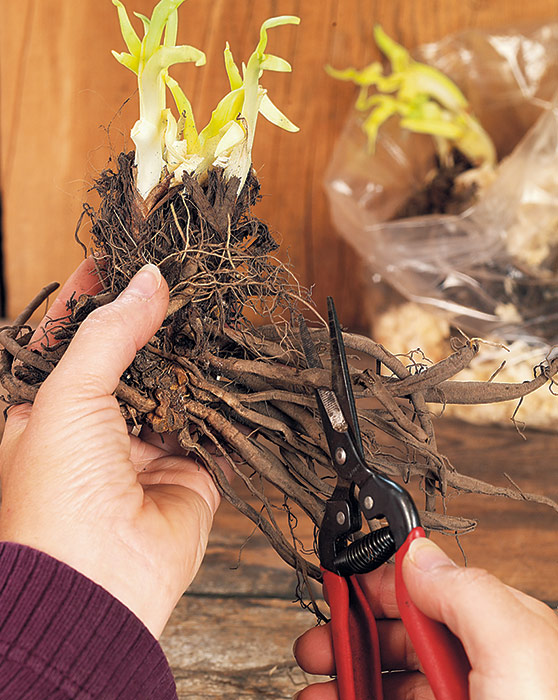
Check bare-root plants for problems
Check things over to make sure your new plants are in good shape so they can get a strong start. If you do happen to notice any problems, be sure to take photos and contact the nursery for a replacement. The daylily in the photo above had a few broken roots, which isn't a big deal — just prune them off. Leaving a dead root to rot on the plant offers an easy place for disease to take hold. Rotten or dessicated roots can be a more serious. Any plant that looks completely dry and brittle has dried out so much it won't recover so go ahead and toss it on the compost pile. Soft, mushy, sometimes smelly, roots have rot. That plant needs to be thrown in the trash or burned. Compost piles don’t get hot enough to kill the fungus that causes the disease, and you shouldn’t bury the plant because that might spread the problem, too.
Prepare bare-root perennials for planting
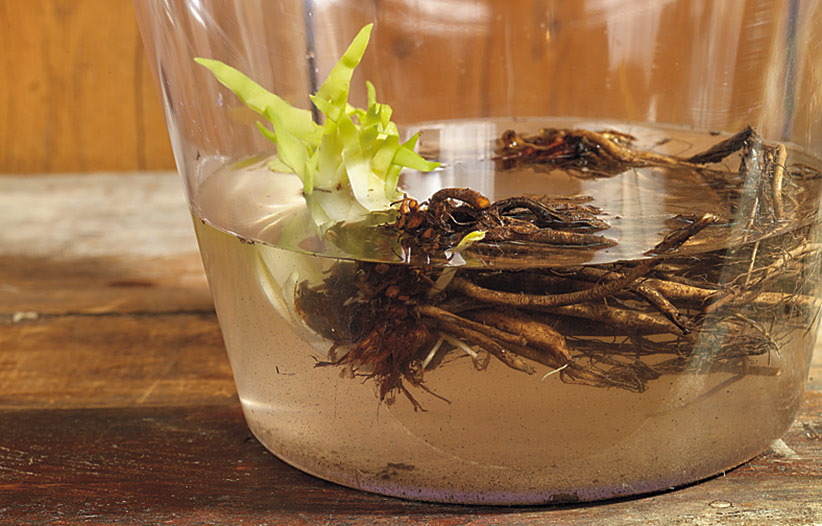
Once you've looked over your new bare root plants, soak them in a bucket of water for an hour as the photo above shows. Add a few drops of fish emulsion fertilizer to give plants a boost to start growing.
How to plant bare-root perennials in pots
The most common reason for potting up bare-root plants is because the weather and the soil are still too cold for them to go outside. But you might also want to baby an expensive or temperamental plant by closely controlling the moisture and light levels. Or maybe it’s summer already and hot temperatures would be a big shock for your young plant. Growing it in a pot in a cool, shady spot for a while will help ensure its success. Here's how to get bare root plants going in a nursery pot.
Get a good potting mix
Make sure to use a soilless potting mix, not soil. Most mixes are made of sphagnum, peat and perlite, which drain well. While getting too dry is a problem for packaged plants, rotting is the biggest concern once they’re planted. So at this point, it’s better to have dry potting mix instead of premoistening it.
Pot up bare-root perennials
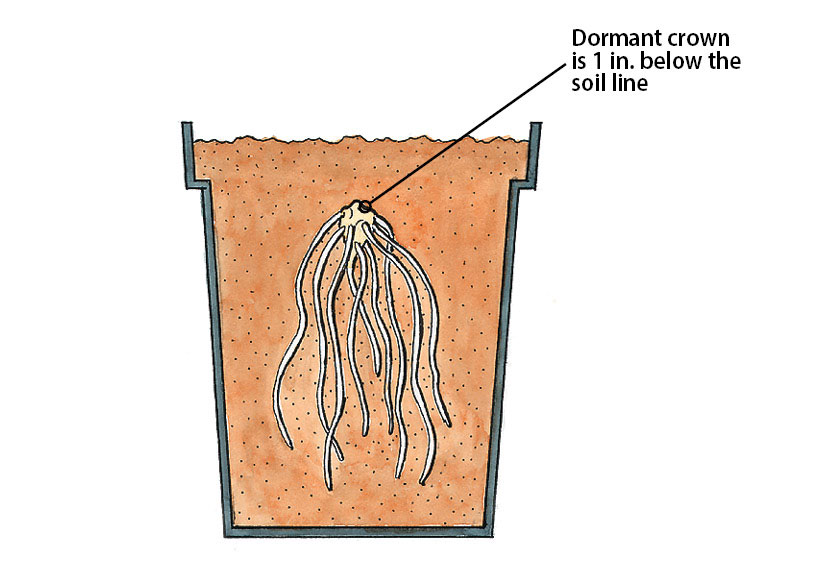
While your plant is soaking in the bucket, get a nursery pot that’s a little larger than the root mass so there’s room for roots to grow. Choose a pot that’s big enough that you don’t have to bend the roots to get it to fit. Now fill the pot part way with the potting mix and tap the bottom on your work surface to settle it. Then add the plant, fill the pot the rest of the way and tap it again to settle. For plants that don't have foliage position the crown (that’s the spot where the roots and green growth come together) about an inch below the surface of the potting mix as the illustration above shows. If it’s set too low, water can pool there and the crown will rot. Make sure any foliage that has sprouted is showing above the potting mix.
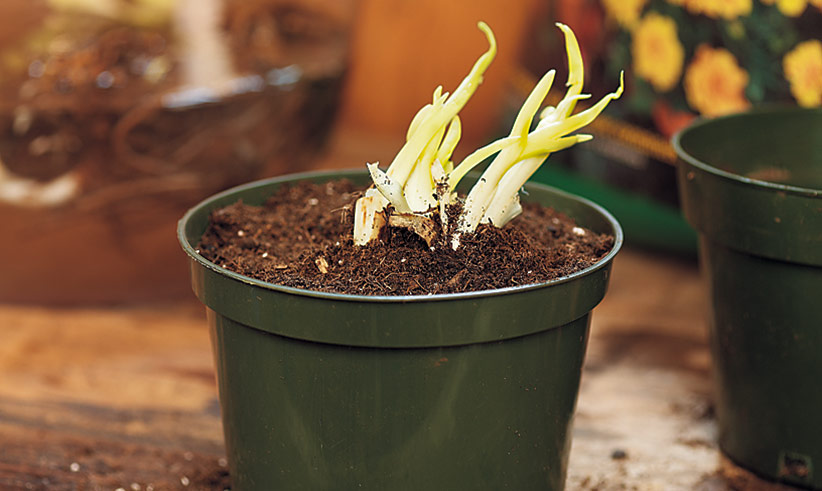
Don’t worry about yellow leaves like these. That’s normal — the plant just didn’t get enough light in storage or shipping. It will green up in a week or so. Water your new perennial until water runs through the holes in the bottom of the pot. To firm the mix around the roots, wait 20 minutes and water again. Use a watering can with a rose for a gentle flow that doesn’t wash the soil away. Remember, you don’t want the plant to rot so there’s no need to water again until you see green growth sprouting.
Let them grow
Once your plant is potted up, it needs a place to grow. In spring, if temperatures are still around freezing, keep it inside where it’s cool, 60 degrees F or so. Avoid air vents that can dry out potting mix and foliage too quickly. A sunny windowsill should provide enough light, even if there aren’t any leaves yet. Usually within a couple of weeks you’ll see new green growth, so you can start watering with a weekly dose of fish fertilizer or a half-strength solution of balanced liquid fertilizer. When there’s vigorous growth on top, your plant is ready to go into the ground.
Once the soil is warm and dry enough to work, your plant can go outside. Give it a sheltered shady spot to start with so sun and wind don’t damage the new leaves.
How to plant bare-root perennials in the ground
Tough plants like daylilies and hostas won’t mind if you take them from the box and plant them in the ground, as long as all chance of frost is past. The daylily in the photo below is going directly in the garden. This process is similar to potting up, but there are a few differences:
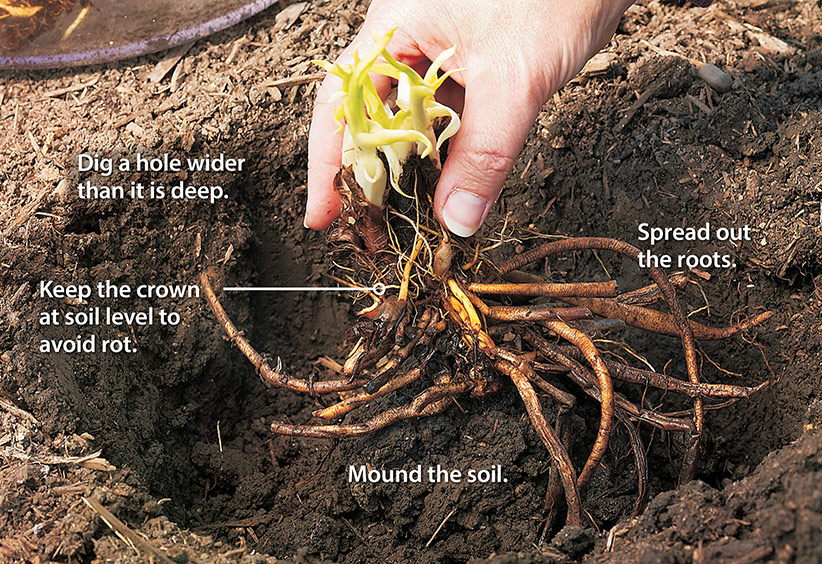
Prepare the soil
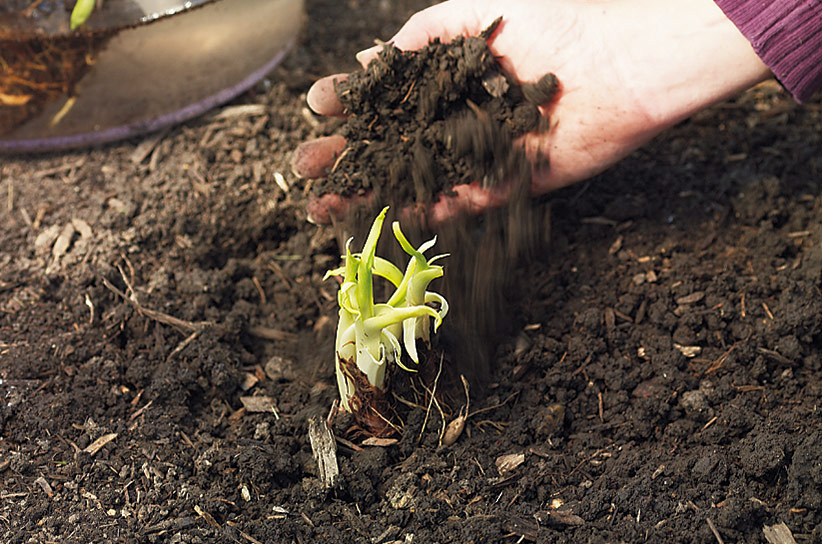
Clean up and soak the plants, just as you do before potting up. While the plants are soaking, dig a hole a little wider than the root mass of the plant you’re putting in the ground. Make a mound of soil in the center of the hole as the photo above shows. That gives the plant support and a place to spread out its roots. Water the empty hole before you plant to help settle the soil.
Plant the bare-root perennial
Place the plant on the mound and make sure the crown is even with the soil’s surface. If the crown is too low add more soil to the mound to avoid rot, check the plants position again and refill the hole with soil.
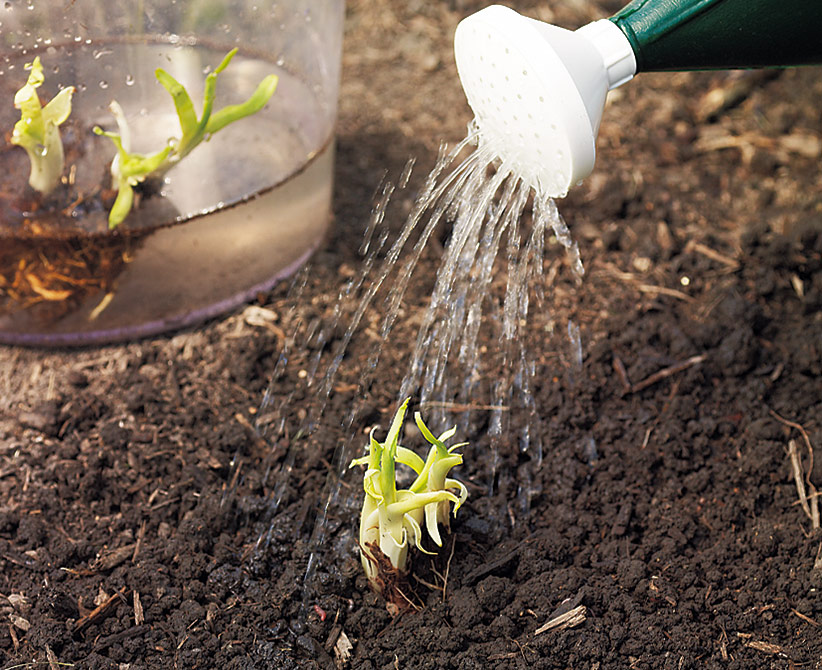
Water gently so the soil isn’t washed away.
Take care of your newly planted bare-root perennial
Keep your new perennial going strong by watering it about once a week if it doesn’t rain — more often if it’s hot. Even sun perennials do better with a little shelter from the hottest part of the day for a few weeks until they get established. Place a laundry basket over the top of the plant for a few hours in mid- to late afternoon each day. Once new growth starts, scratch compost into the soil a few inches out from the crown to feed the plant.
Pests aren’t any more of a problem than they are with other plants. So keep an eye out and treat accordingly. Some plants, such as coral bells or this daylily, will take right off. Others, such as hostas, may sit for a while. They’re just slower to get established, so be patient. It won’t be long, though, and those humble brown roots will be great looking new plants.
For more on how to plant perennials, read our article How to plant perennials in four simple steps.


