Maintaining pruners
Dull, dirty or rusty hand pruners that don’t open and close easily can ruin your day. Keeping your pruners dirt-free and sharp helps you cut smoothly, preventing stress on your hands. And a clean cut heals better on the plant and minimizes the risk of infection or disease. Watch our video and read the steps below to see a how to clean and sharpen pruners quickly and easily.
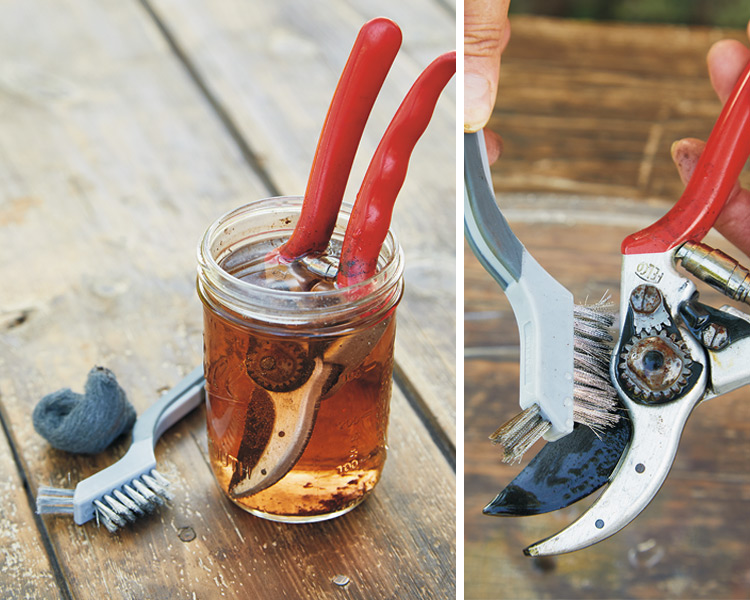
Cleaning up rusty pruners
Vinegar reacts with rust and will break it down. After I soaked the pruners below overnight, I could already see bits of rusty debris falling to the bottom of the jar. After you soak them, use a wire brush to clean off any residual rust, then buff the blades to a shine with fine-grade steel wool. You may have to disassemble the pruners and soak the pieces separately to get all rust off.
Helpful tip
As you take the pruners apart, lay each piece in order on the sticky side of a strip of duct tape, or take photos with your cell phone so you remember how to put it all back together.
You Might Also Like:
Must-Have Pruning Tools for Gardeners
Clever Garden Tool Tips
Helpful Gardening Videos
How to clean and sharpen pruners
- Clean pruners with warm dish soap and water or spray the blades with Scrubbing Bubbles® bathroom cleaner to remove dried sap. If your pruners have rusted, soak them overnight in white vinegar to dissolve the rust.
- Scrub with a wire brush to remove dirt and rust. Loosen nuts or even disassemble the pruners to clean more thoroughly between the blades.
- Rinse pruners after cleaning off dirt, debris and rust.
- Buff with steel wool to take off any remaining rust or sticky sap.
- Dry with an old towel or sock.
- Sharpen the bevel with a diamond file, following the exact angle of the existing bevel. Run the file from the base to the pointed tip several times.
- Lubricate pruners with a few drops of oil such as WD-40® or 3-in-1 oil in between all moving parts. Now they should be clean, sharpened and ready to go!