Soil blocking basics
What if you could start seeds without messing around with a thousand tiny little pots that clutter up your garden shed? Or maybe you want to garden using less plastic. Either way, try growing in soil blocks.
In this technique, a special tool called a soil blocker is used to form potting mix into blocks. Growing without containers like this increases air circulation, which promotes healthy root systems, because it “air prunes” the roots: They stop growing at the edge of the block and branch back into the mix instead of circling the inside of a pot. This minimizes transplant shock later. Let me walk you through how to start seeds in soil blocks.
Soil blocking tools & accessories
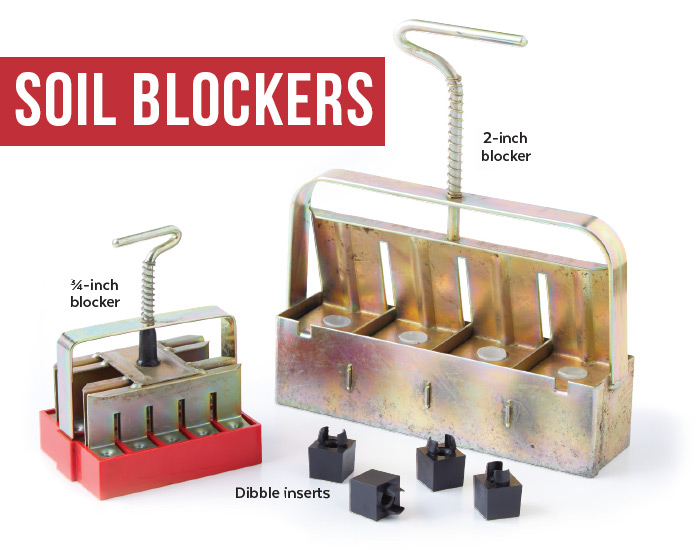
A soil blocking tool is a grid of squares that you pack potting mix into, then press a plunger to release the molded blocks. Soil blockers are available in several sizes, from hand-held ¾-inch block grids to long-handled, stand-up blockers for planting in outdoor fields. You can purchase them in sets of different sizes, complete with dibble inserts, which make the blocks nestable — meaning a smaller block will fit inside the next size larger so you can transplant up as the seedlings grow.
Where to Buy Blocking Tools
Johnny’s Selected Seeds
Gardener’s Supply Company
Using the best mix for soil blockers
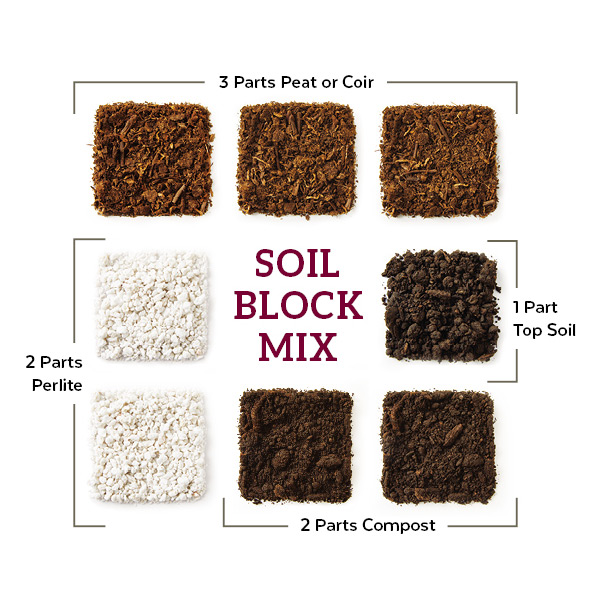
Regular potting mix won’t do — it needs to be a bit heavier to stick together. The mix I use, shown below, is a modified recipe of Eliot Coleman’s soil-blocking mix from his book The New Organic Grower. Using a 5-quart bucket as a measuring tool for each part in this recipe yields about 175 2-inch blocks, but you can scale it down if you don’t need that much, as long as the parts are equal. If you don't want to mix your own, you can purchase pre-made mixes, but be sure the product label indicates it works for soil blocking.
DIY soil mix for soil blocks
- 1 part topsoil — purchase bagged or use your own, just make sure it is weed-free and clods are broken up
- 2 parts compost — purchase bagged or make your own, screen off any large pieces
- 2 parts perlite — vermiculite also works
- 3 parts peat or coir — be sure to use finely milled products
Step 1: Mix soil
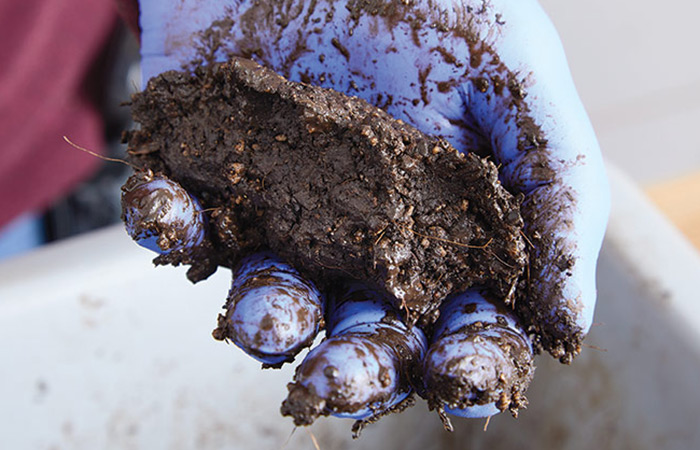
Stir all parts together in a tub, breaking up any large chunks, then add enough water that it almost drips when you squeeze a handful. Pre-moistening the elements so they are damp before mixing is a good idea and helps reduce dust. The potting mix will be similar in texture to cookie dough. When it looks like the photo above, it’s just right.
You Might Also Like:
Garden Compost Basics
6 Organic Products to Use in Your Garden
Seed-Starting Tips From Our Readers

Step 2: Form the soil blocks
Holding the soil blocking tool in your hand, push down into the tub of soil mix to pack it into the form. I usually get as much mix into the blocking tool as I can this way, then pack more in by hand if the blocks seem loose. Level off the bottom of the blocks and brush away any mix on the side of the tool for neater cubes. You can see how messy this can be, and that’s why I wear rubber or latex gloves.
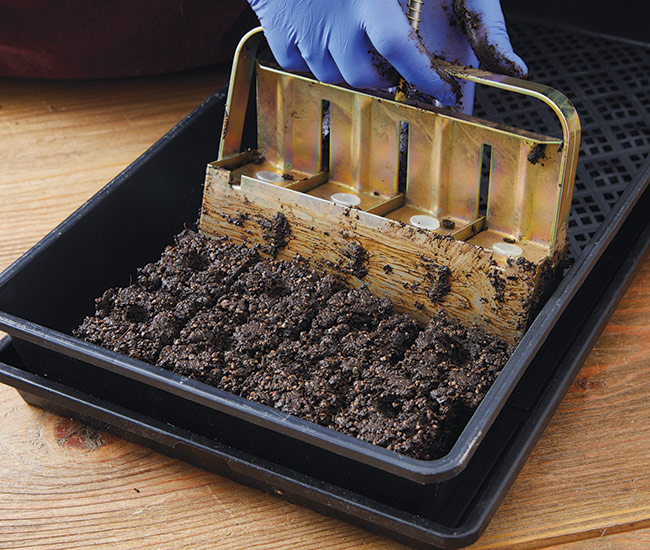
Step 3: Extract the soil blocks
Once the soil blocker is packed full, press the plunger to release the blocks in place, pushing down slightly as you go. Soil blocks are heavier than your usual germination mix, so if you use a conventional grower’s flat, which is rather flimsy, double or triple up. Use a flat with no drainage holes so you can bottom water. Or use a sturdy container like a cafeteria tray, old cake pan, cookie sheet, or plastic storage container. In the photo above, I’m putting these blocks into a mesh-bottom soil blocking tray with an accompanying heavy-duty flat, to be able to bottom water easier.
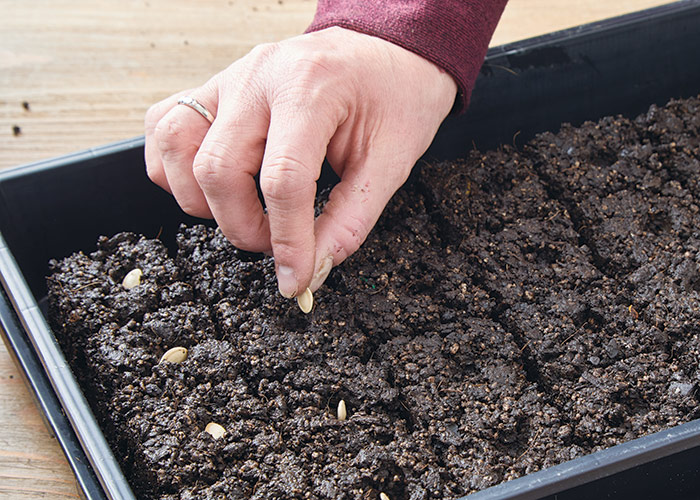
Step 4: Plant in your soil blocks
Each soil block has a divot for seeds. I like the 2-inch block for larger seeds, such as lupine or the zucchini in the photo above, which easily drop into the depression. I also use the smaller ¾-inch blocker for tiny seeds, but find it harder to hit the right spot with a single seed, so sometimes I just sprinkle seed all over, then as they germinate, snip out seedlings that missed the center of the block. For seeds that need darkness to sprout, cover with a pinch of damp soil mix, or save some before you wet it down to sprinkle dry over the seeds, then mist to dampen it. Set a clear plastic dome over your soil blocks to keep the humidity up and place on a germination mat if you like.
You Might Also Like:
When to Start Seeds Indoors
How to Prechill Seeds
How to Start Seeds Outdoors in Winter

Tips for watering soil blocks
-
Because there is no pot, soil blocks may dry out on all surfaces quickly, so check them daily. The heavy mix does hold moisture inside the cubes, so you may only need to mist lightly at first.
-
After seedlings germinate, to prevent eroding the sides of the blocks, water from the bottom: Pour water into the bottom of the tray and let it soak, as in the photo above.
-
When the blocks are saturated, if there’s water left in the tray, suck it out with a turkey baster or pour it off. Once seedlings grow thicker roots that hold the block together, you can top-water gently. Use a watering can with a fine sprinkler only because a heavy stream could break up the blocks.
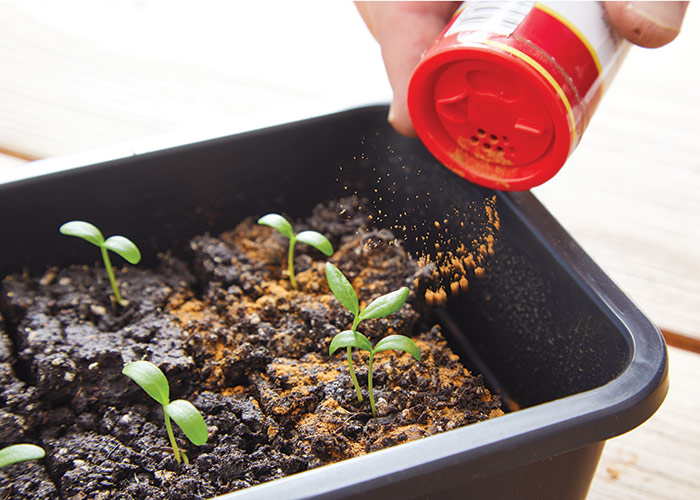
- It is easy to get soil blocks too wet. If you find mold growing on the blocks, water a bit less. Sprinkling cinnamon on the potting mix as in the photo above can eliminate the mold.
Step 5: Transplant seedlings
If you've started seeds in the smallest soil block, you can transplant them into new blocks as they outgrow the smaller size. For example, start seed in the ¾-inch block, then transplant seedlings into new 2-inch blocks, using the square dibble insert just the right size to transplant the ¾-inch cube inside. Grow in the larger cube until you’re ready to plant outside, or move up into an even bigger 4-inch block, dibbled to fit the 2-inch cube.

Transplanting soil blocks outdoors
When you are ready to transplant your seedlings outside, simply pull the blocks apart like brownies from a pan and drop one into the planting hole — no fumbling with pots that blow away across the yard. I like to use a small spatula to separate the blocks and lift them out of the tray, but it isn't always necessary, as the plant roots usually hold the block together. Sometimes roots grow out the bottom of the cube and will tangle together: They should come apart with a gentle tug, or you can cut them apart with a knife.
With a little practice and the right soil mix, soil blocking can be the solution to all those mismatched pots piling up in your garden shed. Start your seeds in a pot-free, eco-friendly, economical way. And your seedlings will be healthier to boot!
Pin it for later!