


Starting celosia from seed
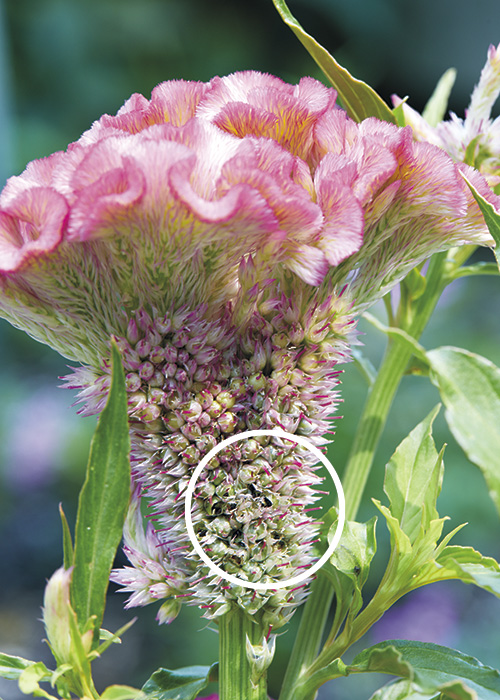
There are lots of celosia varieties you can start from seed and they’re pretty easy to get going. You can even save seeds from your own plants; just know that they may not grow flowers that match the color of those you collected the seeds from. The photo above gives you an idea of where to look for celosia seeds on cockscomb types, as they aren’t quite where you’d expect them to be. Seeds from plume and wheat celosia types can be harvested in a similar fashion.
You Might Also Like:
Easy Flowers to Grow
How to Collect Seeds from Your Garden
Starting Seeds Indoors
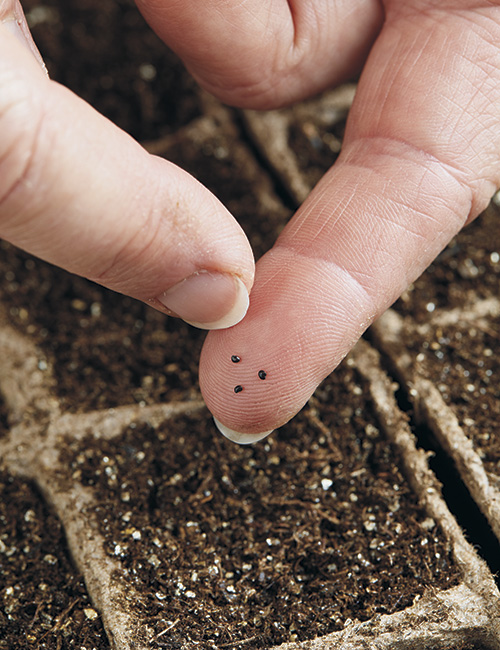
Step 1: Sow celosia seeds
Start celosia seeds 6 to 8 weeks before your average last frost date by filling small peat pots with premoistened seedstarting mix. Peat pots are nice because later, you won’t have to disturb the tender roots to transplant — just plant the pot and it will eventually decompose.
Celosia seed tip
To give these tiny seeds the light they need to germinate, sow the seeds on the surface of seed-starting mix. I found it easy to pick up seeds on my fingertip and gently flick them onto the seed-starting mix.
Helpful Seed Starting Supplies:
Peat pots
Seedstarting mix
Vermiculite
Grow lights
Heat mat
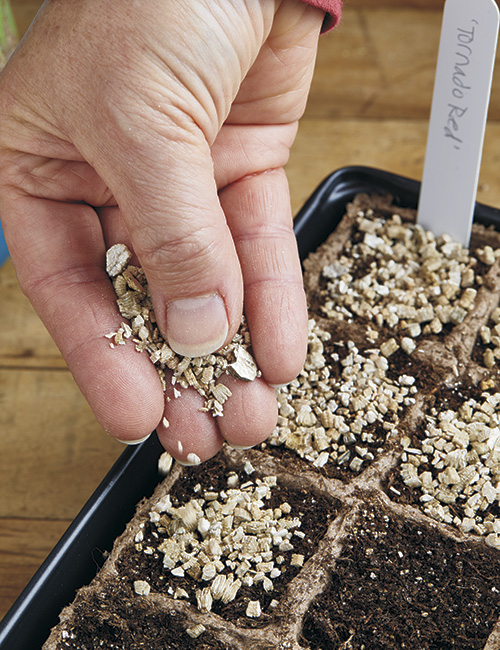
Step 2: Top off with vermiculite
I wanted to try growing a few new celosia varieties this year so I asked the experts at Johnny’s Selected Seeds for some advice. They recommended topping off the seed with a thin layer of vermiculite. It helps conserve moisture while also discouraging damping off, a fungus that often kills seedlings. The light color and rough texture allows enough light in for germination. I tried it with and without vermiculite and had better germination with the vermiculite.
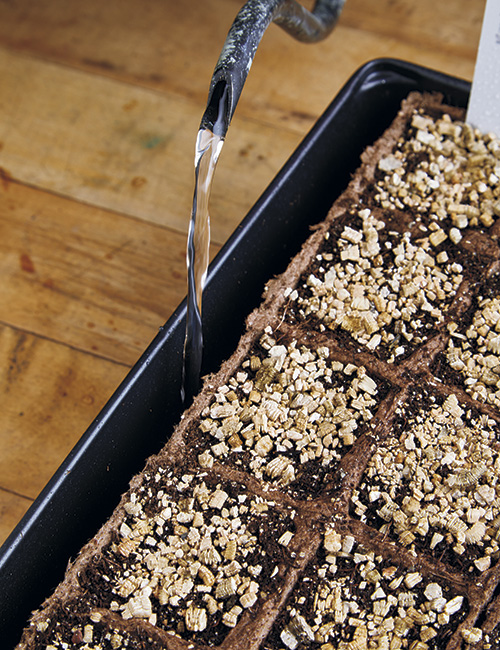
Step 3: Water from the bottom
Moisture encourages germination so water from the bottom, asthe photo above shows, or mist the mix with a spray bottle. That way you’ll avoid washing the tiny seeds away. Keep your tray of newly sown celosia at 70 to 80 degrees F. A heat mat can help ensure consistent temperatures. You should see growth in 10 to 15 days.
You Might Also Like:
7 Easy Plants to Start from Seed
Seed Starting Tips
When to Start Seeds Indoors
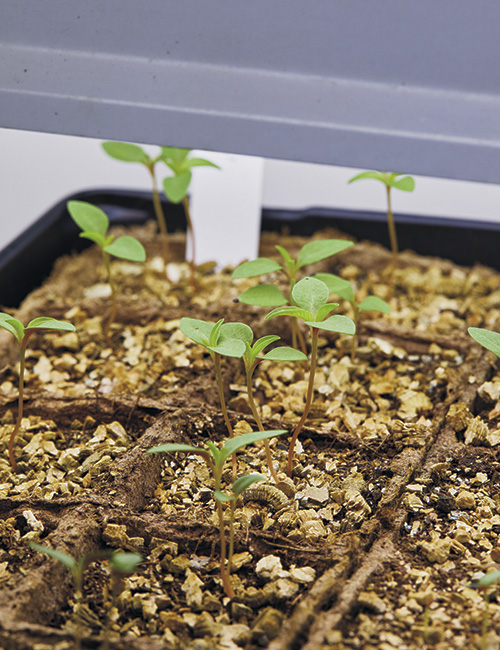
Step 4: Provide heat and light
Set the tray of celosia seedlings under lights that are 6 in. above the foliage and move it up as the plants grow. Once the celosia seeds start to germinate, take the flat off the heat mat and place it under lights for 12 to 13 hours a day. Continue to adjust the grow light to 6 in. above the foliage as the plants grow to avoid burning the seedlings. They'll grow best if you adjust the room temperature to be around 63 to 68 degrees F.
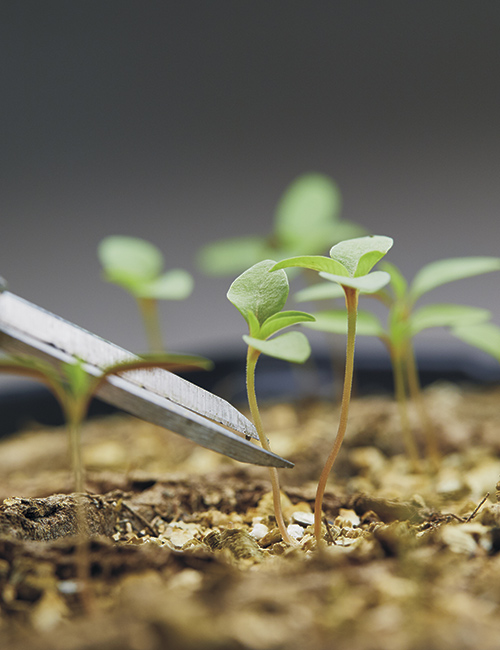
Step 5: Thin celosia seedlings
Anytime before the new plants have two sets of true leaves (those that look like the mature plant but smaller), thin to one plant per peat pot. I used a pair of small pruners with a sharp point, but garden snips or scissors work, too.
You Might Also Like:
DIY Cold Frames
3 Easy Steps for Planting Your Best Annuals
How to Use Fertilizer in Your Garden
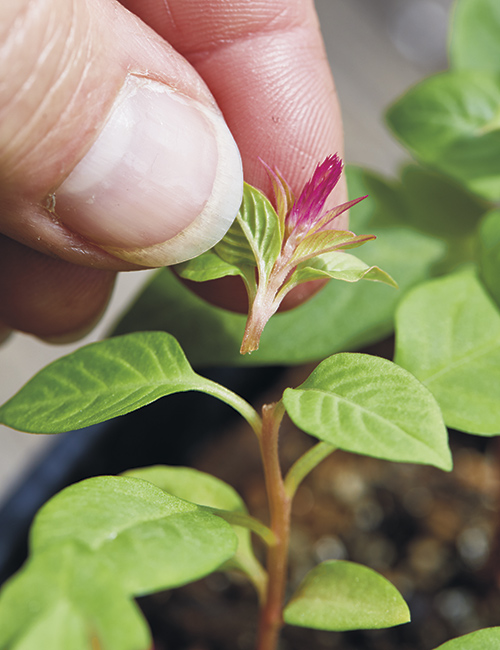
Step 6: Get ready for blooms!
Once plants reach 8 to 12 inches tall, pinch out the tip of the center stem to encourage more branching. When nighttime temperatures outdoors are 55 degrees F or above, it’s time to move your celosias outdoors. It is important to harden them off by setting them outside in the shade for a few hours each day, gradually increasing the time and sunlight over a week to 10 days.
Plant each peat pot in the ground at the distance recommended on the seed packet. Make sure to tear off, fold over or completely bury the top portion of the peat pot so it won’t wick water away from the plant. In a few weeks, you’ll have loads of those dramatic and vibrant blooms to enjoy all season!


