


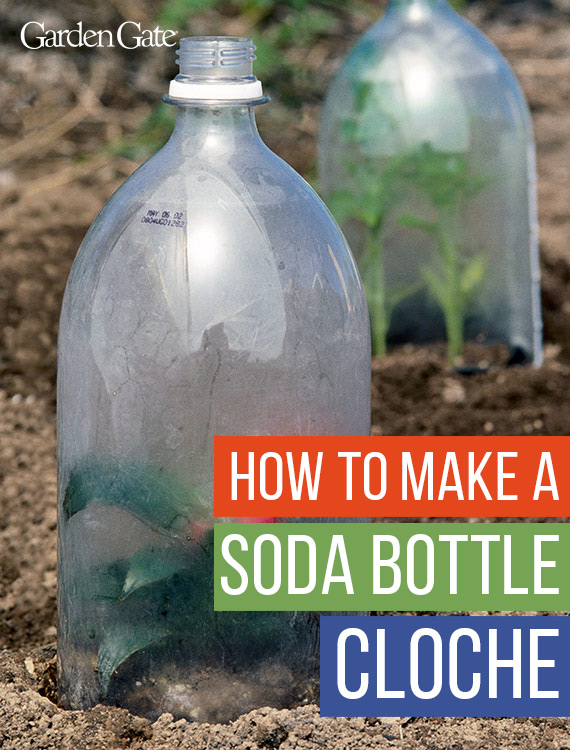
Why should I make a soda bottle cloche?
New plant starts and seedlings can get nipped easily when early spring temperatures dip close to freezing. When the weather forecast predicts a cold snap, you need to move fast to protect your delicate plants. If you have a lot of plants that need protection from the cold, using fancy cloches can get expensive, and you may not have them on hand. So upcycling 2-liter plastic soda bottles is a quick way to get the benefits and protection of a cloche without the high price! Check out our simple how-to steps below to create your own sturdy soda bottle cloche.
You Might Also Like:
7 More Ways to Upcycle Plastic Bottles in the Garden
DIY Potting Bench
Clever Garden Tool Tips
How to Start Seeds Outdoors in Winter
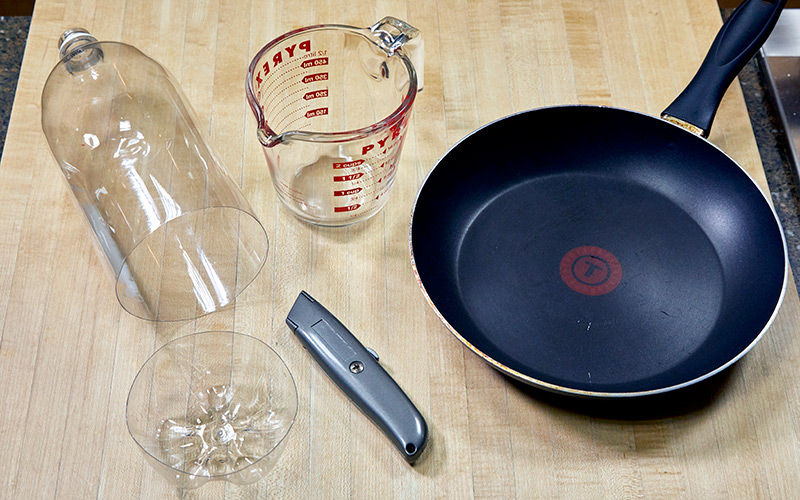
Materials for making a soda bottle cloche
- Nonstick pan
- Stovetop
- Utility knife
- Glass measuring cup
- 2 liter soda bottles (Clear plastic works best and allows in the most sunlight vs. green plastic)
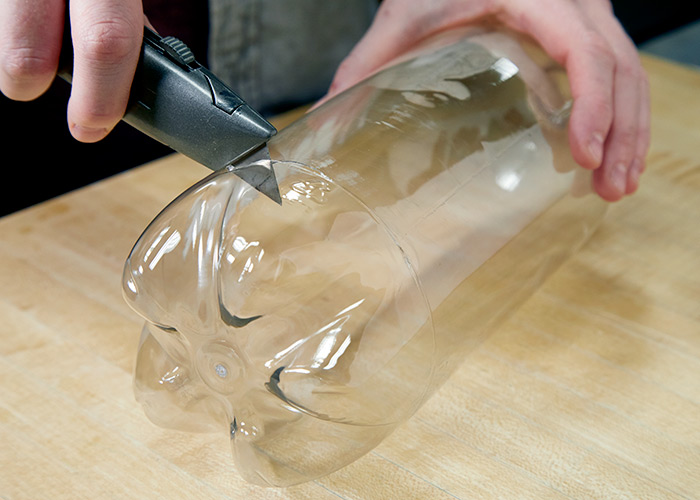
Step 1: Prepare the soda bottle
Gather up several 2-liter soda bottles. Remove the bottoms just above the “feet.” Cut through the plastic on a cutting board, using a sharp utility knife. Trim off any “spurs” or jagged edges. The smoother and more even the cut edge, the better the reinforcing ring you can form.
Tip
Be careful when cutting the 2 liter bottle and keep hands clear of the utility knife in case it slips.
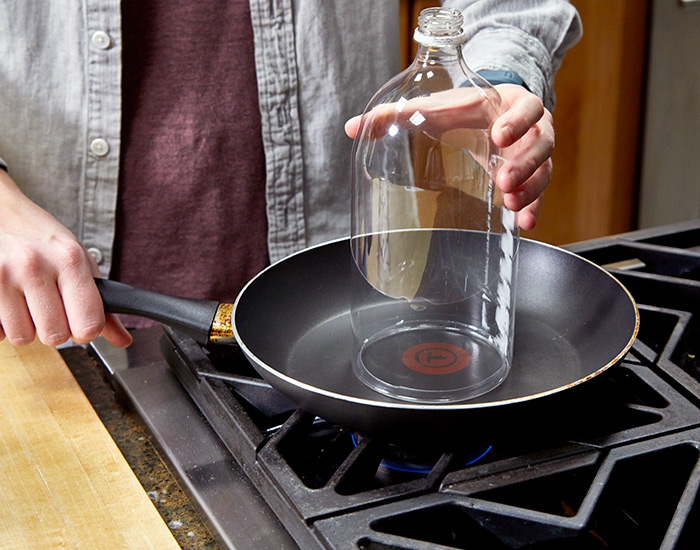
Step 2: Carefully melt the cut edge of the soda bottle
Warm a nonstick skillet over low heat. With the cap removed to allow heat to escape, push the cut edge of the bottle gently onto the skillet.
Apply light, downward pressure to the cut edge, keeping the bottle upright and slowly moving, to melt the plastic evenly. Let the edge curl in 1/8 to 1/4 inch. You may have to try this several times before you get it to come out perfectly. But be patient. Once you get the feel of it, you’ll be able to roll the edges of several cloches in a few minutes.
Tip
If something goes wrong with the curling process, don’t worry, just cut the imperfect ring off, smooth the new cut edge and try again.
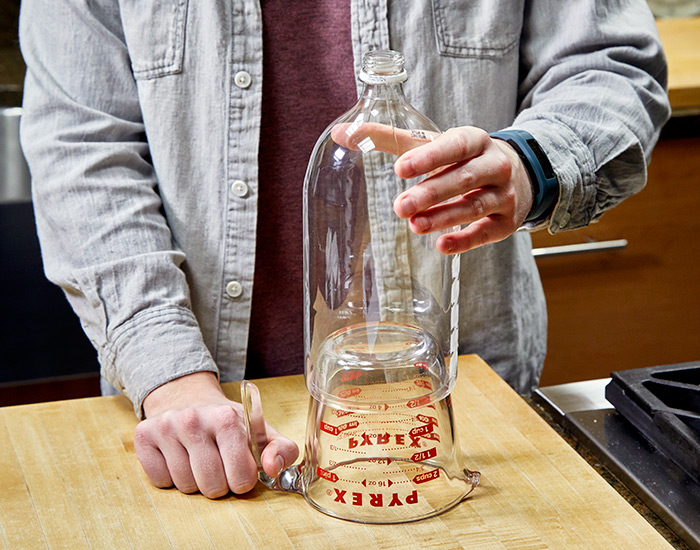
Step 3: Harden the cut edge to create a sturdier base for your soda bottle cloche
Quickly remove the bottle from the skillet and place it over the bottom of an inverted, 2-cup glass measuring cup. The tapered sides of this cup let the softened bottle nestle down firmly and form a perfect ring as the plastic cools.
Tip
This cooling and hardening process is very rapid, so have the measuring cup close by as you melt the bottle on the skillet. Keep turning the bottle as the plastic is hardening to prevent sticking.
You Might Also Like:
4 DIY Vegetable Trellis Ideas
Budget-Friendly Seed Starting Tips
Upcycled Design Ideas for Your Garden
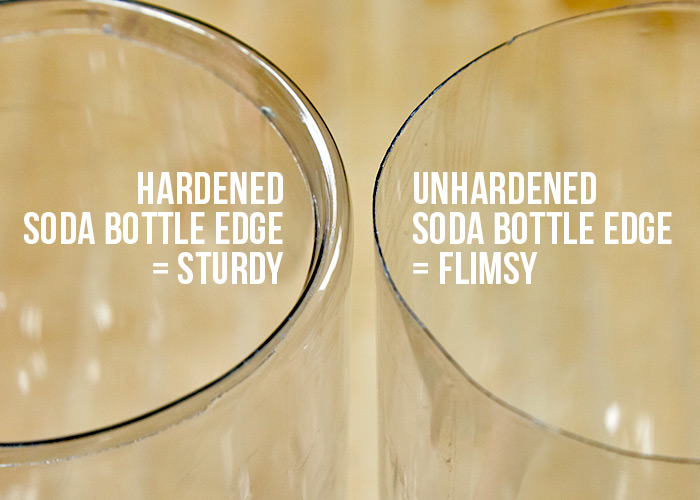
Hardened vs. unhardened edge
You can see in the photo above that the hardened edge on the left creates a stronger and more sturdy construction for your soda bottle cloche. If you skip this step, you will find your soda bottle cloche will be flimsy and harder to put in place in the garden.
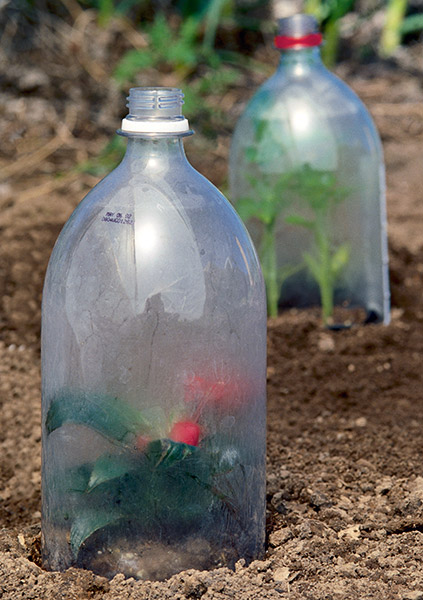
Step 4: Place the soda bottle cloche in the garden!
When you place the cloches over young plants in the garden, keep the bottle caps off during the day. This will prevent heat build up from damaging the plants. In the evening, replace the caps to trap heat and keep the plants warm and comfortable.
Tip
These DIY soda bottle cloches can be used year after year in your garden to protect plants, so skip the pricey cloches and make your own!


