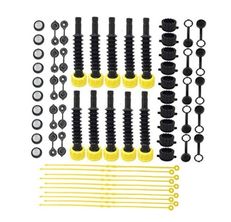
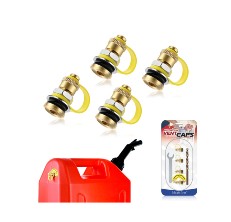
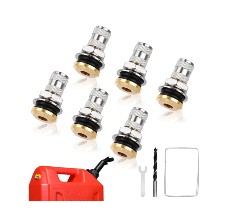
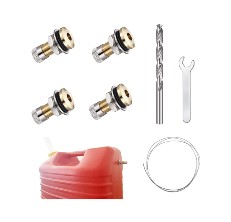
Tired of the splash-back when you're pouring gas? It's a common annoyance, but change is coming. Once upon a time, U.S. gas cans had two vents to make pouring easier. Now, they've simplified it to just one. But to get that fuel flowing smoothly, you need a good vent cap – it's the unsung hero of fuel cans. We've scoured the market and found the best gas can vent caps of 2024, with KP KOOL PRODUCTS Gas Can Vent Cap leading the pack as our top pick. We've also got all the tips and tricks you need to choose the right one. Let's get started!
Our Top Picks For Gas Can Vent Caps
Buying Guide: Gas Can Vent Caps
Ever notice how pouring from a regular gas can feels like there’s a bit of a fight against the air inside? That’s because the air gets trapped and builds up pressure as you pour. If you go too fast, you’re in for a splashy surprise and a messy clean-up. The trick? Just pop another hole at the top end of your can opposite the spout.
Now, about sealing that hole — in my opinion, gas can vent caps are your best bet. They’re like little rain hats for your can, letting you pour out liquids fast without any fuss. They’re real time-savers and make life easier. And just to make things trickier, there’s a whole bunch to choose from; that’s why we’re here to help you figure out what’s what, so you can pick the right one.
How Does a Vent Gas Cap Work?
What gives a vent gas cap its mysterious abilities is air pressure. When you pour out of a gas can through the spout, the air around you is constantly trying to get in through that opening of gas vents. And like a truck trying to take a one-way, there is some fluid traffic. This traffic is reflected in the inconsistent flow you notice as the liquid is pouring out. Pressure continues to build inside the can as the air continuously gets trapped. If you pour too quickly, the gasoline will splash out uncontrollably out of the vent pipe.
Just like all water heaters that burn natural gas or liquid propane gas require a venting system, a gas vent creates an equal and opposite pressure that balances out the air pressure pushing in from the spout. This allows a steady flow of gasoline even when you pour it out quickly.
To know more about the need for gas can caps, visit here.
How To Install a Gas Can Vent Cap
Installing a vent gas cap is kid’s stuff. First, you want to drill a 1/2-inch hole into the high back of your can, using a step drill bit preferably. We recommend drilling into the high back because the only other option is the handle, and handles are usually quite thick. After drilling the hole, you push the cap of the vent into it and make sure it sits tight to avoid any leakages. Voila! You have yourself a vented gas can that will pour effortlessly every after.
Check the video below to learn more about installing a cap for the gas vent.
How Do You Replace Your Current Vent Cap?
Just like every other thing in life, the cap for gas vents doesn’t live forever. If you notice that the cap is deteriorating or damaged, you can replace it easily by installing a new vent. Opt for a high wind cap made of galvanized steel to improve longevity. To replace the vent, first want to empty the gas container and dry it out inside and outside. Then using a screwdriver, you carefully but assuredly pry out the old vent cap and dispose of it as you would any other piece of plastic that has paid the price of service. Check the inner diameter and also the outer diameter of vent pipes before finally pushing the new high wind cap tight. Also, be sure it fits and doesn’t leak carbon monoxide. Some gas vent caps may require a sealer. Do not use silicone rubber. Seal all is typically the better choice.
People Also Asked
Why do I need a vent on my gas can?
A vent is an opening that allows gases or liquids to flow into or out of a container. Just as water heaters use vent duct or pipe to emit exhaust gases to outdoors, gas cans also have vents. Gas cans used to have two vents before, one for pouring and the other to help maintain a steady flow of gasoline. Nowadays, gas containers have only one spout responsible for pouring and venting at the same time. So, essentially, you have been tasked with creating a vent yourself if you want a steady, controlled flow of liquid in and out of your gas can.
What do I need to install a gas can vent cap?
To install a gas can vent cap and say goodbye to slow pouring, you need a drill, wrench, and of course, gas can vent caps. Luckily, some sellers include all of these and more in the kits that come with your purchase.
Can I use gas can vent caps for containers with other liquids?
Gas can vent caps have a wide application. They can be used for plastic or metal cans, and can also be used with other fuels and liquids like diesel, kerosene, paint, water, or any application where you need a smoother, faster flow.
How do I clean a gas can vent cap?
Keeping your gas can vent caps clean is key. Start off with a simple wipe using a dry rag to clear away any loose bits. For those pesky nooks and crannies, a paintbrush is your best friend — it'll get into all the small spaces. And if you're dealing with some serious gunk, let the cap have a good soak in a mix of industrial cleaner and water. Once it's dry, pop it back on your lawnmower. Regular cleaning not only keeps things running smoothly but also helps you avoid gas leaks, which means safety first and some extra dollars in your pocket.


