


Step-by-step planting guide
By: Garden Gate staff
| 1 of 5
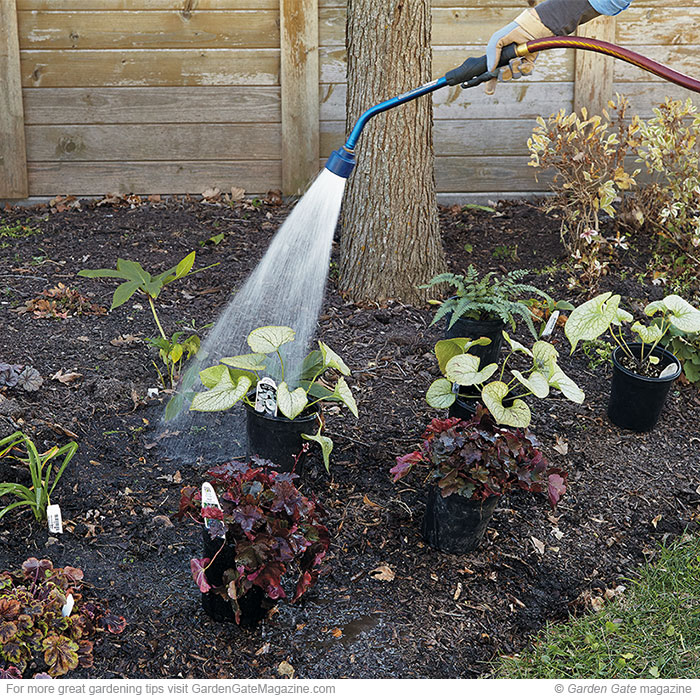
Prepare the bed
You can plant almost any time of year, but spring and early fall are best. Temperatures are cooler, and you don’t have harsh sun or hot nights that can be so hard on new plants.
Before planting, work amendments, such as compost or sphagnum peat, into the soil. You’ll also want to water the bed, as well as the plants that will go there. Do this all at once, just like you see in the photo at left, the night before you plant to plant, and you’ll have moist, but not soggy, soil to work with.
And by setting out the plants where you want them to grow, you’ll get a good idea of how the garden design will look. It’s easier to move pots around than to dig and replant if you don’t end up liking the look.

| 2 of 5
Dig the best hole
The day after watering your perennials and the bed where they’ll go, start digging a planting hole like the one at left. Each hole should be at least twice as wide but no deeper than the nursery pot your plant has been growing in.
A wide area of loosened soil makes it easier for new roots to spread and start gathering nutrients and moisture right away. Set the nursery pot in the hole to test if it’s the right depth, and make sure it’s the crown of the plant that’s level with the soil, not the lip of the pot. A hole that’s too deep can cause water to collect around the plant’s crown, especially in winter, which leads to rot.
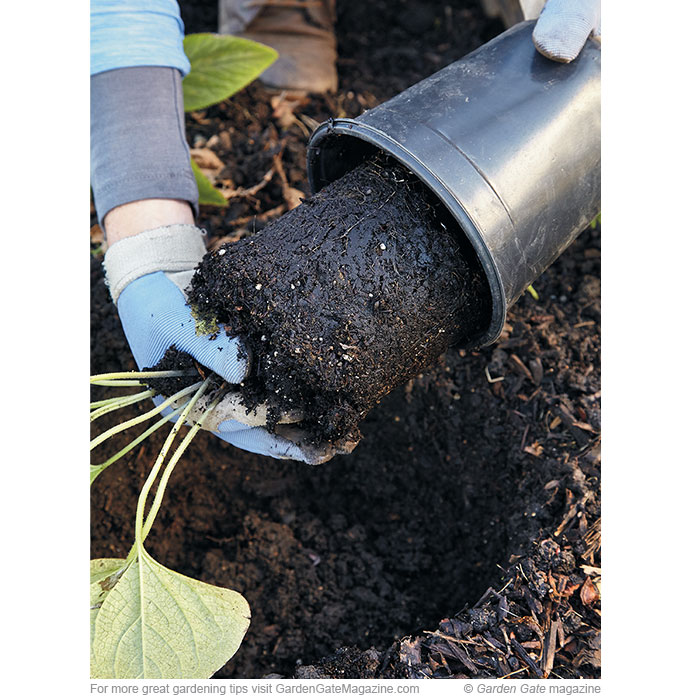
| 3 of 5
Unpot the plant
Now it’s time to take the plant out of the nursery container. Tip the pot while supporting the crown, like you would when inspecting the plant at the garden center. This technique keeps the soil from falling apart and secures the plant, so you’re less likely to break a steam, just like in the photo here.
When the roots have completely filled the pot, though, it won’t be as easy to take out the plant. First, cut off any roots that might be coming out of the holes in the bottom of the container. Then give the pot’s sides and bottom a few squeezes and taps, then tip it over. If the plant still won’t come out, gently push down on the nursery pot as you roll it on the ground a few times.
When the plant is out of the pot, use your fingers to pull out any circling roots from the bottom. That way, they’ll start growing into the soil instead of continuing in a circle.
| 4 of 5
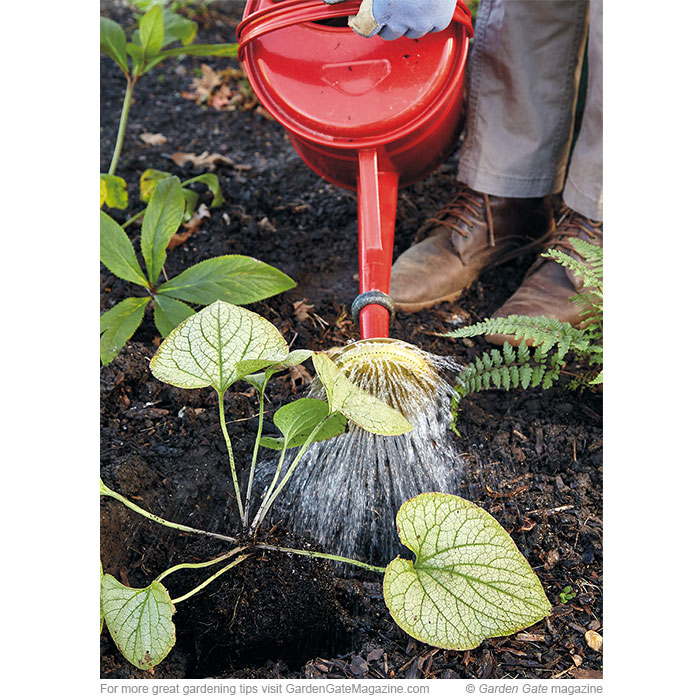
Plant the bed
After you’ve teased out any circling roots, brush off the top couple of inches of potting mix so you can see where the crown is and get it level with the soil — it’s better to set the crown a little higher than lower to avoid rot. Push a few inches of soil into the hole and press it gently around the root ball. Keep an eye on the crown and reposition the plant if it sinks or slips out of place.
Then water around the root zone, not directly on the crown, like you see here. The plant is less likely to sink this way. You can add an organic liquid fertilizer, such as fish emulsion, to your watering can at this time to help roots take off faster.
Finish backfilling the hole, and make sure to cover all the potting mix at the top of the root ball — it can wick away moisture if it’s left exposed. When all of your perennials are in the ground, water the area with a sprinkler. Keep the bed moist but not soggy for the next couple of weeks to help your plants settle in. After that, you should be able to cut back on the amount of watering.
| 5 of 5
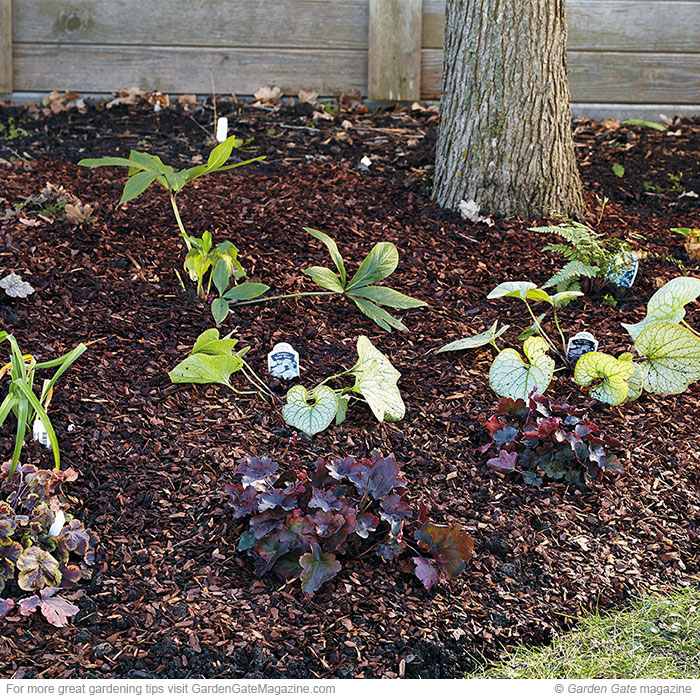
Manage your new perennials
A 2- to 3-in. layer of organic mulch, like the pine bark chips here, will help conserve moisture. Just make sure the mulch is kept 3 to 4 in. away from the crown so excess moisture doesn’t build up around it.
Continue to give your perennials about an inch of water per week, whether it’s from rain or your garden hose. Keep an eye out for wilted leaves in the morning or late in the evening, and water then, too, so growth isn’t set back.
- 1
- 2
- 3
- 4
- 5


