


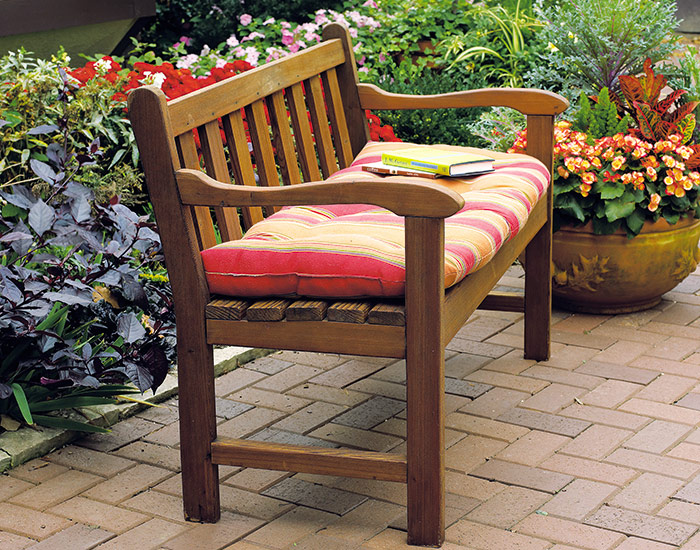
Fix up your wooden garden bench
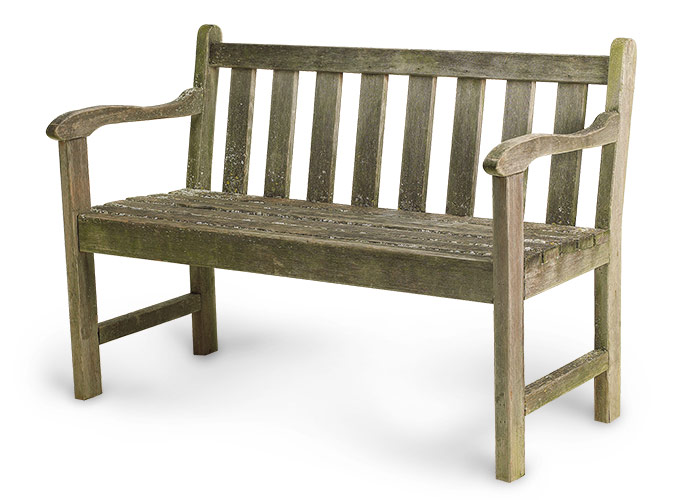
Outdoor furniture may be all the rage right now, but it’s not a new concept. You’ve probably been using wooden furniture in your yard for years. And if that’s the case, it may be showing the effects of time. Take a look — is your wooden bench gray and mossy? They may not look great, but that doesn’t mean you need to throw them away and buy new. In a single weekend, you can get your old garden bench looking as good as (or better than!) new. Here’s how we took a weathered redwood bench and brought it back to its former glory.
New look for your wooden garden bench
Whether your outdoor furniture is made of teak, redwood or cedar, it’s going to weather if you leave it outside. If you prefer the bright new-wood look, read on! We’ll show you how to get it back with wood brightener and an oil finish.
Materials and tools
- Wooden bench, chair, table or other piece of furniture
- Wood brightening solution (we used Penofin® wood brightener)
- Penetrating oil finish
- Garden hose
- Pump sprayer
- Pressure washer (available for rent at many hardware stores)
- Scrub brush
- Paint brush
- Medium-grit (150) sandpaper
- Sheet of plastic
- Rubber gloves
- Tack cloth
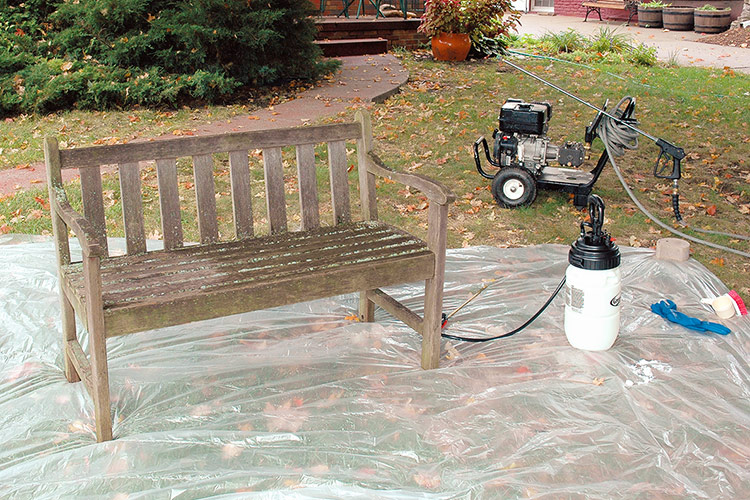
Step 1: Prep area to refresh bench
Prep work is important in this project. Wood brightening solutions contain acid that could bleach your driveway or street while they bleach your wooden furniture, so work on a lawn. The sheet of plastic you see in the photo just adds another layer of protection for the lawn. If you don’t have plastic sheeting, wet down the surrounding grass and plants, so they’re less likely to absorb any solution that gets on them. It’s also a good idea to wear rubber gloves while you work — the wood brightener won’t necessarily hurt you, but it’s best not to get it on your skin. Finally, go ahead and mix up your wood brightening solution in the pump sprayer, according to package directions.
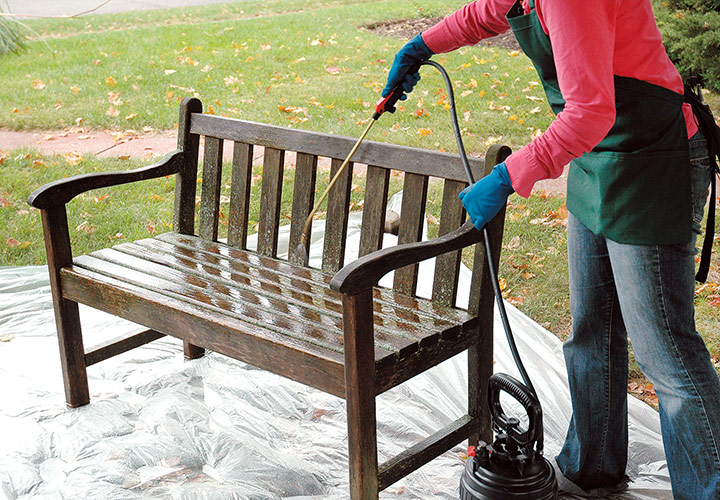
Step 2: Spray down bench with wood brightener
Once you’re set up, spray down your piece of furniture with with water from a garden hose to get rid of any surface debris. Then, using the pump sprayer, spray a fine mist of wood brightening solution over the furniture. Notice how we’re making sure to get solution in all the hard-to-reach areas, such as between slats, down the back and on the underside of the seat. When the bench is fully covered, let the solution sit for 15 minutes. If you see spots start to dry out during that time, spray on a little more solution so the bench stays wet.
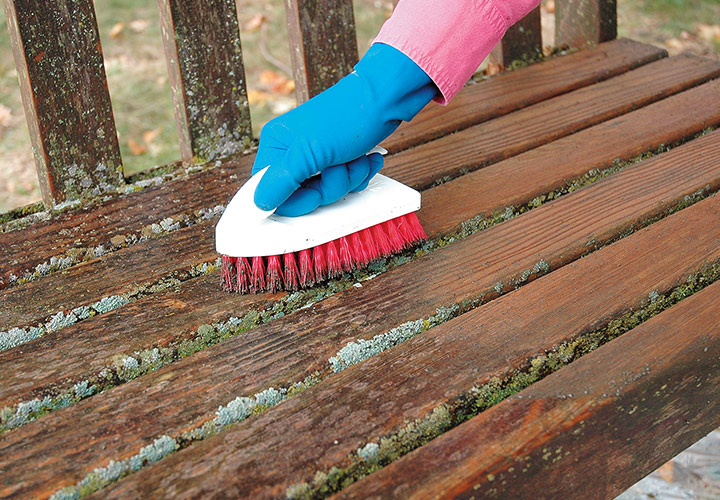
Step 3: Scrub garden bench to remove dirt & debris
After 15 minutes, take the scrub brush and lightly scrub dirt and debris (and in our case, moss and lichen) off the wood. You can see it’s hard to get between the slats with the brush. Don’t worry too much about that. The power washer will take care of most of these spots in the next step.
You Might Also Like:
Woodworking Project Plans
How to Build a Wood Raised Garden Bed
Garden Project Ideas
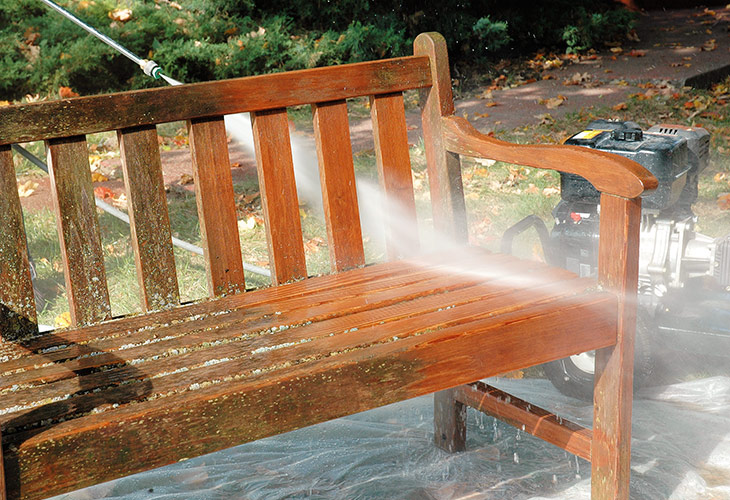
Step 4: Power wash the garden bench
Once you’ve scrubbed down your furniture, use the pressure washer to blast the rest of the brightening solution away. Power washers are available for rent at many hardware stores. Adjust the end nozzle so you have a strong stream of water rather than a fine mist. This is where you’ll see the dramatic results. Isn’t this bench looking like new already? The water pressure may cause the wood to become rough or splintered, but that’s not a big deal — you’ll be able to sand that down later. Just be sure to keep it moving so you don’t end up with deep gouges. When you’ve power washed away all the old gray color, put your furniture somewhere dry and protected, and let it dry. Unless the weather’s humid, overnight should be enough.
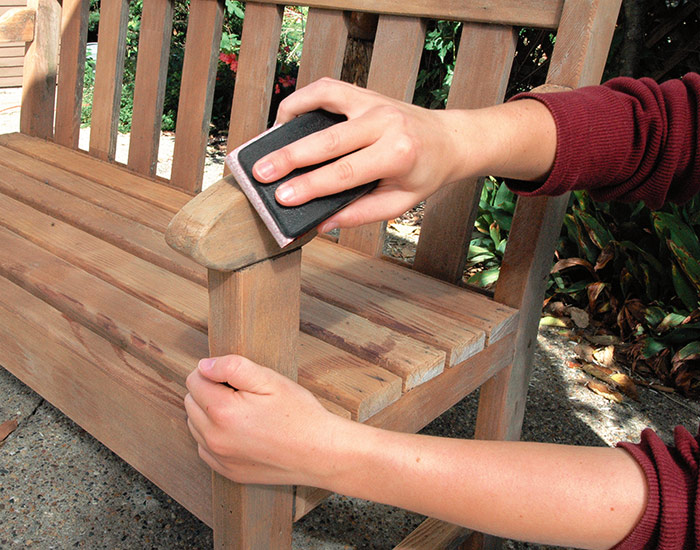
Step 5: Sand wood bench smooth
The power washer may leave your furniture rough, but a light sanding with 150-grit sandpaper should smooth things out. You can also use a random orbital sander on the flat spots, but some areas, like this bench’s arms, are easier to finesse with hand sanding. Once your furniture is smooth, wipe away the dust with a tack cloth.
You Might Also Like:
Upcycled Vertical Pallet Planter
Create Your Own Stone Mosaic Stepper
Helpful Gardening Videos on YouTube
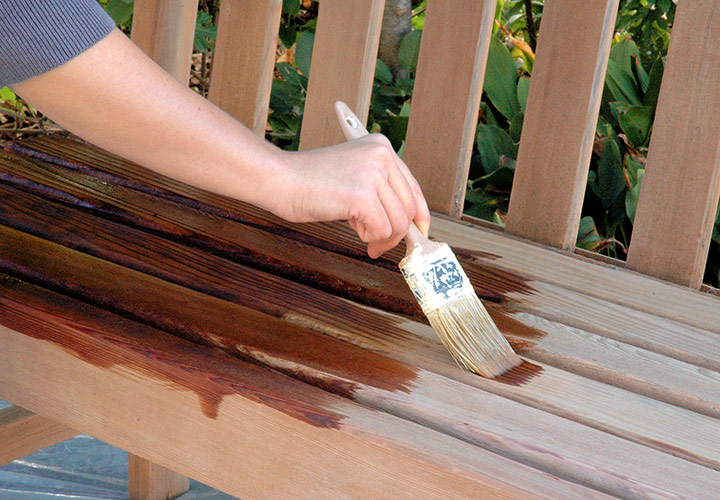
Step 6: Apply the finish to your wooden garden bench
We used a transparent penetrating oil finish because we liked the natural color of the wood, but you can find stained oils, too. Brush on a thick coat of oil all over your furniture, adding a little extra to the end grain, where wood really soaks oil up. (See how dark the oil finish looks in the photo? It will dry lighter.) Let the oil soak in for 20 minutes, then wipe down the piece to get off any extra oil. Let your furniture dry overnight. CAUTION: Penetrating oil is very flammable, so hang up rags and paintbrushes to dry overnight so they don’t start a fire in your trash. (They’re safe to toss when dry.) Once the bench is dry, put it back outside and enjoy!


