


One of the reasons many people neglect a garden pond is they get tired of all the maintenance. But a properly set up pond can be pretty easy care. The experts at smartpond® helped us rework our pond to make it easy to care for and more beautiful at the same time.
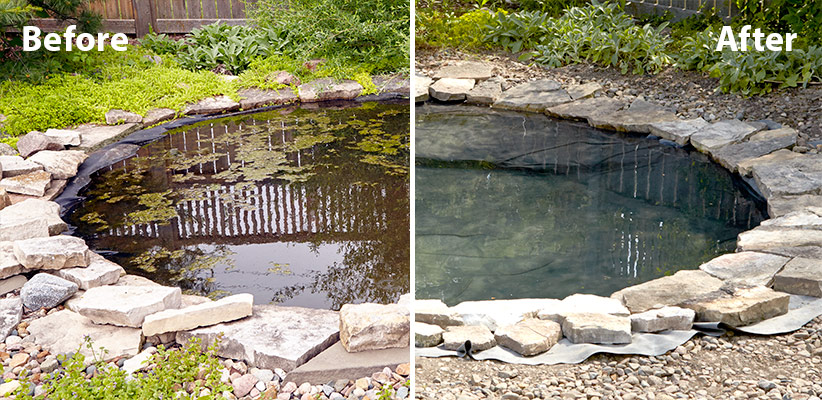
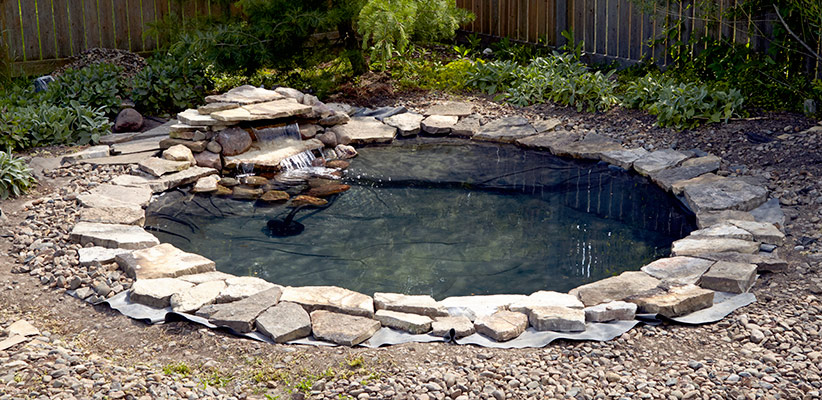
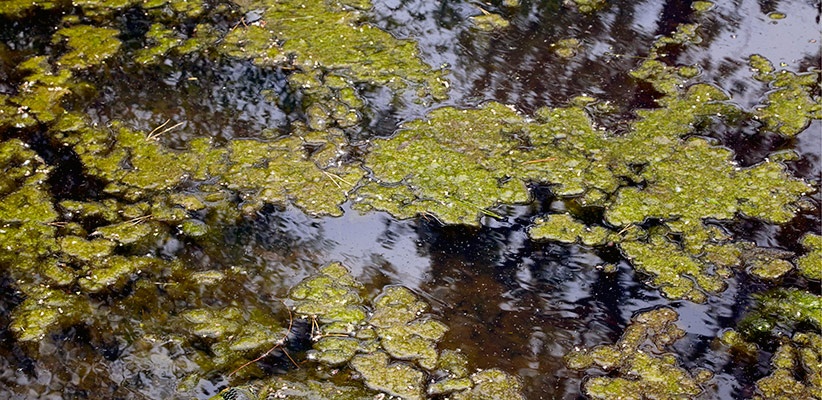
Before
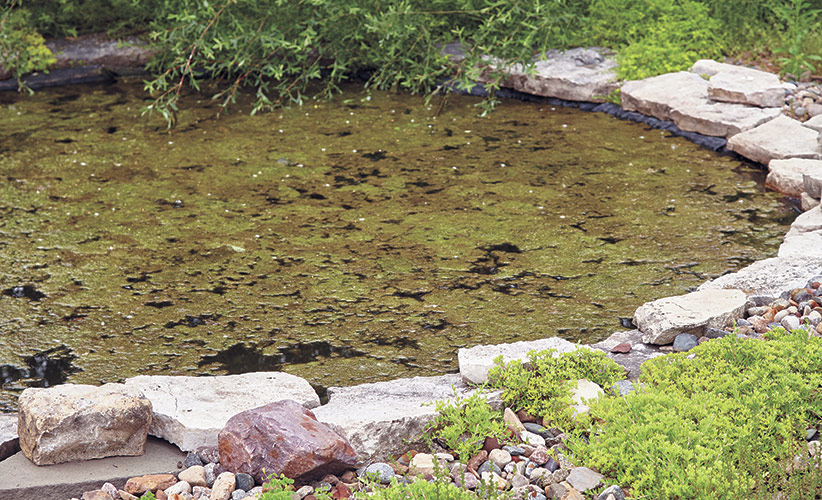
Several years ago, after raccoons went fishing in our 5-ft.-deep pond and killed all of our fish, we filled in the deep end with river rock and reduced the depth of the entire pond to about 2 ft. This rock at the bottom collected debris and decomposing organic matter over the years — a very conducive environment for algae. And boy, did we have algae!
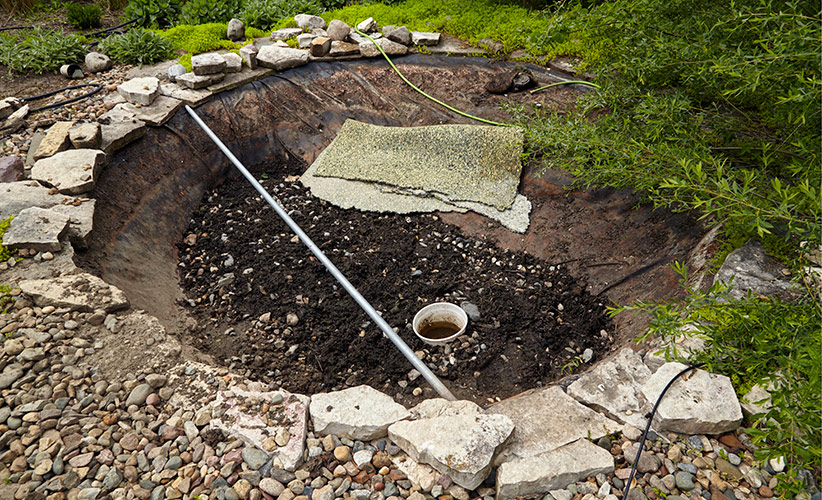
Step one — Drain the pond
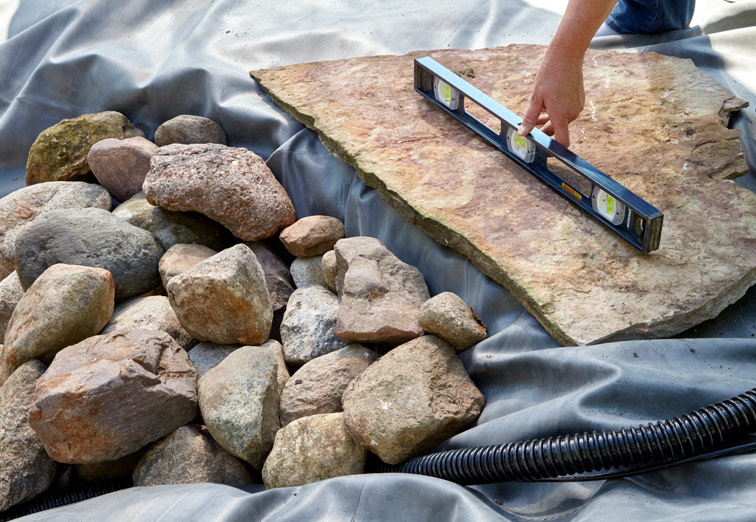
To get ready for our new pond filtering system, I drained the pond using a sump pump. When the water level lowered to the mucky bottom, I dropped the pump into the white nursery pot with drainage holes to keep large debris and mud from clogging the sump pump. For several days, water seeped into the pot from the muck and remaining mud dried. I got my workout scooping rock out of the bottom of the pond as it drained, then pushed the remainder into the deep end (after I decided it really didn't need to be that deep anyway), along with some dried muck. A pole laid across the diameter of the pond helped us measure the depth. Since we were not putting fish in again, we could make it 18 to 24 in. deep. We also used a level along the pole and moved it to several positions across the pond to make sure the sides had no low spots that would leak water or show the liner. We wanted the pond to fill level to the top all around.
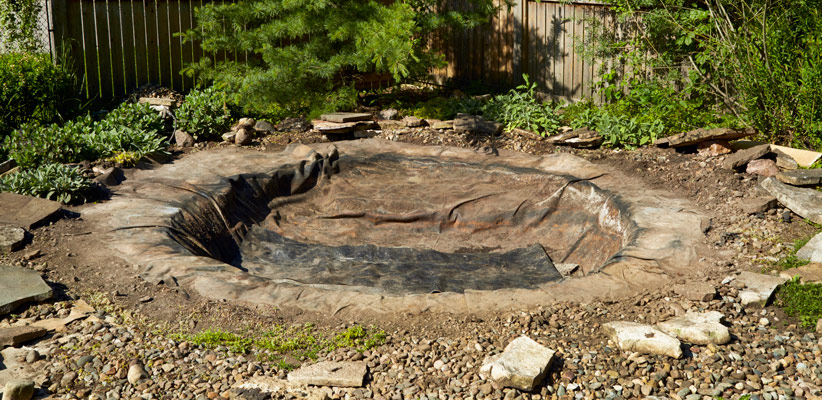
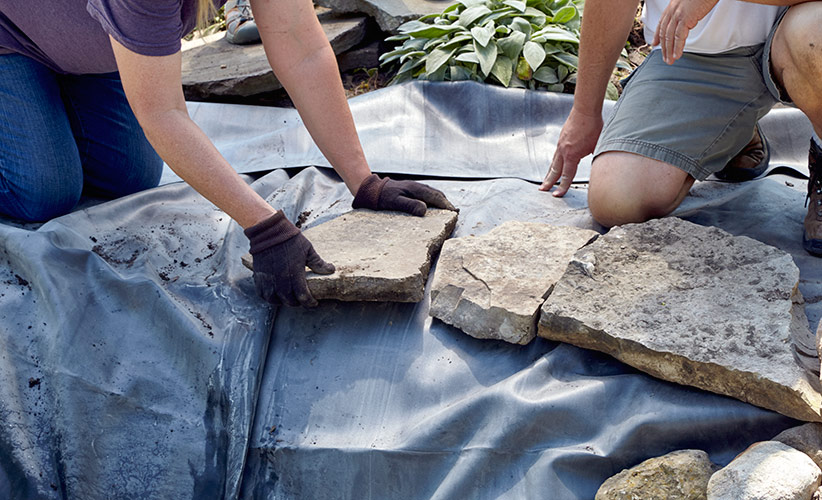
Step two — Add padding and a liner
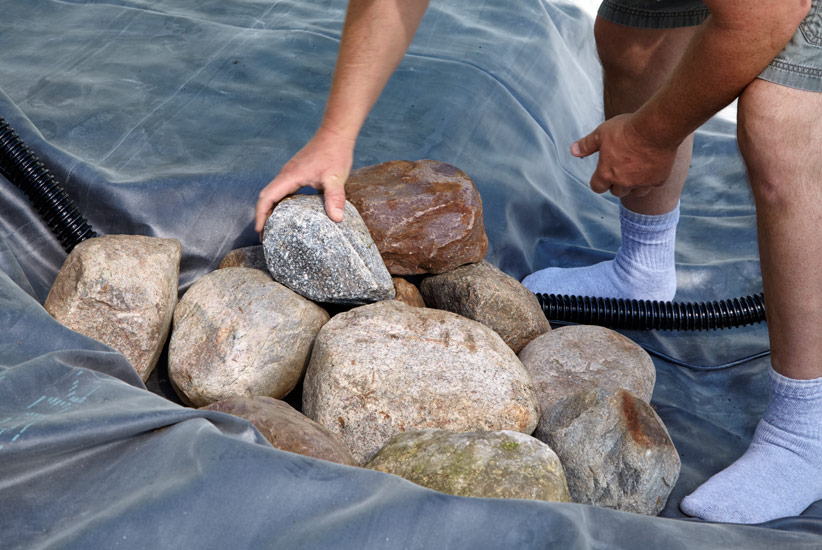
Once the pond was drained, I pulled the rock away from the pond edges and we were ready to lay in a new rubber pond liner, to cover the fill rock/soil of the deep end. We opted to leave the old liner intact to provide an extra protective layer under the new liner. I did poke a few holes in that old liner so water didn't seep between the liner layers and form a bubble — this way it could drain out if any happened to get in. A curb-shopping trip through a local neighborhood during spring cleaning day yielded a chunk of old carpet padding along with a scrap piece of rubber liner to lay on top of the fill to prevent any rocks from shifting and puncturing the new liner. Old carpet, with the soft side up, works great, too. Neither deteriorates, so it works perfectly for this.
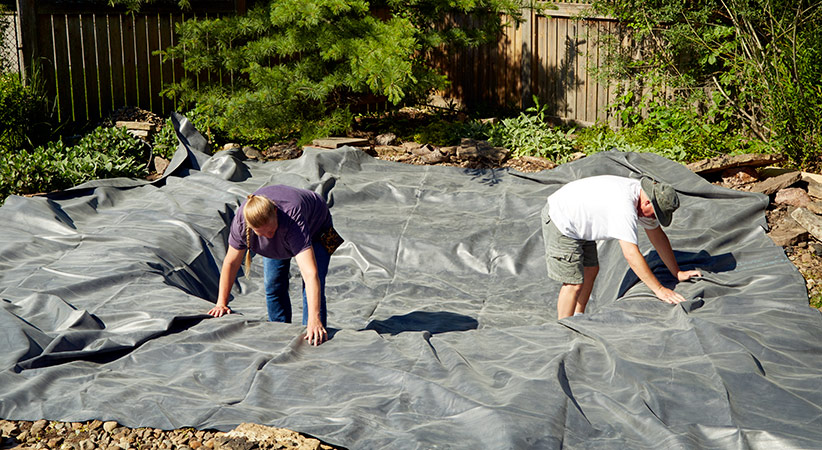
Next, we installed a new liner. The folks at smartpond® helped us with this project. Here's how I calculated the size of my pond, liner and chose a pump size. Our pond is round, 13 ft. in diameter and 2 ft. deep. So our piece of rubber liner needed to be 20 x 20 ft. to line the pond, with enough extra to lay over the top edge and be covered with stone to hold it in place. We cut off excess after the pond was filled.
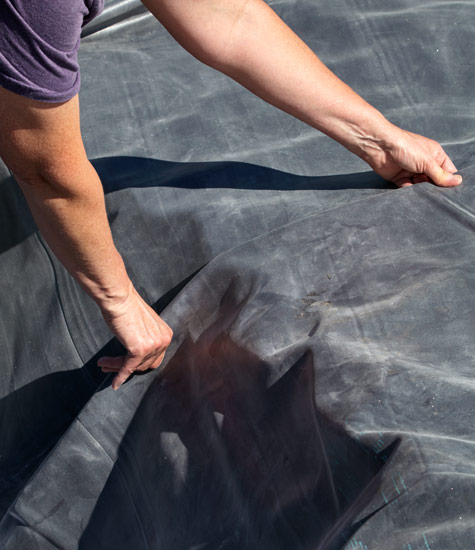
We started by pressing the bottom in place and making a few folds flat on the side of the pond. It’s best to wear socks or very soft-soled shoes while installing the liner — you don’t want to accidentally poke a hole in the new liner. Plus, if you work with a sun-warmed rubber liner, it will be softer and easier to mold into the pond, but also very hot on bare feet as the black rubber heats up in the sun.
Step three — Install the pump
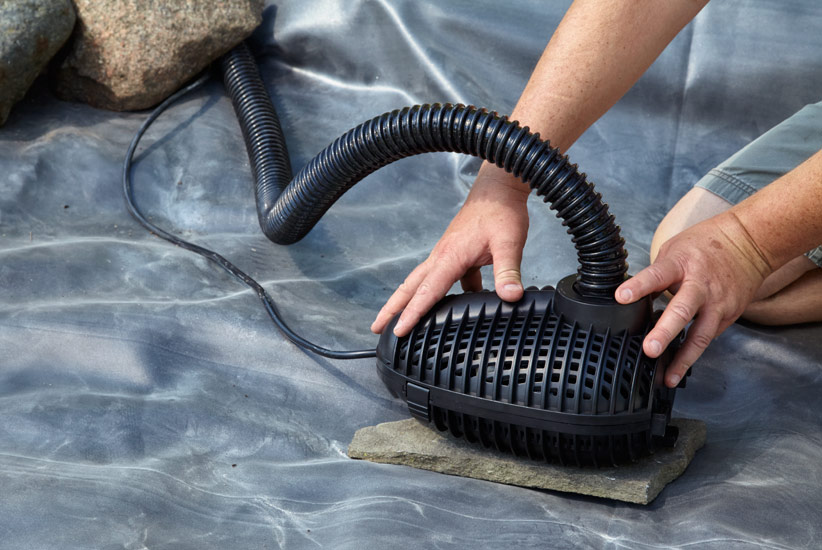
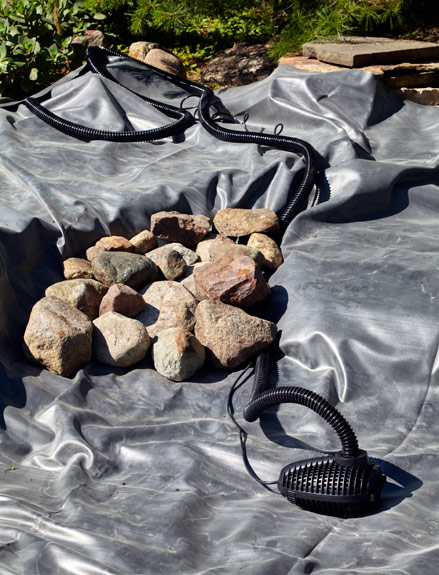
The three elements a pond needs to combat algae are circulation, filtration and aeration. Circulation is accomplished with a pump that keeps water moving to prevent algae growth and odors from stagnant water, adds oxygen, plus it deters mosquitoes from laying eggs. Our pump is a 3600-GPH Premium Waterfall Pump from smartpond® that will accommodate a pond this size and move the entire volume of water in one hour. It has a cage surrounding the mechanism to help catch large debris to keep the pump from clogging. The pump lays sideways in our pond, but in deeper water will stand upright. A hose from the pump sends water out of the pond to the filtering system.
Step four — Add UV filtration
Filtration systems collect debris so it doesn't decompose in the pond and become algae food. These devices can be skimmer boxes and filtering cages to catch large debris, and also receptacles that the water runs through that have filtering sponges, bioballs, or even ultraviolet light to help eliminate algae.
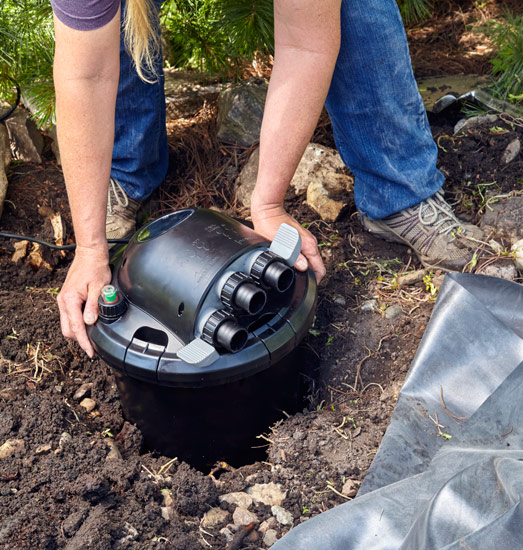
Behind our pond's spillway, a UV filter is sunk into the ground. This canister receives the water from the pond pump, runs it through a set of sponge filters that catches filamentous algae, the kind that clumps together in long strands under water or floating as blobs on the top. Then it exposes the water to light from an ultra-violet bulb contained in the unit, which kills tiny planktonic algae, the kind that turns the water green. From the UV filter the water flows to the waterfall spillway box.
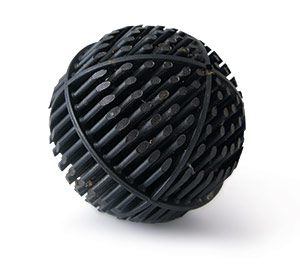
The filter box also holds a set of bioballs — spiny, 2-in. plastic balls with a lot of surface area where beneficial bacteria collect. This naturally occurring bacteria is what feels slippery when you touch rocks or the pond liner under the water, so what you might think is slime is actually a good thing! They remove nutrients from the water that algae feed on, reducing the food supply for that unwanted invader. When you start a new pond or add water to an existing one, a dose of liquid bacteria available in the pond care section of the garden center can help supplement the natural population.
Step five — Position the waterfall
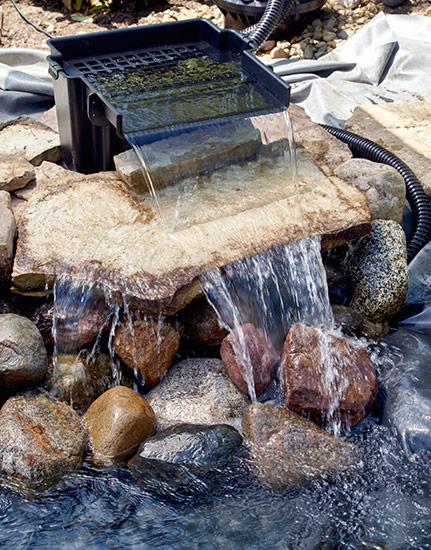
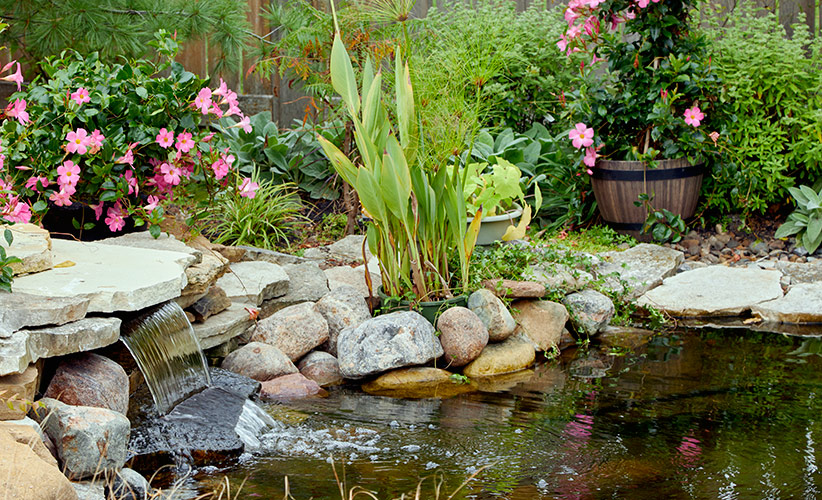
Aeration adds oxygen to the water, which fish and plants need to survive if you have them in your pond. Waterfalls, bubblers or fountains can provide aeration and be fun, too. We added a waterfall spillway box to our pond to create the aeration portion of our algae control. Larger stones are placed below the spillway site to create the waterfall and to minimize splashing of water (that would cause more evaporation of water from the pond).
Stones under the spillway help disguise the hose and pump cord in the shallower water.
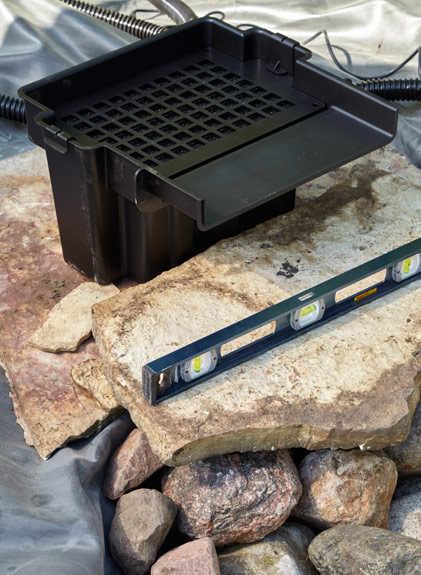
A large flagstone makes a base for the waterfall spillway box. It needs to be level. Excess pond liner extends well past the waterfall setup to make sure any splashing water or possible leaks go back into the pond, not draining off and outside on the ground.
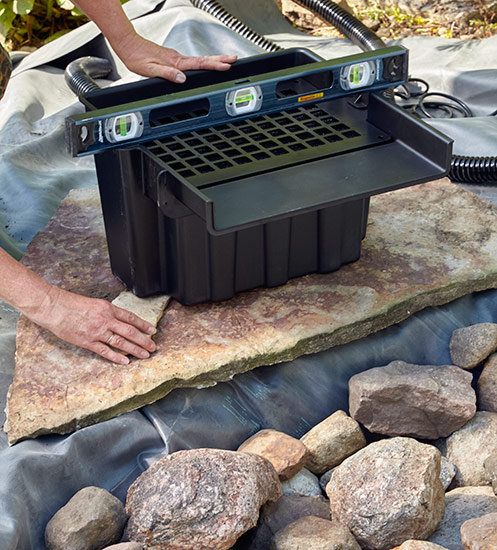
The spillway box is set onto a flagstone base, and a sliver of flagstone is used as a shim to make sure the box is level. Water is fed into the bottom of the box in the back, where it moves up through a cavity filled with more bioballs that harbor the beneficial bacteria that aid in algae removal. A set of sponge filters at the top catches even more algae before it spills out the waterfall and back into the pond.
In front of the spillway is another flagstone, levelled to catch and spread the flowing water and direct it to the pond. I repositioned this stone several times to make sure all of the water splashed into the spillway.
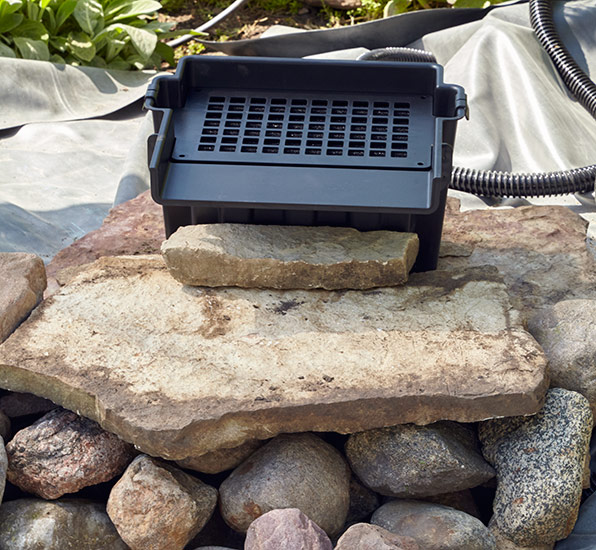
A second, smaller stone sits under the mouth of the spillway to hold the spillway in place, help direct water and hide the plastic box. This set of rocks also makes it easy to place the spillway back in the right position in the spring after removing it for winter.
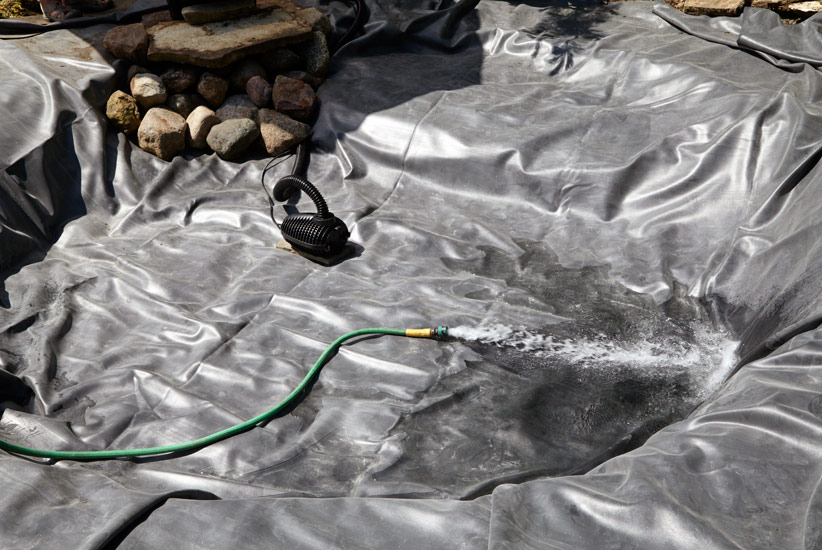
Step six — Start filling
At this point, we could start filling the pond. As the water ran, we smoothed out the liner, pulling up to stretch it tight against the bottom of the pond.
When the water started moving up the sides of the pond, we made flat folds to fit the liner to the sidewalls. The weight of the water holds the liner tight against the sides and is less visible once the pond is filled. We began setting in rocks on the top edge of the pond to hold the liner in place and create a rim around the water that hides the black liner. Our flagstone pieces are irregular, so it was like a puzzle to fit pieces together tight around the edge.
Step seven — Start the pump
As the pond continued to fill, we fired up the pump, sending water through the UV filter, then to the spillway. The spillway filled and ran back into the pond, so we could see how the water flowed and make adjustments to the spillway box and stones that made up the waterfall.
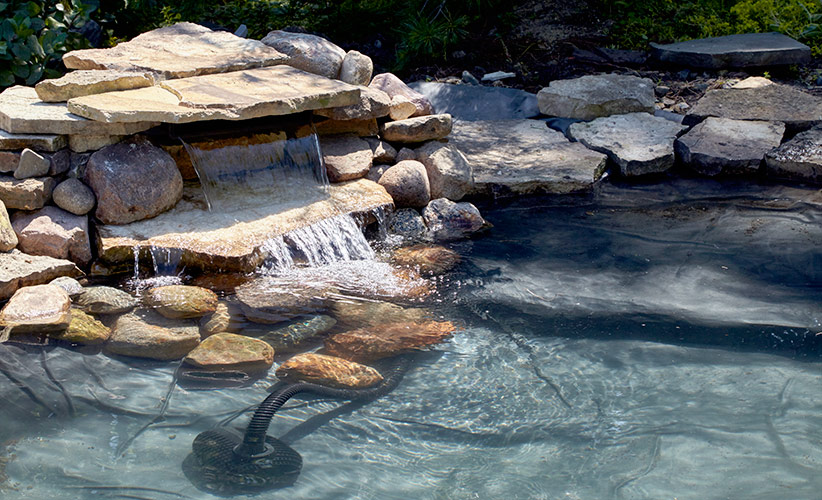
Once we were satisfied with how the water spilled from the box, we added rock around and on top of the spillway, making sure nothing shifted the flow of water. Later, we would rearrange rocks as needed to make the waterfall more appealing and help cover plants and the UV filter behind the spillway.
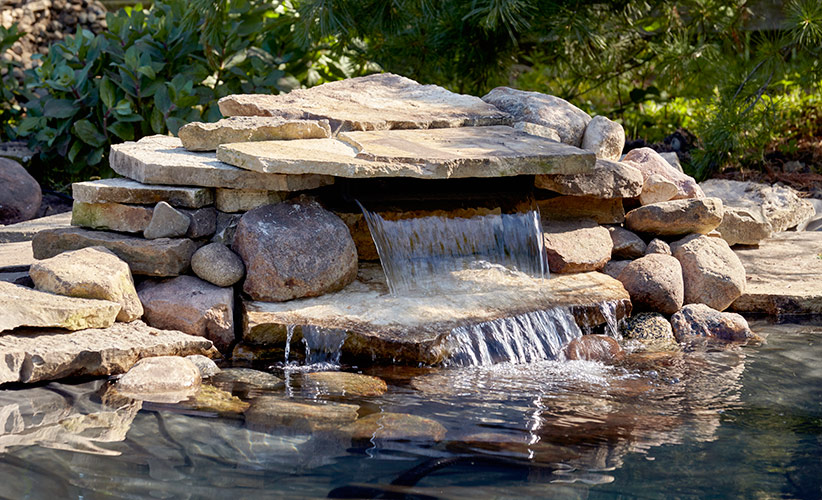
Step eight — Add finishing touches
The spillway is hidden in an arrangement of stones and rock, with a couple large flagstones to cover the top and hold it all in place. These flagstones can be easily removed to clean the filters of the spillway or to remove the box for winter.
Once the waterfall and edge of the pond were finished, I cut off excess liner.
We added extra stones to the planting shelf to make a "bog" of shallow water that holds water-loving plants in containers in place and keeps them from blowing over in the wind. The canna in this photo has been in the pond for two seasons in a container, but this season I planted it on the shelf by spreading its roots in the water and weighing them down with stones, eliminating the need to conceal its container.
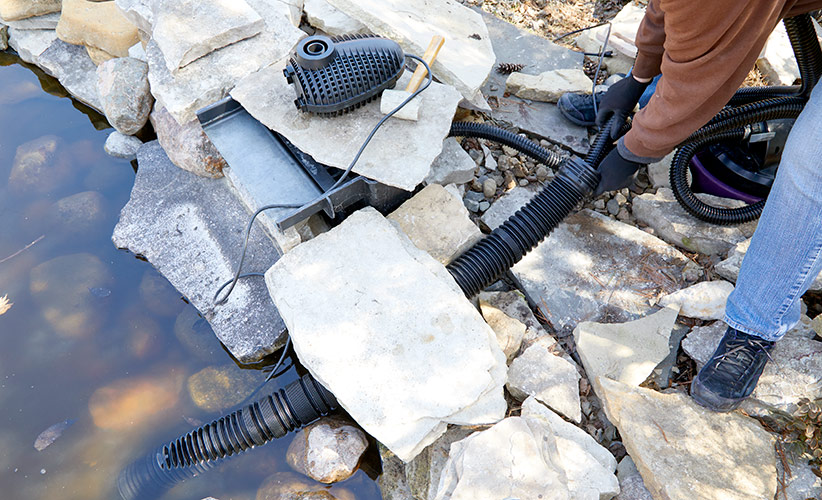
Some of these stones help cover an addition made this year to help with the removal of the pump at the end of the season. Since we are in a zone where the pond may freeze all winter, we need to remove our pump, UV filter, and spillway so they aren't damaged if the pond freezes up. So I ran a 4-in.-diameter length of flexible tubing (like you might find for downspouts) from the bottom of the pond to the outside near the UV filter canister. This tubing is big enough to run the pond pump's water hose to the UV filter and electrical cord through. The flexible tubing is then covered with rock from the waterfall and the bog to hide the workings of the pump. Now, I should be able to feed the cord and hose through this tunnel easily to remove the pump for winter, and to replace it in spring. If any rocks have shifted, it won't catch the cord or hose, and I won't have to deconstruct the whole waterfall.

Around the pond we ran plastic edging to contain a 6-in.-wide layer of river rock laid down as a transition from the rock pond edging to the lawn. It also helps to prevent grass from growing up into the rock surrounding the pond.
Step nine — Add plants and fish
Plants are great for algae control — they compete for nutrients and also shade the water, which will slow algae growth. Our water lilies get bigger every year, and we simply leave them in all winter to go dormant.
Another good thing for a healthy pond is fish. They help aerate and move water, eat algae, and deposit waste that plants use for fertilizer. But too many fish can create an overload of organic matter that algae can capitalize on, so make sure you have a good balance of fish, plants, and the three elements of circulation, filtration and aeration.
What else is helpful to combat algae?
Once our pond was up and running, we found it pretty simple to maintain for the last two years. But occasionally we get a bout of algae. In early spring before I get the pump reinstalled, stringy algae can take off, so I need to replace the pump/filter/waterfall system as soon as I can in the spring. I also use a pond vacuum to suck up debris from the bottom that has dropped in over the winter.
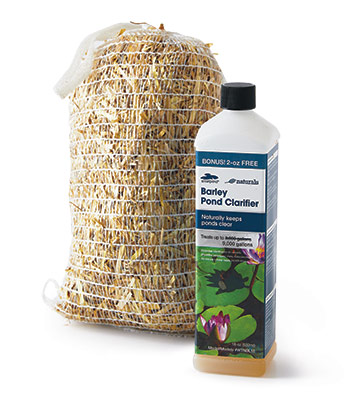
In the heat of summer, algae can form quickly, even when the pond is running as it should. For a one-time quick algae cleanup, I use a dose of liquid algaecide if the problem is not clearing up with other methods. Since I don't have fish in the pond, it is a good option, but if I did, I would need to check on the label to see if it was safe for them and other wildlife. Liquid barley extract or small bales of barley straw also inhibit algae and are safe for fish and plants. Pond tints are colorants that make the water blue or black and allow less light to penetrate the water, which slows growth of algae, like shade does.
In all seasons, if you can skim fallen leaves, blown grass clippings, sticks and other plant debris off the surface of the pond, you'll do yourself a huge favor. The less organic matter decomposing in your pond, the less algae you'll have.
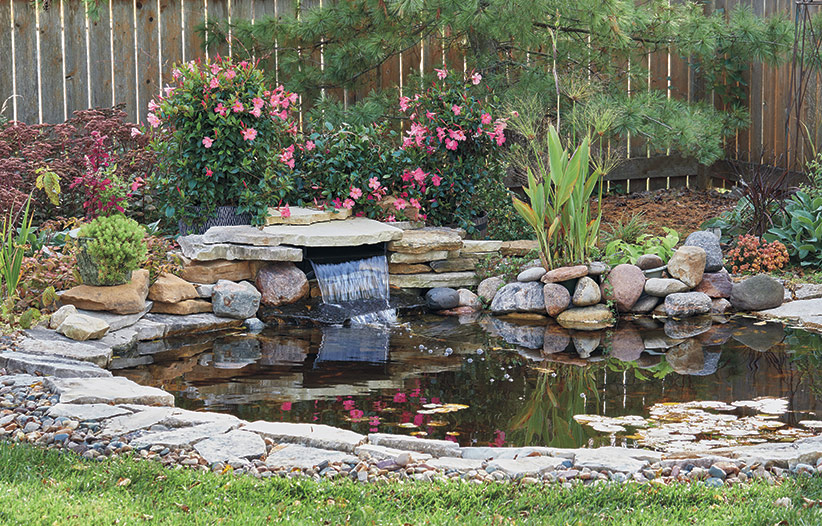
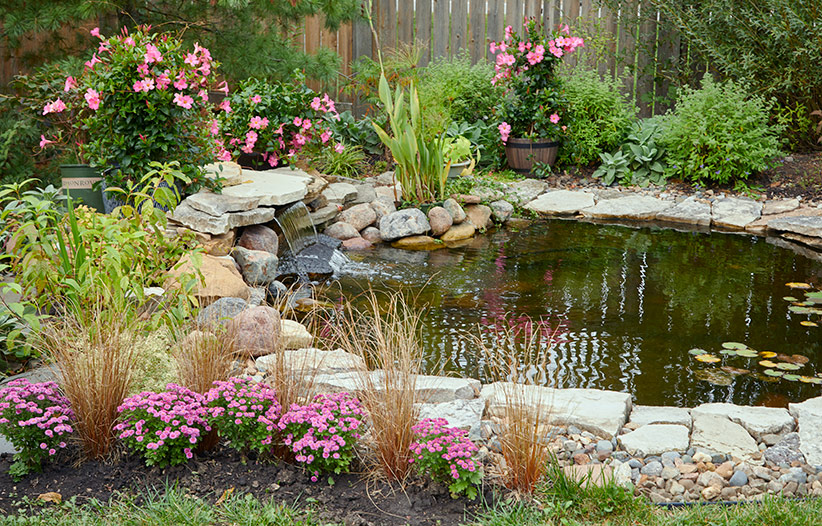
After
And now our previously embarrassing algae puddle is a beautiful highlight of our garden, chock full of frogs. We even had a pair of ducks stop by for a visit this summer!


