


Test your soil
A garden is only as good as the soil it’s growing in. So it makes sense to find out as much about your soil as possible. The best place to start is with a soil test for pH to determine if you’re working with acid or alkaline conditions. There are many easy-to-use, do-it-yourself kits on the market, and they all do a good job. Look for test kits at your local garden center or home improvement store. Here's how to do the test:
Step one — Gather the sample
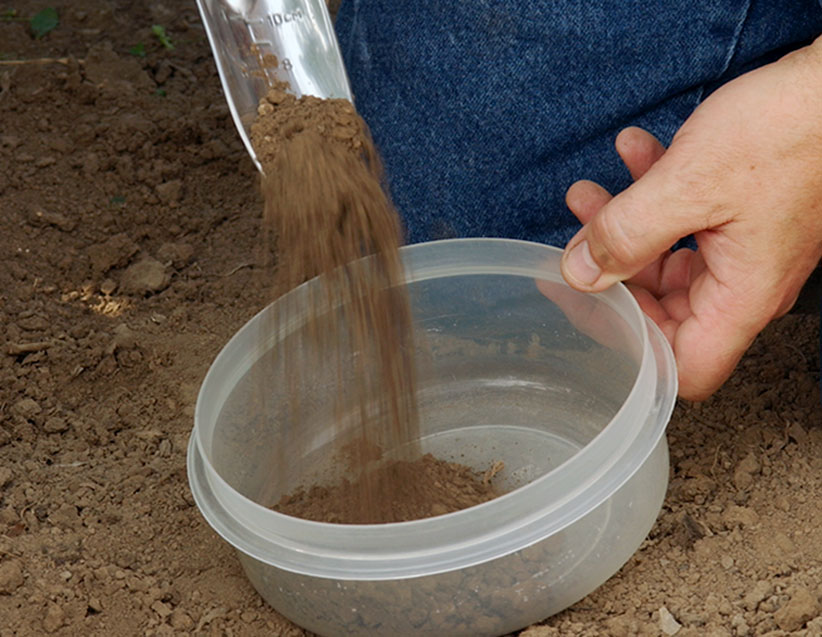
Using a trowel, dig a 4- to 6-in.-deep hole from the area you want to test. Remove some soil from the bottom of the hole and put it into a plastic or glass container. You won’t need much, less than a teaspoon, but take extra and blend it together. You’ll probably get a better reading this way. Or if you want to test a larger area, take several samples and blend them together.
Using the trowel, break up the clods. Don’t use your bare fingers — they can influence the pH of the soil and change your test. Set the soil aside to dry. After it’s dry, again use the trowel to break the soil into tiny particles.
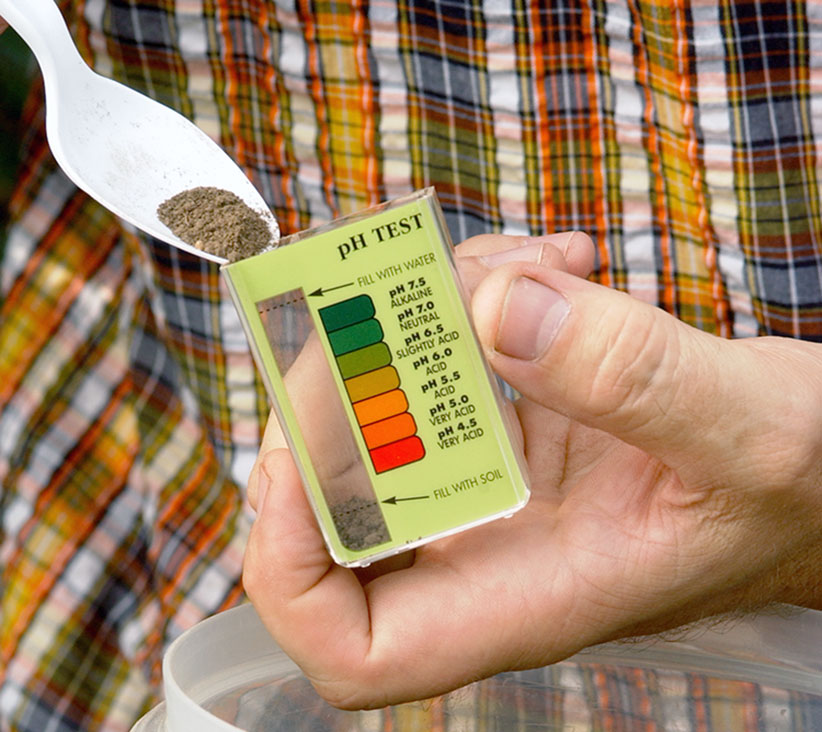
Step two — Scoop soil into the vial
After the soil is dry and pulverized, you’re ready to put a small amount into the vial. Again, don’t touch the soil, but try to remove any foreign materials, like roots or rocks, before you put the sample into the testing chamber. To get the soil into the small opening, a small plastic spoon helps.
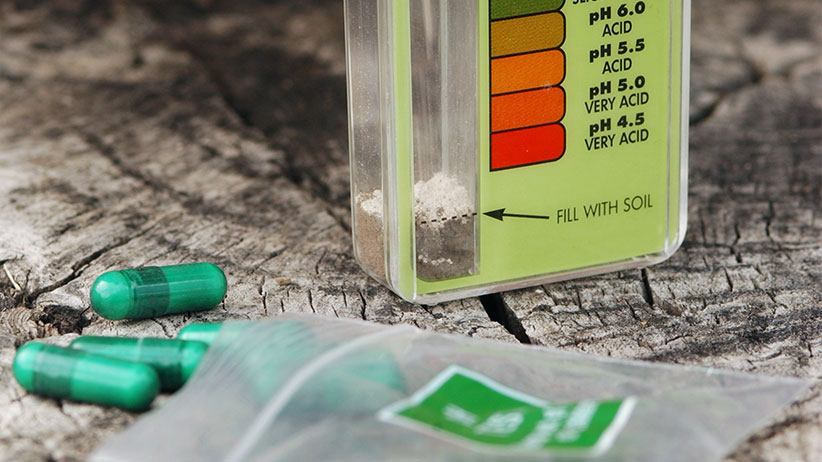
It doesn’t take much soil to do a sample. Look closely at the photo and you can see the fill line. If the soil is dry, it’s easy to dump a bit out until you get the right level.
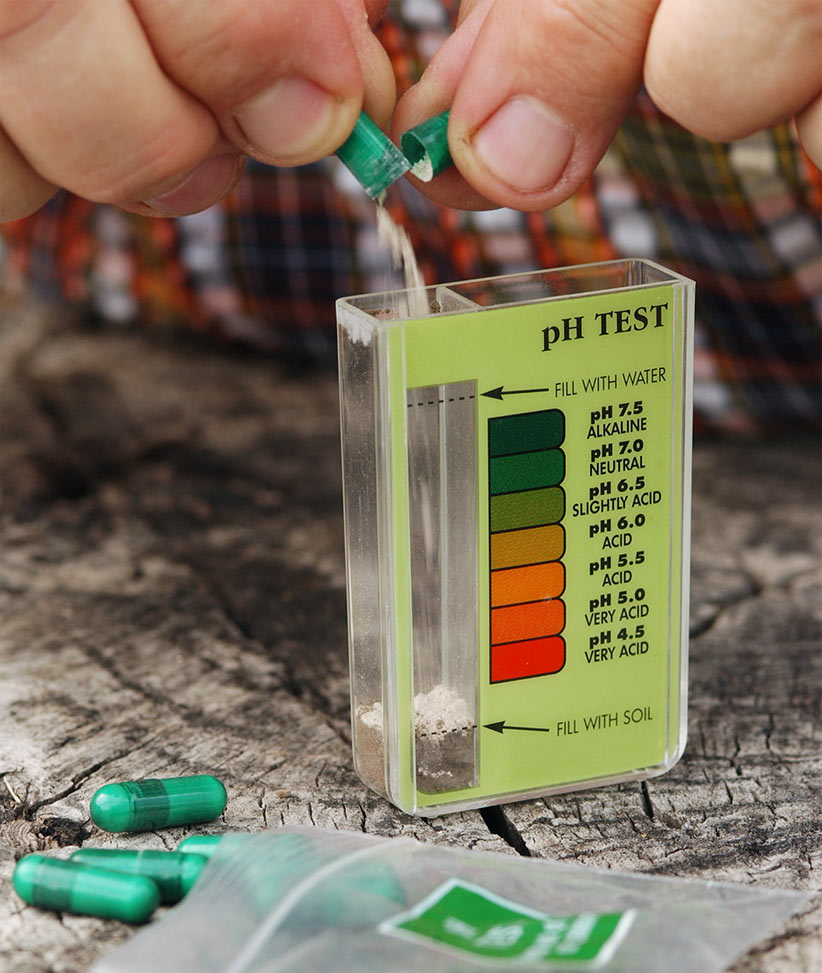
Step three — Add the testing powder
Take one of the kit’s capsules, open it carefully and empty the contents into the vial with the soil. The capsule can be a bit hard to open, so you might want to twist and loosen it a bit before you try to open it over the vial.
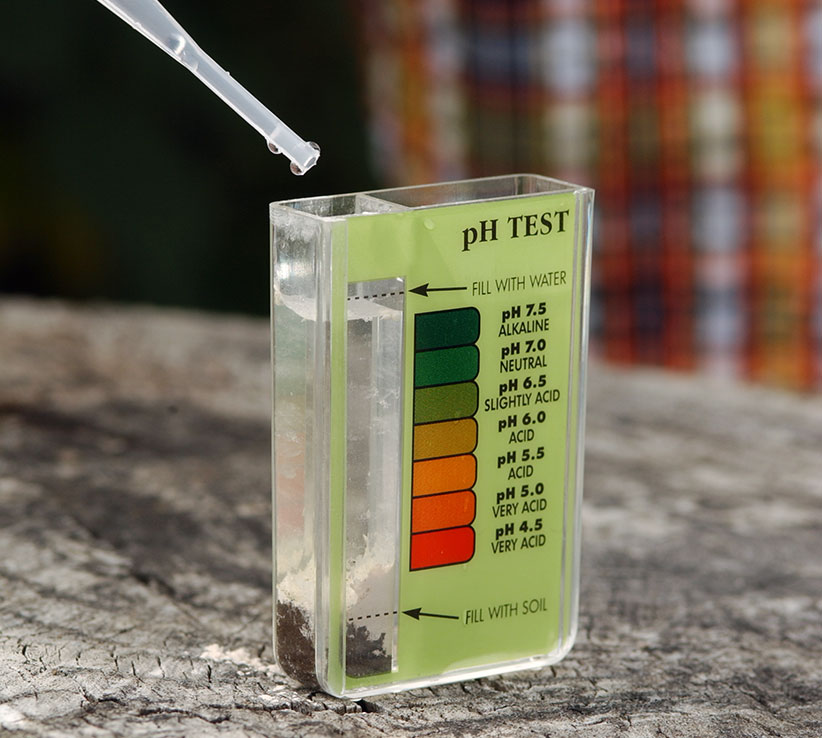
Step four — Add the water
Using the plastic eyedropper that comes with the kit, fill the vial to the top fill line with distilled water. You can use tap water, but it might alter your soil test results. Distilled water, available from the grocery store, is neutral so it will give the most accurate reading.
Put the lid on the vial and shake it vigorously until the powder and the soil are thoroughly mixed with the water.
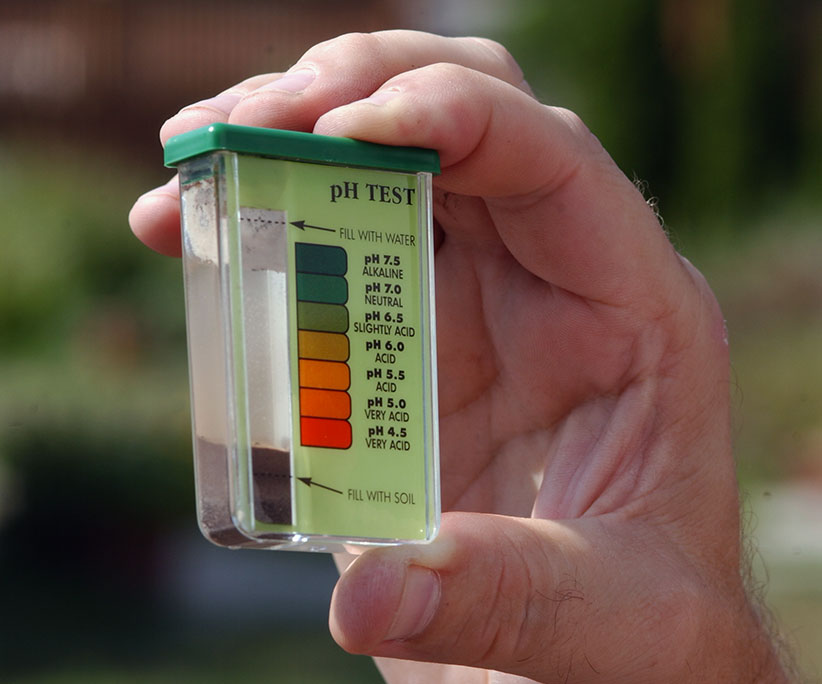
Step five — Compare the color
Let the vial sit for at least a minute so the soil can settle out. To determine the soil’s pH, compare the color of the water with the color chart along the side of the vial. Sometimes the color change is subtle. If you hold the vial up so sunlight shines through the water, you can determine the color more easily. You can see in the photo that this soil sample has a pH of 5.5 to 6 — it’s slightly acid.


