- Flowers & PlantsVegetables
The Best Soil Test Kits of 2024
Last updated: Apr 17, 2024
.
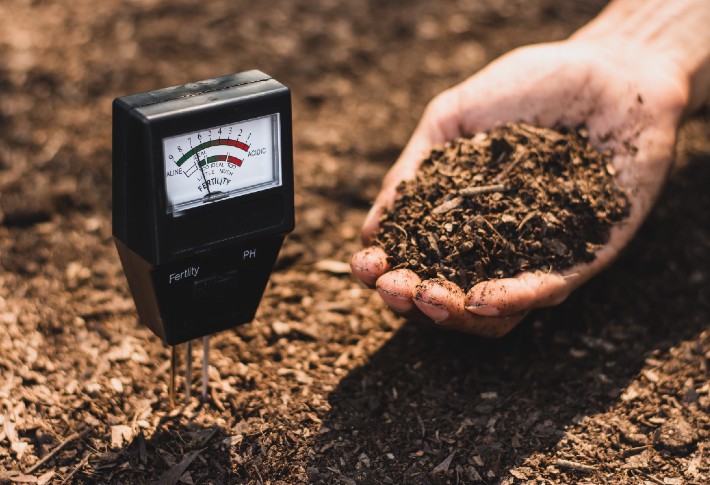
Soil testing kits are an invaluable tool for gardeners of any experience level. They allow you to test for things you can’t figure out just from looking at or touching the soil, like the soil pH balance, moisture content, or potassium, nitrogen, or phosphorus levels. The health of your soil dictates the health of anything you grow inside of it, so knowing exactly what you need to add or withhold from your soil is extremely important. Our team researched the best soil test kits on the market, and the Sonkir Soil pH Meter, MS02 3-in-1 Soil Tester takes the best overall spot. This tester is at the top of our list because of its easy-to-use interface, analog design, clear instructions, and reliable manufacturing technology.
- Best Overall: Sonkir Soil pH Meter, MS02 3-in-1 Soil Tester Shop Now ➔
- Most Lightweight: Kensizer Soil Tester Shop Now ➔
- Rapid Results: Atree Soil pH Meter, 3-in-1 Soil Tester Kits Shop Now ➔
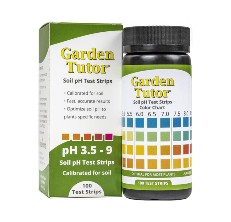
- Best for Testing Soil pH: Garden Tutor Soil pH Test Strips Kit Shop Now ➔
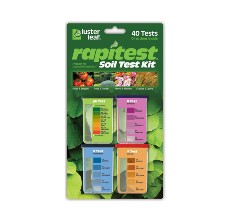
- Easiest to Use: Luster Leaf 1601 Rapitest Test Kit Shop Now ➔
- Most Versatile: Trazon Soil pH Meter 3-in-1 Soil Tester Shop Now ➔
- User-Friendly: Alkey Soil Moisture Meter 3-in-1 Soil Tester Shop Now ➔
View all ContentsThe Best Soil Test Kits
Best Overall
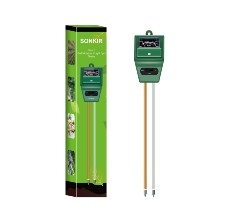
The Sonkir Soil pH Meter, MS02 is a 3-in-1 testing unit designed for in-ground use and accurately measures soil moisture, pH value, and sunlight level of your plant. This unit is one of the most popular on sale due to its affordable price, and you’ll find it in garden centers across the USA. If you have issues with hard water in your county, and you need to regularly check the pH of your soil several times a week after watering your garden, then we highly recommend this device.
Pros
- This soil tester comes at a reasonable price.
- It is an affordable and easy-to-use option for novice gardeners.
- The moisture detection on this divide sets it apart from its peers in terms of precision. Once you insert the probe into the ground, it indicates a reading of between 1 to 10 to let you know if it’s time to water the garden.
Cons
- The sunlight detection panel on this device is placed at the front of the panel, which is a little awkward, and might not give very accurate results. We have found that pushing the probe into the soil at an angle will allow for maximum sunlight to reach the sensor, hence, ensuring accurate results.
Most Lightweight
The Kensizer Soil Tester is a multifunctional device that can be used to test soil moisture, sunlight level, and pH value. It has a clear reading dashboard and a sensitive dial. So you can get your readings in no time. Just dip the probes into the soil on your lawn or in your vase and let the Kensizer soil tester do its thing.
Pros
- It is lightweight and portable.
- The display is easy to read and works well indoors and outdoors.
- The moisture readings on this device are superb.
Cons
- By design, the prongs on this device are quite fragile.
Rapid Results
With the 3-in-1 functions of the Atree Soil pH Meter, you can measure soil moisture, pH value, and sunlight intensity easily. It’s helpful for monitoring plant life and making plants and flowers grow healthy and strong. Make no mistake, this soil tester can only be used to measure soil parameters, it cannot be used to test any liquids.
Pros
- This device is very easy to use right out of the box.
- It is compact and usable indoors and outdoors.
- This device provides a reasonable level of accuracy.
Cons
- Except for the fragility of this device due to its lightweight, there is not much to worry about.
Best for Testing Soil pH
The Garden Tutor Soil pH Test Strips Kit is calibrated specifically for soil pH testing. This kit comes with enough test strips for 100 soil pH tests and includes a detailed 16-page full-color pH testing handbook with lime and sulfur application charts. If you are looking to get accurate results for soil pH, we highly recommend this kit.
Pros
- Testing strips are generally easy to use, and they don’t create any mess.
- The kit allows you to place the test strip over the chart for more accurate analysis.
- It comes at an affordable price.
Cons
- The color chart is not attached to the case of the kit so it can easily be misplaced.
Easiest to Use
Luster Leaf 1601 Rapitest Test Kit is a classic home chemical testing kit for measuring the pH, Nitrogen, Phosphorus, Potash content of your soil. Simply place your soil sample in the tube on the exterior of the kit, add some drops of distilled water and mix in the reagent capsule. It will take 5 to 10-minutes for the reaction to occur, and you can compare the results to the color chart provided with the kit after the color settlers.
Pros
- It comes at a very affordable price.
- The color chart is attached to the case of the kit, so you never have to worry about misplacing or losing your color chart.
- This product offers better precision and accuracy than the ones designed by other manufacturers.
Cons
- This kit may not be as accurate as professional soil testing kits, but it’s a good guideline for amateur gardeners that want to know the pH or macronutrient properties of their soil.
Most Versatile
If you’re a garden enthusiast and you can’t afford to take soil samples to the lab and wait for a full report in 3-5 days before taking any actions towards your plants as you would like to be in the know of what your plants need to thrive, this soil pH meter is a must for you. The Trazon Soil pH Meter 3-in-1 Soil Tester provides readings for sunlight, moisture, and soil pH values. All in one device.
Pros
- It comes at an affordable price.
- It can be used indoors and outdoors.
- The readings are reasonably accurate.
Cons
- The prongs attached to this device are somewhat fragile, so don’t try to force it into hard surfaces as the device may split apart.
User-Friendly
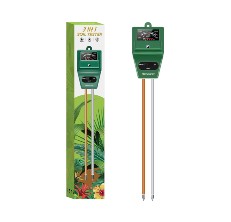
Similar to the previous soil testing kit we discussed, the Alkey Soil Moisture Meter also offers a 3-In-1 Multi-function, allowing you to test the soil moisture, sunlight level, and pH value of the soil. This soil testing kit does not measure the N, P, and K levels of the soil, neither does it test the soil for micronutrients. However, it does work well as a day-to-day testing unit and is a great tool for newbie gardeners who want to keep tabs on the health of their soil, especially during the growing season.
Pros
- This soil tester is affordable.
- It is very easy to use, making it suitable for novice gardeners.
- It offers a reasonable amount of accuracy.
Cons
- The sunlight detection panel on this device is also placed awkwardly, and might not give very accurate results. Using our hack of pushing the probe into the soil at an angle to allow for maximum sunlight to reach the sensor will give you accurate results.
The Best Soil Testing Kit Buying Guide
Are your potted plants dropping leaves like a cool DJ on a Friday night? Do the flowers in your home garden keep shriveling up like a single lady under the covers on a cold winter’s evening? Even though you’ve used high-quality soil and fertilizers and you’ve made sure that your plants are receiving the appropriate amount of sunlight that their particular species requires, if your flowers, veggies, succulents, fruits, or whatever type of plants you’re trying to grow are failing to thrive, then a simple solution might be purchasing one of the most rated soil test kits in 2021 to know what’s really up with your garden.
With the best soil pH meter, you can check the pH level of the soil and also monitor its moisture and light content.
And yet there are one too many test types available. Which should you choose? As always, we have put together a buying guide to let you in on all that you need to know before purchasing a soil test kit from an online retailer or a physical store. We even have some information on how you can get your soil tested for free. We know we do too much.
Why Should I Test My Soil?
Take a look at any box of fertilizer, and you’ll see the common macronutrients listed on the label; phosphorus, potassium, and nitrogen because just like people, plants need the optimal balance of macro and micronutrients to grow. Before you go ahead and plant those geraniums in your flowerbed, it’s important to test your soil to know what you’re working with. That way, you can throw out the guesswork in your gardening and amend it to suit the needs of the new flowers or vegetables you want to grow. Without testing, you won’t know if your base soil is ready to go, or whether it’s going to require an upgrade by blending with other materials to improve it enough to be fertile. Many times, fertilizers are not always the solution.
As a matter of fact, adding fertilizer to nutrient-rich soil might result in your plants burning, or cause problems associated with erratic growth. Ever heard of root-forking? It is common in over-fertilized carrots and can cause abnormal growth. Nobody wants a three-legged carrot! Except for rabbits. More for them isn’t it. And you’re not growing your carrots for rabbits, are you? By testing the soil, you are aware of the nutrient level in the soil, and so you can avoid these types of mishaps in your garden.
You also need to know the pH of your soil as well. While all plants are different and require different levels of acidity or alkalinity, most like to remain at a neutral range. Too acidic or alkaline soil will not produce good growth results.
If you don’t test your soil, you can’t guarantee the best growth for your plants.
What Are the Types of Soil Testers?
Chemical soil testers
Chemical soil test kits are relatively straightforward to use. Simply add a small sample of soil from your flowerpot or vegetable garden to a vial, and then insert a colored capsule that corresponds with the vial lid. Shake the vial, and then wait for the chemical reaction to take place. After the reaction is complete, compare the results with the reference chart provided with the kit.
Digital soil tester
Digital kits are a bit more complex than chemical testing kits. These battery-operated units send electrical charges into the ground that interact with the nutrients in the soil. Some kits come with a probe that you tuck into the soil, while others require you to fill a vial with soil and add distilled water before probing the vial for your results.
Lab testing
Professional lab testing is the most accurate method of testing the pH and nutrient quantity of your soil. You’ll need to acquire a soil sample from multiple sites in your garden and mix them. Once the soil dries out entirely, send it to the lab for testing. Lab testing provides very accurate results, but it is somewhat pricey and far costlier than buying a multi-use chemical or digital reader. If you might have numerous nutrient deficiencies in your garden, we suggest you try this method.
How Do I Use a 3-In-1 Soil Tester Kit?
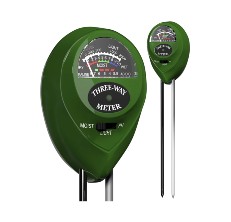
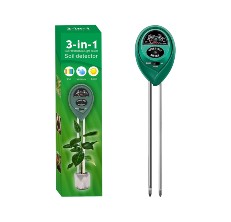
A 3-in-1 soil tester is a metal-prong instrument that is inserted into the soil to test soil pH, light intensity, and moisture levels. In our review of the best soil pH testers, we considered a bunch of 3-in-1 solutions for testing your soil. You may have noticed that most of these testers are similar in both their design and their functionality, that just goes to show that you really can’t go wrong with any from this list. Here is a step by step guide on how to operate one:
Insert the prongs into the soil you wish to analyze. The first reading that appears is the pH, which is measured on a scale from 1 to 14, with 1 being the most acidic, 14 being the most alkaline, and 7 being neutral. You can alter soil pH by adding limestone to raise it, or sulfur to lower it.
Next, push the button on the tester to view the moisture readings. Most plants prefer moist soil in the mid-range. Sand can be added to soil to increase drainage capabilities for excessively moist soil.
Finally, push the button on the tester again to view the light readings in foot candles. For reference, the average indoor home lighting is around 100 foot-candles. Plants requiring shade can be planted in the lower light areas, and plants requiring full sun can be planted in the upper light ranges.
Do use a clean cloth or dry paper towel to clean and dry prongs before testing, and between testing each plant to avoid a false reading on the next plant.
If you’d prefer to watch a video explanation of how to use a soil test kit, this video from California Gardening may help:
People Also Asked
Can I get my soil tested for free?
In many areas of the United States, local agricultural extensions of colleges offer soil testing services. However, sometimes there is a small fee for mailing your results or for the chemicals that are used in the process of testing. You first need to check in your area to see if these services are available to you. And if they are, you simply go and pick up a soil sample box. You then collect the sample per the instructions inside the box and drop it off at the test facility.
Is homemade soil testing possible?
You can do a very rudimentary pH test at home with just a few simple components. You’ll need your soil sample, some baking soda, some white vinegar, some distilled water, and two clean containers. But with this method, your results may not be consistently accurate, so why not just buy an affordable soil tester kit that will give you accurate results every time.
How far deep should the probes of my Soil Tester go into the soil?
To get reliable and accurate readings, insert the probes anywhere between 2 to 4 inches.
Article Contributors
Read More About Garden Gate Review Team HereThe Garden Gate Review Team’s product reviews and in-depth guides are here to help you choose the best products for a beautiful and bountiful garden and backyard. The content is created by The Garden Gate Review Team. Garden Gate’s editorial staff is not involved. Garden Gate is reader-supported: When you buy through links on our site, we may earn an affiliate commission. The Garden Gate Review Team is composed of authors, editors, and gardeners. Artificial Intelligence (large language models) may have been used in the research and creation of the content.
Please reach out to aimperiapt@gmail.com with any questions regarding product testing or specific articles.
