- Flowers & PlantsVegetablesOur content is meticulously curated through independent research, testing, reviews, and AI-driven recommendations, all designed to present you with the finest product choices. When you make a purchase through our links, it could result in us earning a commission.
The Best Broccoli Seeds of 2024
Last updated: Apr 24, 2024
.
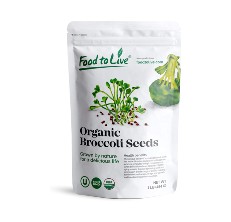
Few vegetables have the same versatility, nutritional value, and culinary appeal as broccoli. Broccoli was initially cultivated in the Mediterranean by the Romans but didn’t become a commercial crop in the United States until 1923. From its nutritious sprouts, tender florets, and robust stalks, broccoli is packed with fiber, antioxidants, and vitamins that are amazing for the body. If you’re ready to grow your broccoli, you need some seeds to get you started. We’ve gathered a list of the best broccoli seeds, and the Food to Live Broccoli Seed takes our top spot because it doesn’t require soil to grow, has a high germination rate (97%), and the seeds are organic & non-GMO.
Our Top Picks For Broccoli Seeds
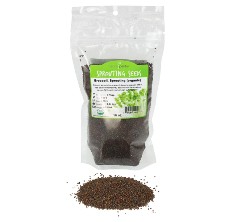
- Best Overall: Food to Live Broccoli Seed Shop Now ➔
- Most Seed Amount Variety: Rainbow Heirloom Seed Shop Now ➔
- High Germination: Easy Peasy Broccoli Seed Shop Now ➔
- Best Value: Country Creek LLC Broccoli Seed Shop Now ➔
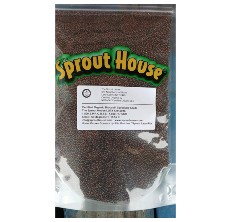
- Crunchiest Sprouts: The Sprout House Broccoli Seed Shop Now ➔
- Fast Growing: Handy Pantry Broccoli Seed Shop Now ➔
- Best Seed Mix: Todd's Broccoli Seeds Shop Now ➔
View all ContentsThe Best Broccoli Seeds
Best Overall
Food to Live strives to make the world a better place by embracing and encouraging healthy eating habits and safe agricultural practices. They prioritize where their food and produce comes from to deliver only top-quality products to you. The Food to Live facility is CCOF Organic certified, which means you can be 100% sure that these broccoli seeds are completely free from GMOs, nitrates, and any other dangerous toxins. Food to Live organic broccoli seeds are easy to sprout and ready to eat within six to nine days of sprouting. Broccoli sprouts are packed with nutritional benefits and are delicious in smoothies, salads, with vegetables, and garnishing pretty much any dish. The seed packs are available in sizes from 1 pound up to 18 pounds bulk size.
Pros
- Kosher
- Non-GMO
- Organic
Cons
- The seeds are on the pricier side compared to other brands
Most Seed Amount Variety
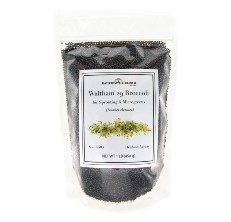
Heirloom seeds are seeds of which the varieties are at least 50 years old. Heirloom seeds are never hybrids or GMOs which means they are a natural and healthy choice. Rainbow Heirloom Seed Company offers top-quality heirloom broccoli seeds with high germination rates. These seeds are grown and packed in the USA. These broccoli seeds can be grown in growing trays, sprout jars, or countertop sprouters year-round. Rainbow Heirloom Seed Company offers friendly customer support to answer any of your sprouting questions to help you achieve the best results. The broccoli sprouts are a Waltham 29 variety and are available in 1 pound quantities.
Pros
- Non-GMO
- Seeds come in a resealable bag for safe storage
- Broccoli sprouts contain a high amount of Vitamin C and Vitamin A
Cons
- Although the seeds are not treated with chemicals they are not certified organic
High Germination
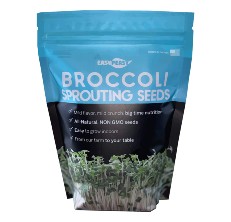
Easy Peasy non-GMO broccoli seeds are ideal for sprouting in mason jars, potting soil, or even paper towels. Instructions are provided to help you get the maximum germination. The broccoli seeds are sustainably grown on the family Illinois farm or sourced from similar all-natural setups without the use of pesticides or other chemical treatments. Sprouting broccoli seeds are ideal because you do not need a garden to enjoy the benefits of growing your own microgreens. Easy Peasy broccoli seeds are available in ¼ pound packs which is ideal if you just want to try them out. They also come in larger 1 lb, 2 lb, and 5 lb quantities.
Pros
- Non-GMO broccoli sprouting seeds
- Easy to grow instructions
- Available in small ¼ pound quantities if you don’t want to order a large bulk pack
Cons
- Although the seeds are not treated with chemicals they are not certified organic
Best Value
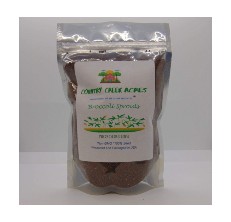
Country Creek broccoli seeds are non-GMO and available in 4 oz quantities. All the seed lots are tested for germination and are ideal for growing sprouts and microgreens. Within eight days of planting the broccoli seeds, you can enjoy your homegrown microgreens. Country Creek provides a step-by-step guide on their website to growing broccoli microgreens for best results.
Pros
- Non-GMO broccoli seeds
- All seed lots are tested for germination
- Sprout in a mason jar on your windowsill or plant in soil
Cons
- Most reviewers have had the best germination rate using sprouters. If you’re not using a sprouter the germination rate may not be as good as it could otherwise be.
Crunchiest Sprouts
The Sprout House offers certified organic, non-GMO broccoli seeds in a 1 pound resealable bag. This allows you to take out the amount you need and keep the rest safely sealed for freshness. Once you begin the sprouting process, your greens will be ready to eat in 5 to 7 days. Your homegrown sprouts can be used in salads, sandwiches, wraps, smoothies, and on top of pizza.
Pros
- Certified organic broccoli seeds
- Non-GMO seeds
- Seeds come in a resealable bag for safe storage and freshness
Cons
- The packaged seeds come from different sources and are slightly different tasting. Your batches will therefore not be identical in taste as some seeds can be a little spicier than others.
Fast Growing
Handy Pantry broccoli seeds are certified organic, non-GMO seeds grown in the USA. The seeds have been microbial tested and come in a resealable pouch for safe storage and to ensure a long shelf life. Handy Pantry broccoli seeds can be sprouted using trays, sacks, or a jar method. They should be soaked for 6 to 8 hours before starting the germination process. Rinse and drain the seeds two to three times daily during the sprouting process. After 4 to 6 days your fresh and slightly sweet sprouts will be ready to enjoy. Handy Pantry provides customer service to answer any questions about their products or sprouting.
Pros
- Certified organic broccoli seeds
- Non-GMO seeds
- Seeds come in a resealable bag for safe storage and freshness
Cons
- The broccoli seeds are only available in 16 oz quantity
Best Seed Mix
This seed mix contains broccoli, alfalfa, radish, and clover seeds. The seeds are organic, non-GMO and germination rates are regularly tested with an average of over 97%. The seeds come with full sprouting instructions to make sure you get the best out of each batch. The variety mix offers great flavor and incredible health benefits. Todd’s seeds broccoli seed mix is only available for delivery in the USA.
Pros
- Non-GMO broccoli seeds mix
- The variety of seeds in the pack include broccoli, alfalfa, radish, and clover
- High germination rate
Cons
- Only available for delivery in the USA
The Best Broccoli Seed Buying Guide
Broccoli seeds are so easy to grow. Whether you sprout them on your windowsill or grow them in soil, they are an excellent seed variety for first-time growers to sow, nurture, and harvest. The sprouts and microgreens are packed with flavor and nutritional benefits since they are loaded with vitamins, minerals, antioxidants, and even protein. Generally, sprouts will be ready to eat within 6 days or microgreens within 8 days of starting the germination process. When choosing your seeds there are a few things to consider to make sure you get good quality nutritional value. Once you’ve got your seeds, it is vital to take the right steps to sprout them to ensure maximum germination rates. Here’s everything you need to know.
What To Consider When Buying Broccoli Seeds
To ensure your sprouted seeds will offer the most nutritional value, you want to make sure they are completely natural and have not been chemically treated. Therefore, always choose seeds that are non-GMO and where possible certified organic.
Some smaller companies find the cost of organic certification very high and may produce organic seeds which are not necessarily certified. Other companies do not chemically treat their produce or use chemical pesticides but cannot guarantee the organic soil quality which will disqualify the certification of the produce.
In addition to ensuring you only purchase non-GMO seeds, look out for companies who test the germination rates of seed lots to avoid getting seeds that won’t sprout. Sprouts from different suppliers may taste a little different depending on the seed variety.
Broccoli Seed Growing Guide
Regardless of the method, you use to sprout or grow broccoli microgreens you need to sanitize them first. Place 2 tablespoons of broccoli seeds into 1 cup of water mixed with 2 tablespoons of apple cider vinegar. Let the seeds soak in the water-vinegar mixture for 10 minutes. Drain the seeds and rinse them with clean water. The seeds are now ready to be used for sprouting or planting.
How To Sprout Broccoli Seeds in a Jar
Step 1: Use three tablespoons of seeds for a one-quart size jar. Place the seeds in the jar and rinse the seeds twice by filling the jar with water, putting the sprouting lid or screen on, swirling it around, and draining out the water.
Step 2: Fill the jar halfway with water and place it in the refrigerator to soak for 8 to 10 hours overnight.
Step 3: Pour out the soaking water and cover the seeds in clean water to rinse them well. Shake out as much water as possible after rinsing. Turn the jar a few times to allow the seeds to coat the sides of the jar.
Step 4: Place the jar at an angle in a small bowl so any excess water can drain out.
Step 5: From this point forward, you need to rinse and drain the seeds one to two times daily and place them in the same angled position for excess water to drain out. It is important to get rid of excess water to prevent mold or other issues. You will begin to see them sprouting. After 6 to 9 days your sprout will be ready to eat
For a visual how-to, check out this seed-to-harvest video.
How To Grow Broccoli Microgreens
Broccoli is one of the easiest and fastest-growing microgreens to work with. To grow your broccoli microgreens, you will need:
- A planting tray with draining holes in the bottom
- A water traying without any holes
- A cover for your planting tray
- Potting Soil
- A spray bottle (optional)
Step 1: Fill the planting tray with a premium potting mix, firmly compacted. Don’t fill the compartments to the brim, leave a small amount of space at the top open since you will be adding more soil later.
Step 2: Spray water to wet the soil surface. Let the water soak into the soil and then respray.
Step 3: Spread a small number of seeds evenly over the soil without overcrowding. Cover the seeds with a light coating of soil and very gently press down the soil.
Step 4: Use the spray bottle to wet the seeds and settle them into the soil. Cover your seeds with a lid to keep them in a dark and cool environment. If the lid is clear, place a small towel over the lid to keep it dark and retain the moisture. Leave your seeds for 2 days to germinate.
Step 5: If your seeds have only germinated very slightly, give them another one to two days under the cover. If there is a large amount of germination remove the lid and allow your sprouting seeds to receive a lot of light, whether sunlight, a special grow light, or LED lighting.
Step 6: Add water to the watering tray as the little plants will now be watered from the bottom to prevent disease. You may have to add more water for the first round as the soil will be dry and absorb more moisture until it is saturated. Leave your greens in plenty of light and add water to the bottom tray as needed.
Step 7: After 8-to-ten days your broccoli microgreens will be 2.5-to-3 inches tall. Harvest only the amount you intend to use at a time by using a sharp knife to cut the stem just above the soil. Wash your broccoli microgreens just before using. If you are storing them in the refrigerator, wait until you use them before giving them a rinse.
People Also Asked
Are seeds for sprouting the same as regular seeds?
Seeds used for sprouting and growing microgreens or mature vegetables are the same. The difference is in the growing method and time they are left to mature before harvesting.
Can you label a product as organic if it is not certified?
If a product carries the USDA Organic seal, or states "organic" on the labeling, it must, by law, be certified organic. Businesses or individuals may otherwise risk being fined up to $17,000. Many smaller companies follow organic practices but are unable to carry the cost for organic certification. It is best to ask your supplier directly about the methods they use if you are unsure.
What is the difference between sprouts and microgreens?
Although the seeds are the same, sprouts are only grown in water. Once the sprouts are ready, the entire little plant is eaten including seed, leaves, and stem. Microgreens are grown in soil and are cut off above the soil level with only the stem and leaves being eaten.
Article Contributors
Read More About Garden Gate Review Team HereThe Garden Gate Review Team’s product reviews and in-depth guides are here to help you choose the best products for a beautiful and bountiful garden and backyard. The content is created by The Garden Gate Review Team. Garden Gate’s editorial staff is not involved. Garden Gate is reader-supported: When you buy through links on our site, we may earn an affiliate commission. The Garden Gate Review Team is composed of authors, editors, and gardeners. Artificial Intelligence (large language models) may have been used in the research and creation of the content.
Please reach out to aimperiapt@gmail.com with any questions regarding product testing or specific articles.

