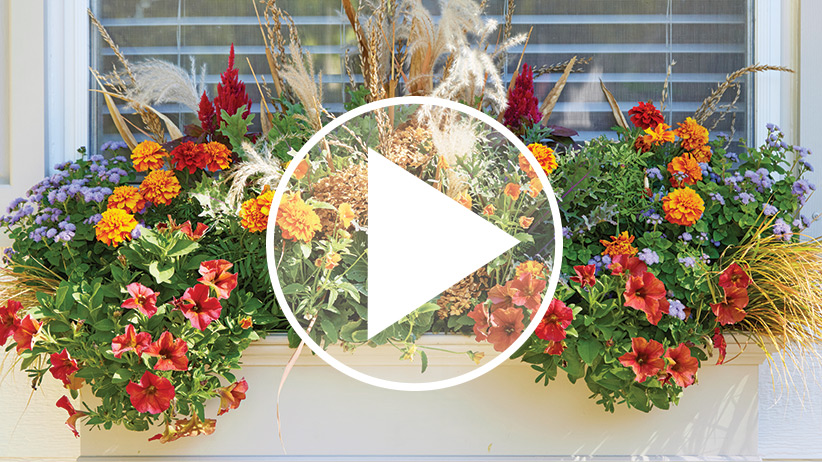
A colorful hayrack planting
If you’ve always dreamed of a beautiful hayrack planter dripping with flowers under your window but weren’t sure how to execute it, Tera Boaeuf of Tera’s Gardens in Colorado can help. She has the secrets to planting and maintaining hayracks and is willing to share them with us!
How to design a hayrack planter
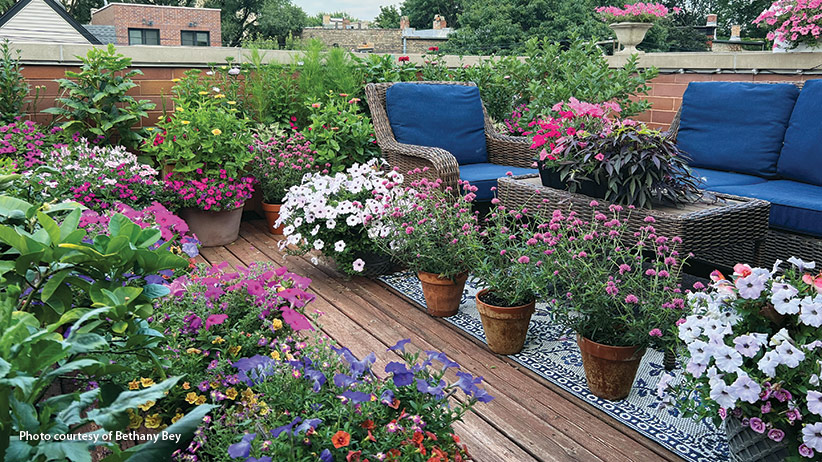
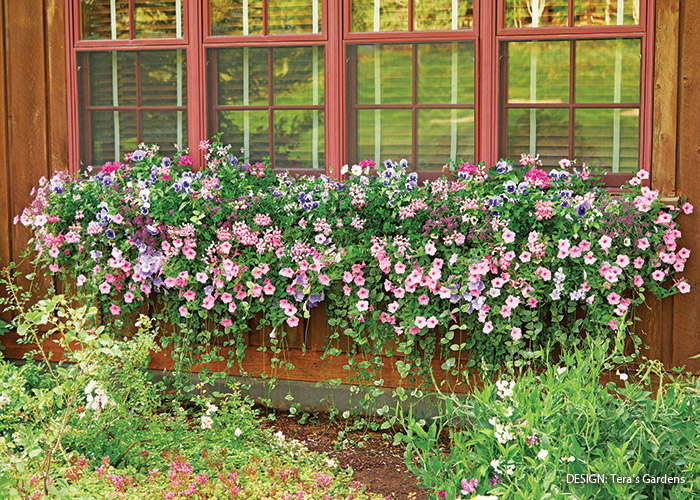
Tera uses the same principles for hayracks that she uses in other container designs: Position trailing plants at the front to billow over the edge, place tall plants in the back row, and bridge the gap with smaller upright filler plants. Of course, your color choices are really all about personal preference, but she tries to match color temperature, meaning she wouldn’t place a red-orange geranium (Pelargonium hybrid) in the mix of cool pink geraniums, petunias (Petunia hybrid) and blue pansies (Viola xwittrockiana) in the planter above, but she would include a fuchsia-red one, for example.
The more plants, the better
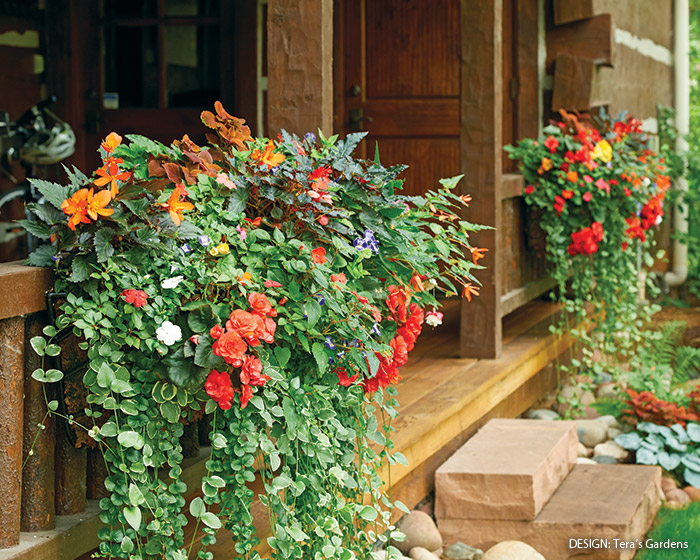
To get the full look you see here, you’ll need a lot of plants. Each of the two 55-inch planters above holds about 50 plants. For instant gratification, start with 4-inch pots of some of the showpiece plants, such as the trailing petunias and geraniums. Fill in around them with more economical flats of vinca and sweet alyssum.
You Might Also Like:
Watch Our Talk & Tour Video with Tera Boaeuf
Hanging Basket Hacks
Colorful Windowbox Plantings
Containers Made Easy! Garden Book
Practical considerations for hayrack planters
Any time you install a windowbox against a flat surface like siding, it’s a good idea to mount it with spacers to prevent moisture from building up between the planter and the siding. A 1 ½-inch spacer block at the top and bottom of the hayrack should be enough to allow air to circulate and prevent rot.
You can find hayracks in many sizes, but as with any container, the bigger it is, the heavier it is. Add soil and plants and it’ll be much tougher to mount. So it’s best to mount the empty hayrack and plant it up right where it hangs.
Sometimes it’s hard to get watering just right
Tera tells people that if leaves look dull, they may need water, but if they’re yellowing, they’re probably getting too much water. This is more common than you might expect. Pick up a moisture meter from your garden center to help gauge your watering habits.
Well-fed flowers bloom better
Whether you fertilize seems to be more important than what you use, so whatever you choose, just follow the package instructions for amount and frequency.
3 Steps to the perfect hayrack planter
The biggest secret to Tera’s hayrack planter success is in the planting method. If you’ve ever wondered how to keep the soil in or how to get plants to trail the way you want them to, here are Tera’s steps for planting the perfect hayrack. Read through the steps here and watch the video above to see Tera in action. Her favorite hayrack planters and liners are from Kinsman Company.
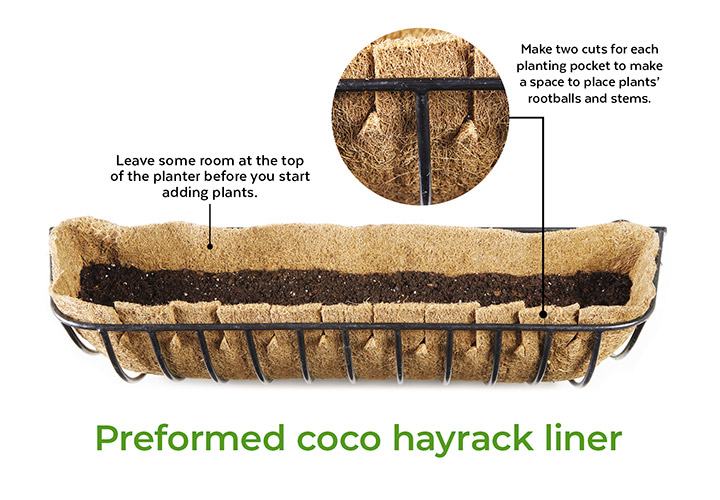
Step 1: Line the hayrack planter
Every hayrack planter needs some sort of lining to hold the soil. The easiest to use is a preformed coco liner that fits your rack perfectly. If you can’t find a preformed one, you can also buy coco fiber in sheets and form your own. If you go this route, leave the liner a few inches taller than the hayrack as you form it. Once you have the liner set, fill it with potting mix, water it and let everything settle in for a day or two before you cut the top down to the correct height.
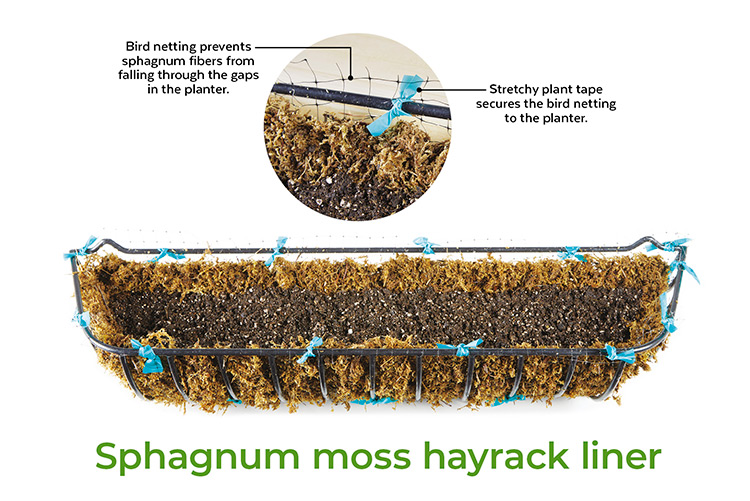
Create a hayrack liner with sphagnum moss
Tera sometimes lines her hayrack planters with sphagnum moss instead of coco fiber. This technique is a little more complicated: To keep the long-fiber sphagnum moss from falling through the hayrack’s frame, line it with bird netting, tying it on in several places with plant tape. Soak the sphagnum in a bucket of water, then grab a handful of the material, squeeze out the water, stretch the fibers out a bit and line the bottom of the planter and partway up the sides. Fill the lined portion with potting mix, then repeat, moving up the sides with more sphagnum and more potting mix, until the planter is fully lined and filled with mix.
Step 2: Prepare the front of the hayrack liner
The goal when planting hayracks is for the planter itself to nearly disappear. Tera says that when you grow trailing plants in the top of the hayrack, they’ll eventually spill over the front edge, but to create a fuller look right way, she also likes to plant right into the front surface of the liner.
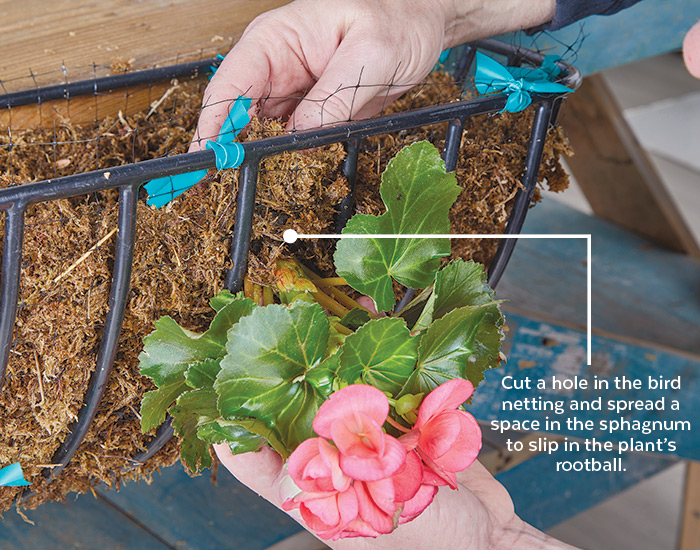
Create planting gaps in the hayrack liner
If you’re using a coco liner, use kitchen shears to cut a slit one shear length long at the top of every gap in the hayrack. Then toward the bottom of that cut, make another shorter angled cut to make a notch for each plant’s stem. In sphagnum, snip a hole in the bird netting and spread a space in the sphagnum to insert the plant’s rootball. Some of the best plants for this front-row treatment include trailing petunias, ivy geraniums, impatiens, (Impatiens hybrids) tuberous begonias (Begonia hybrids), and vining foliage plants, such as vinca (Vinca minor) and creeping Jenny (Lysimachia nummularia).
Hayrack Planter Supplies:
Hayrack Planter and Liner sets from Kinsman Company
Coco Fiber Sheets
Bird Netting
Sphagnum Moss
Plant Tape
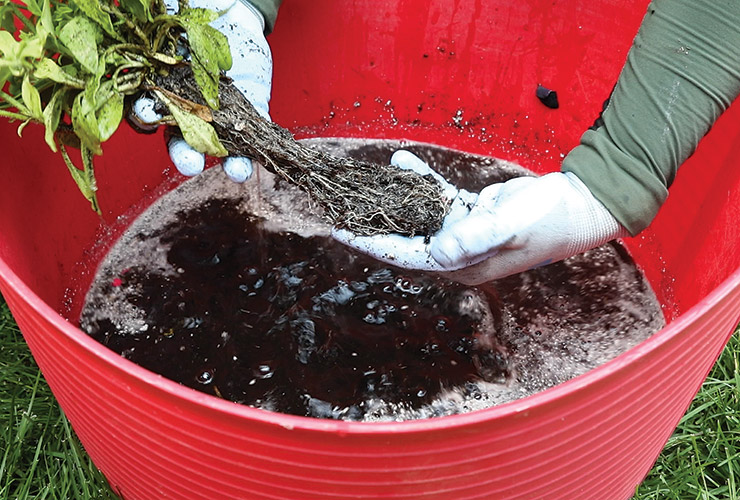
Step 3: Rinse roots & plant in hayrack planter
Tera likes to wash the potting mix from the roots of plants she tucks into the front of the hayrack. This does two things: Makes it easier to fit the plants into the small slits or holes, and also allows her to pack more of them into a small space.
Planting tips
- If you’re using 4-inch pots, slip in one plant per slit or hole.
- If you’re using multi-packs, you can squeeze a couple of plants into each hole.
- Once the front has been planted, then you can add the plants to the middle and back of the hayrack. There’s no need to wash the potting mix from those roots (unless it helps you pack more plants in).
- When all the plants are in place, fill in around them with potting mix and water thoroughly to help settle the mix around the roots.
Although planting can take a bit of time, this method is one Tera swears by, and it’ll get you swoonworthy results!