Why start your own seeds?
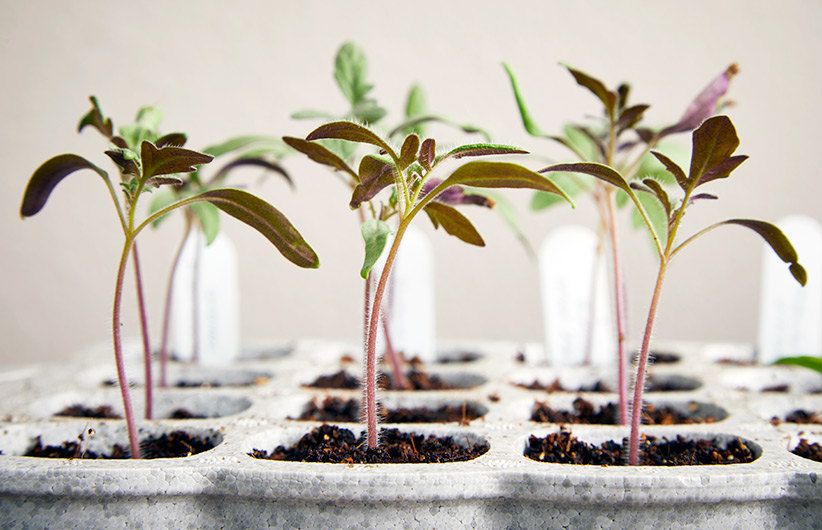
Starting seeds indoors is an amazing process: You take a small (sometimes tiny), hard, dried-out bit of plant, place it in some soil and in a few days or weeks a slender stem unfurls filled with all the potential and hope of spring. With a little water and plant food you’ll eventually have a plant that can make your flower border or vegetable garden richer.
When you start your own seeds you can grow whatever you want!
Though your local garden centers likely offer a good selection of plants, starting seeds really expands your palette. When you buy order your own seeds you can grow a rainbow of tomatoes, hard-to-find heirlooms or varieties that are harder for growers to mass produce. In addition, you can save money by starting a whole flat of annuals or perennials for a mass planting — what better way to give birds and butterflies an easy meal than with a big patch of coneflowers?
What you will need to start seeds indoors
Though the things you’ll need will vary somewhat, it basically comes down to gathering containers, a light and seed-starting mix. Keep reading and you’ll find two different setups — one budget-friendly and one convenience-oriented. They both have just what your seeds need to grow and thrive.
The budget-friendly seed-starting system uses things from around the house or that are inexpensive to buy — it’s great when you’re looking to save some money or just start a few seeds. The other has a lot of conveniences that make your job easier. Whatever supplies you start with, the process will be the same. Let’s take a close look at each idea, and then keep scrolling to learn five keys to starting seeds indoors well.
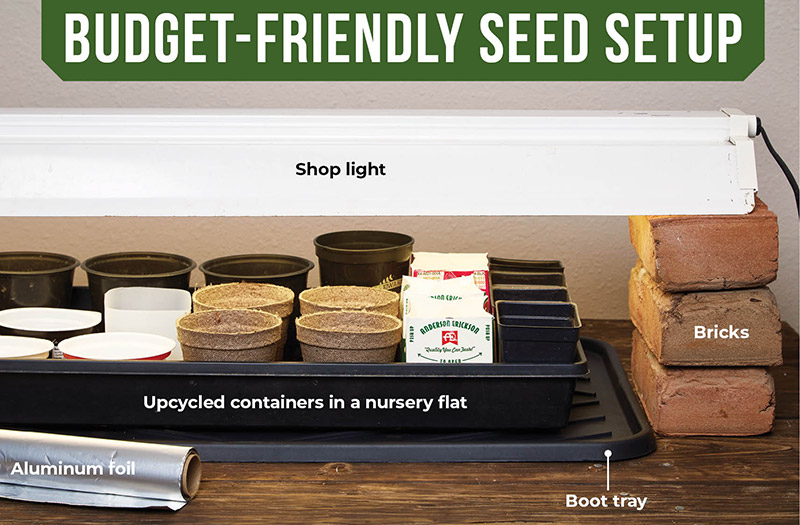
Budget-friendly seed-starting setup
- Shop lights Economical, but you’ll need to add one warm and one cool fluorescent tube for the right light spectrum.
- Upcycled containers They can be practically anything you have around the house. Clean them out and poke holes in the bottom for drainage before using.
- Nursery flat Reuse one you have or upcycle something to help keep containers stable.
- Seed starting cells Seed starting cells are another affordable option that can be found online or at big box home stores if you don't want to go with upcycled containers.
- Bricks A stack on each end helps raise the light once seedlings start growing.
- Boot tray Use it to protect the table surface if your flat has drainage holes.
- Aluminum foil Tape pieces on the light fixture to reflect more light.
You Might Also Like:
When To Start Seeds Indoors
7 Ways to Upcycle Plastic Bottles in the Garden
Seed Starting Hacks from Our Readers
How to Sow Seeds Outdoors
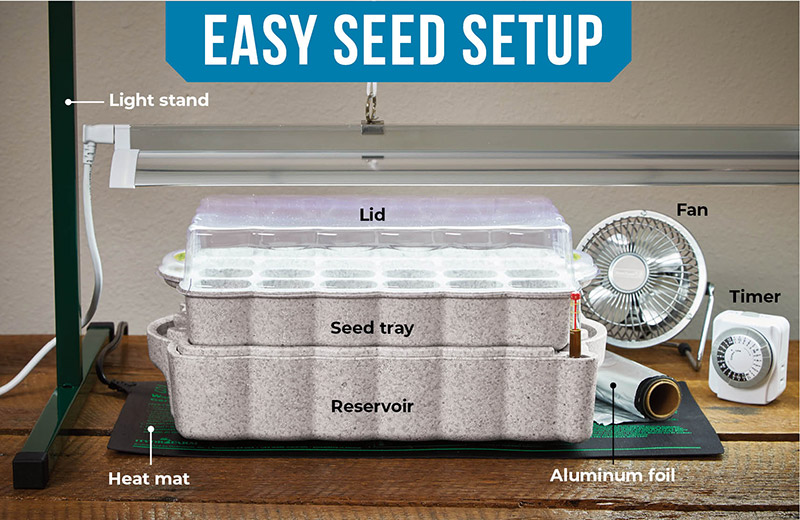
Easy & convenient seed starting setup
- Light stand This one’s 4 ft. long to fit several flats. It comes with a full-spectrum light and a pulley system for lifting the light up and down. Available at local garden centers.
- Self-watering seed starting kit This setup you see above has a wicking mat, water reservoir and lid to keep moisture consistent.
- Heat mat Thin and waterproof; keeps seedlings warm while germinating.
- Timer Plug it in and you won’t have to turn the light on and off.
- Fan Helps keep air circulating to cut down on disease.
- Aluminum foil Reflects more light on plants.
Self-watering seed starter
You’ll pay a little more for the Self-Watering Seed Starter in the convenience setup above, but it will last for years. And it includes a wicking mat to keep the potting medium evenly moist. This can be a big help if you’re a forgetful waterer or tend to overwater. See how the different components fit together in the photo at left.
Sanitizing tip
It’s OK to reuse flats and containers but they need to be cleaned each year to avoid disease problems. Rinse off any remaining seed-starting mix, then soak the container in 10 parts water to 1 part bleach for about 15 minutes. Rinse again and let dry.
Five keys to starting seeds indoors
1. Seed-starting containers
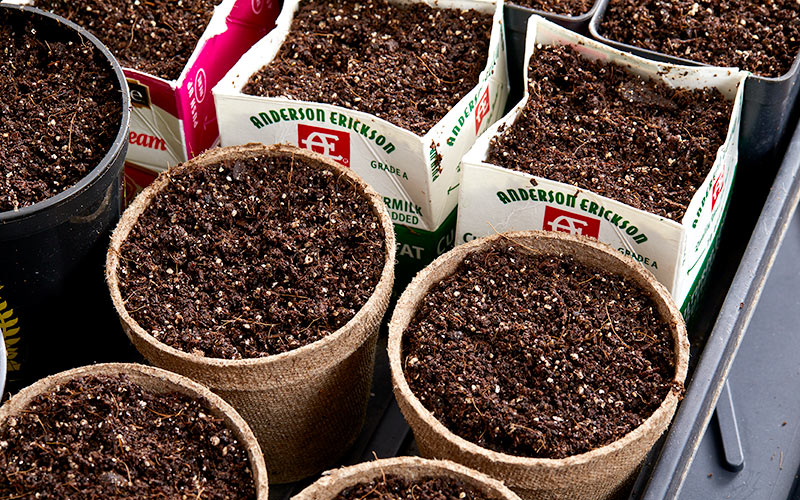
These can be upcycled items, such as milk cartons, peat pots, nursery pots or all of the above. Whatever you use, be sure to poke a few holes in the bottom so water can drain; otherwise seeds will rot.
Peat pots
Peat pots are a good choice for plants that don’t like their roots disturbed, such as sweet peas (Lathyrus odoratus) or delphiniums (Delphinium hybrid). When it’s time to plant outdoors, these pots can go right in the ground and they will decompose — just make sure that the lip of the pot is buried so it won’t wick moisture away from the growing plant.
Plastic seed cells
Plastic seed starting cells are another great and affordable option that can be used for several years, unlike peat pots that are only meant to last for one growing season. Just make sure to sanitize between each growing season.
Nursery flats
A nursery flat ensures the containers aren’t easily tipped over. The one above has drainage holes, so a boot tray protects the table surface. You can also buy sturdy growing trays without holes.
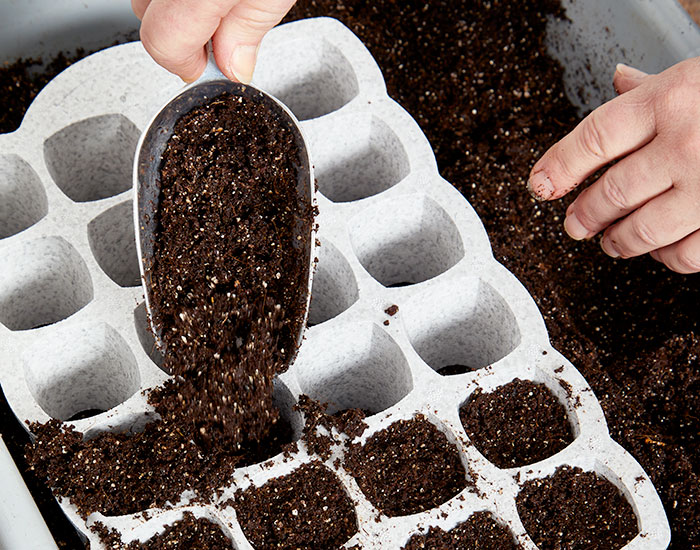
2. Seed-starting growing medium
You’ll need seed-starting mix for starting seeds indoors. It has the right combination of fast-draining materials — usually sphagnum peat moss or coir, vermiculite and perlite.
Or make your own by mixing equal parts of each. Commercial mixes often include micronutrients that help seeds get established. However, don’t use garden soil. It isn’t sterile and may harbor diseases. In addition, when it dries out, it gets so hard that seedlings may not be able to emerge.
Planting tip
Premoisten the mix before you plant so the seed has plenty of moisture right away. Watering after planting can wash seeds, especially tiny ones, to one side of the container or even over the edge.
3. Lights for starting seeds indoors
Most seeds germinate best in dark conditions so you must push them into the growing medium to the depth appropriate to that plant. Others need light to start growing. Scatter those on the surface of the mix and press in lightly.
Once sprouted, seedlings need 12 to 16 hours of light a day. That’s why lights (rather than a spot on a windowsill) work best. Position a light 3 to 6 in. above the tray to start. As plants grow, keep the light 3 to 6 in. from the top of the seedlings. Spring for the stand above and you’ll find it’s easier to raise and lower as needed. But a basic shop light fixture works, too. Attaching a piece of aluminum foil to the sides of the light fixture to hang down around the seed-starting flat can help reflect more light onto the containers for the seedlings. It also helps keep the air warmer above the new sprouts.
Lighting tip
A timer will save you the hassle of turning the light on and off yourself each day.
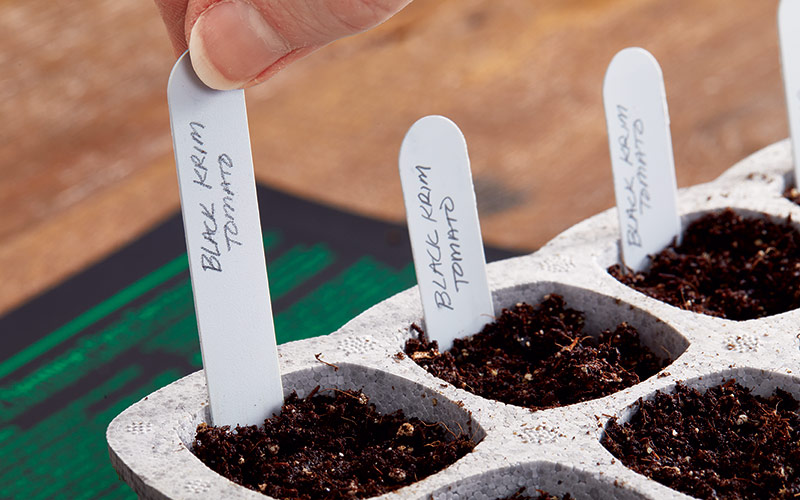
4. Plant labels
Don’t forget plant labels! Whether it’s an old miniblind cut into pieces or the purchased ones in the photo above, labels help you know if that tiny tomato is the indeterminate beefsteak you want to plant with plenty of room to grow in the garden or the dwarf cherry that goes in the pot on your deck.
What else? Not every tray comes with a lid, but if you can supply one, it creates the moist environment germinating seeds thrive in. Can’t find one? No problem — cover the flat loosely with plastic wrap. Leave it on until most of the seeds sprout, then take it off.
5. Germination temperature
Many seeds have an ideal temperature range they need to germinate. Tomatoes can take 50 days to sprout at 50 degrees F but only four days when the seed-starting mix is 85 degrees F. Find out what your plants need in our reference chart here.
Placing the containers on top of the refrigerator provides plenty of warmth. But sometimes it can get too warm, drying things out quickly. That’s where a heat mat comes in handy. It’s thin, water-proof and works a lot like a heating pad. Some even have a temperature gauge. Leave the heat mat on day and night until the seeds have sprouted, then remove it. Position a small fan nearby to provide air circulation that will discourage disease. With your setup in place, you’re ready for the seeds.
More Products You Might Like to Start Seeds Indoors
Seed Starting System
LED Grow Lights
Mini Greenhouse