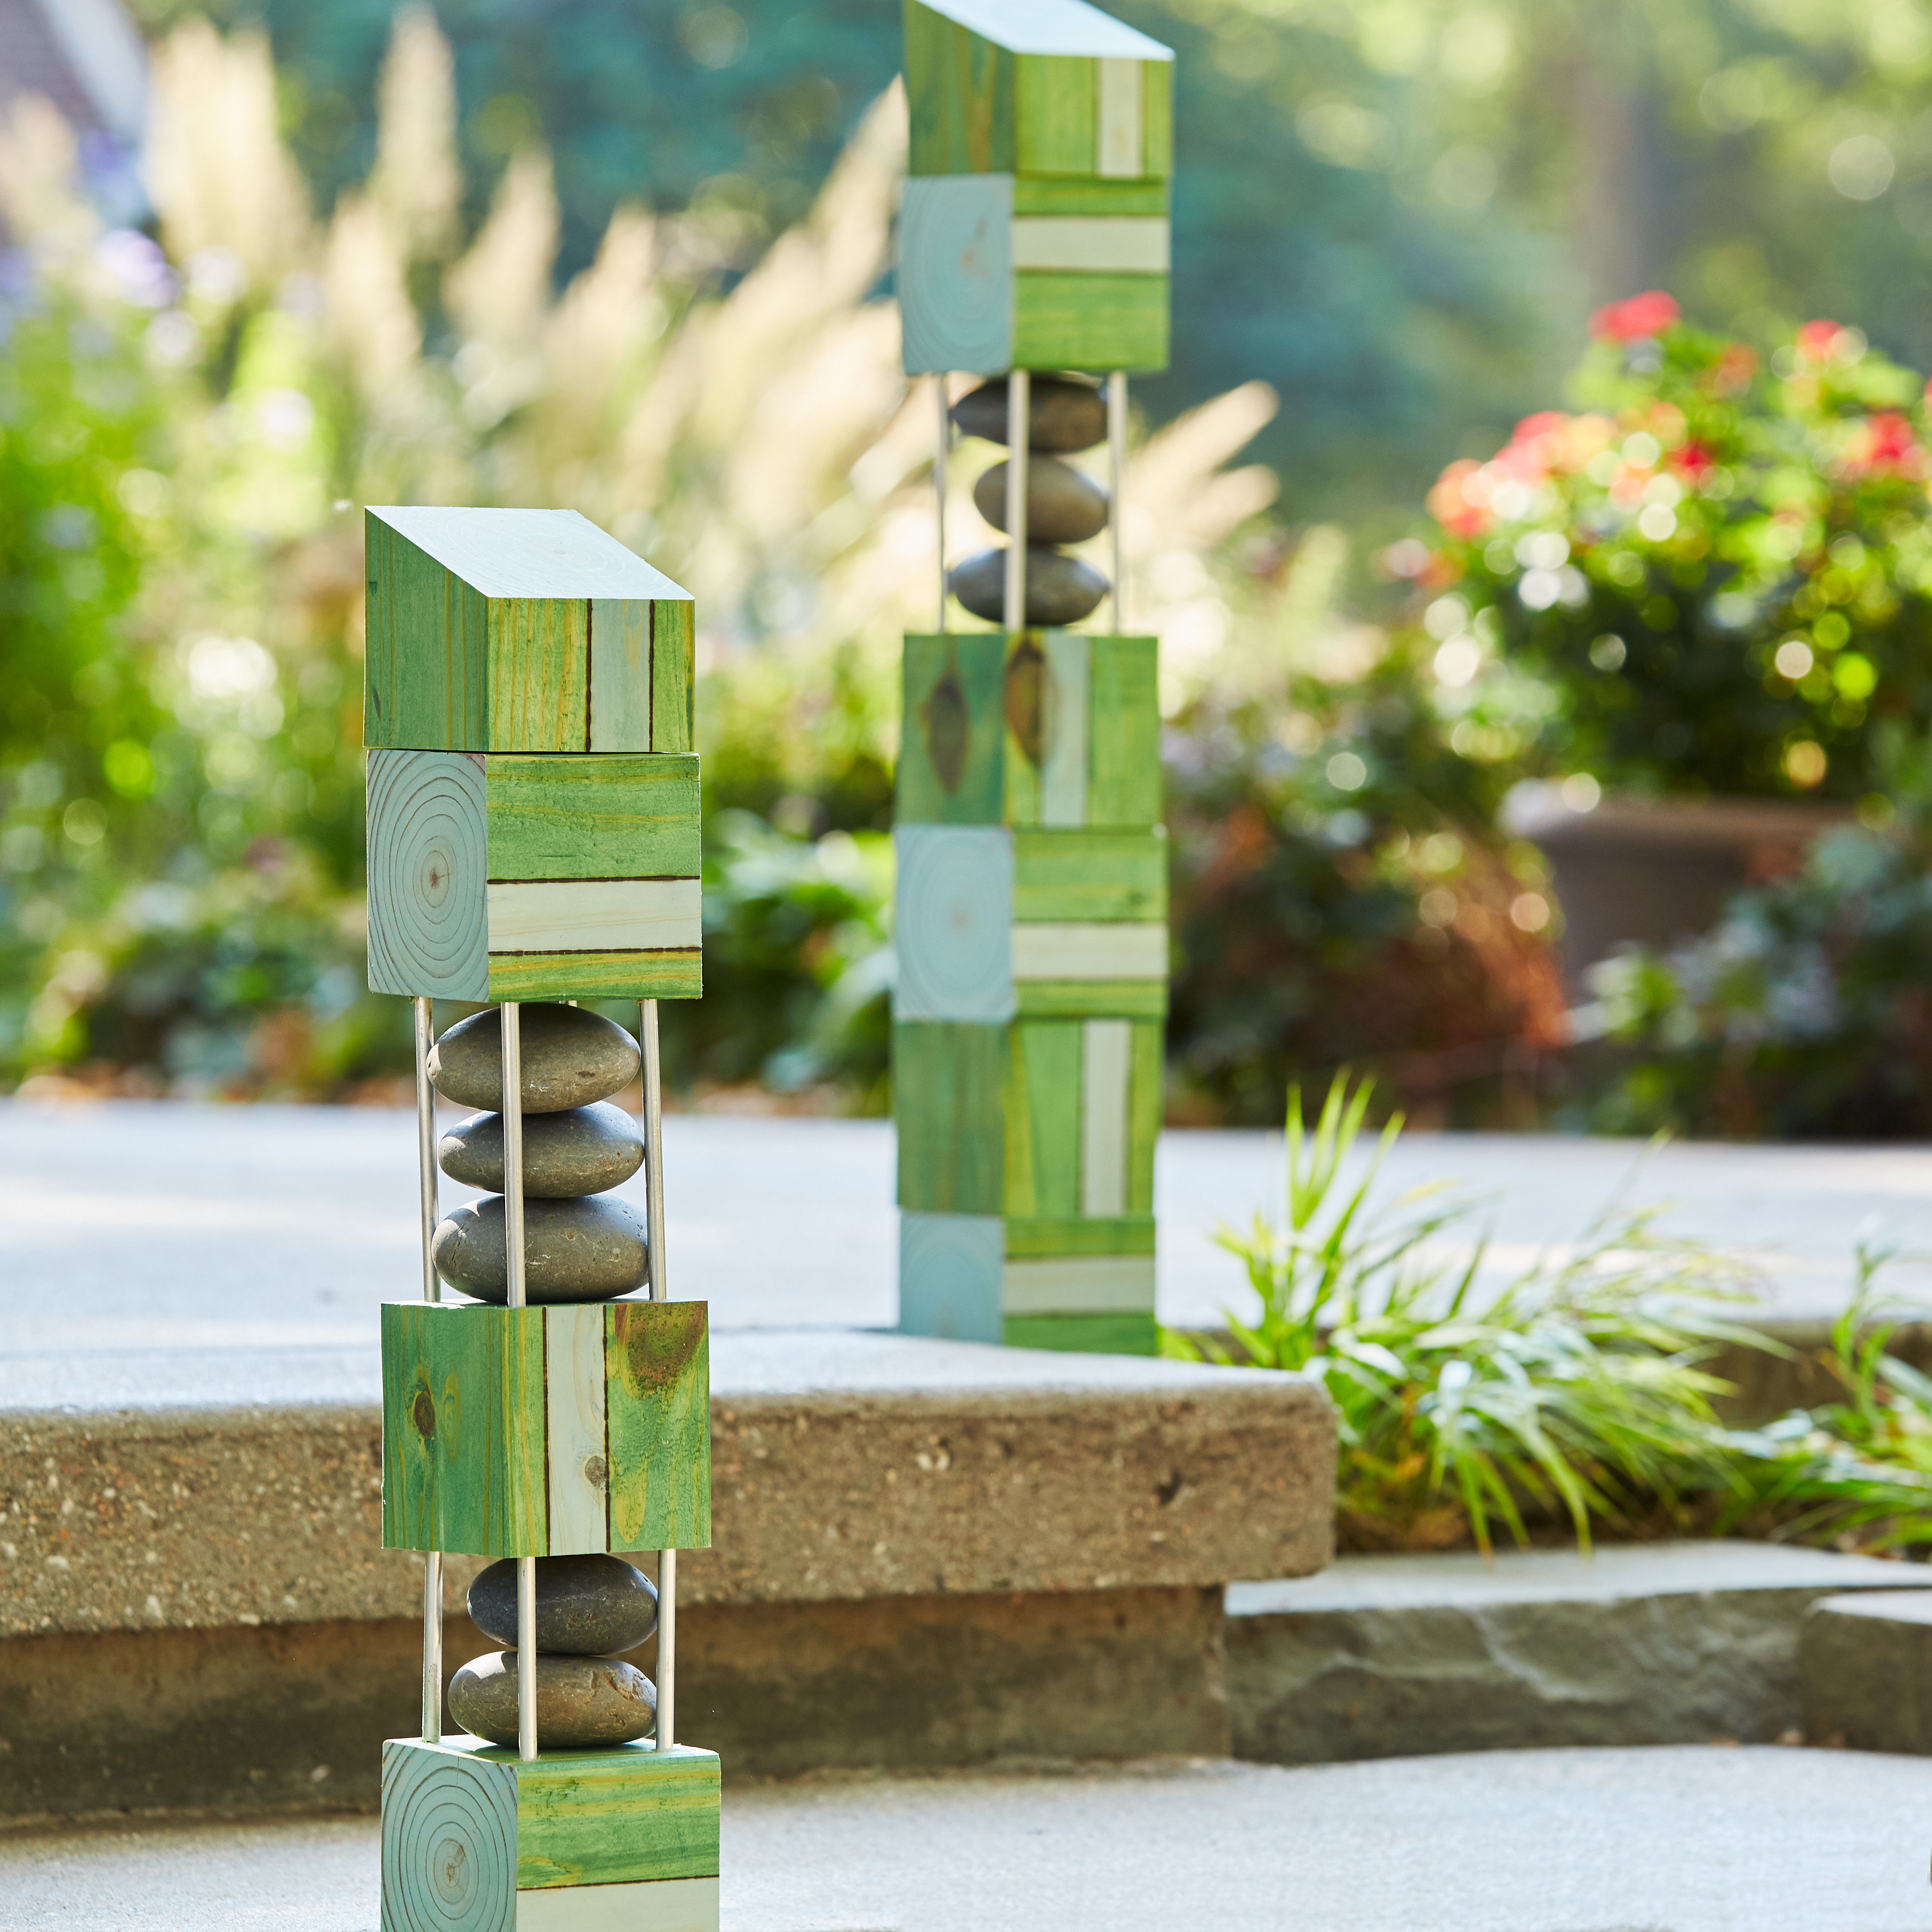
Build your own garden poles
These DIY garden poles have a simple design, can be made from supplies you may have on hand (or are inexpensive to buy), and are fun to personalize. The poles in this project are made from a series of stacked 3-1/2-inch square blocks and 3-inch diameter river rocks. I used a chop saw to cut a 4×4 wood post (which are actually 3-1/2 × 3-1/2 inches) into blocks. If you don’t have one, you can ask your lumber source to cut them for you. Watch the video above to see how to make these unique ornaments.
Materials
- 4×4 treated wood post (6-foot length)
- 1/2-inch rebar (two 1-foot lengths)
- 1/4-inch dowel pins (24)
- 1/4-inch aluminum rod (two 3-foot lengths)
- 1-inch painter’s tape
- Exterior wood glue or epoxy
- Semi-transparent stain and brush (I used Cabot® Evergreen and Chesapeake)
- Mexican river rock
- Drill with 1/4- and 1/2-inch drill bits, sandpaper (80-120 grit), metal ruler, chop saw, wood-burning tool, rubber mallet, 1/4-inch dowel centers, hacksaw
Decide on the garden pole design
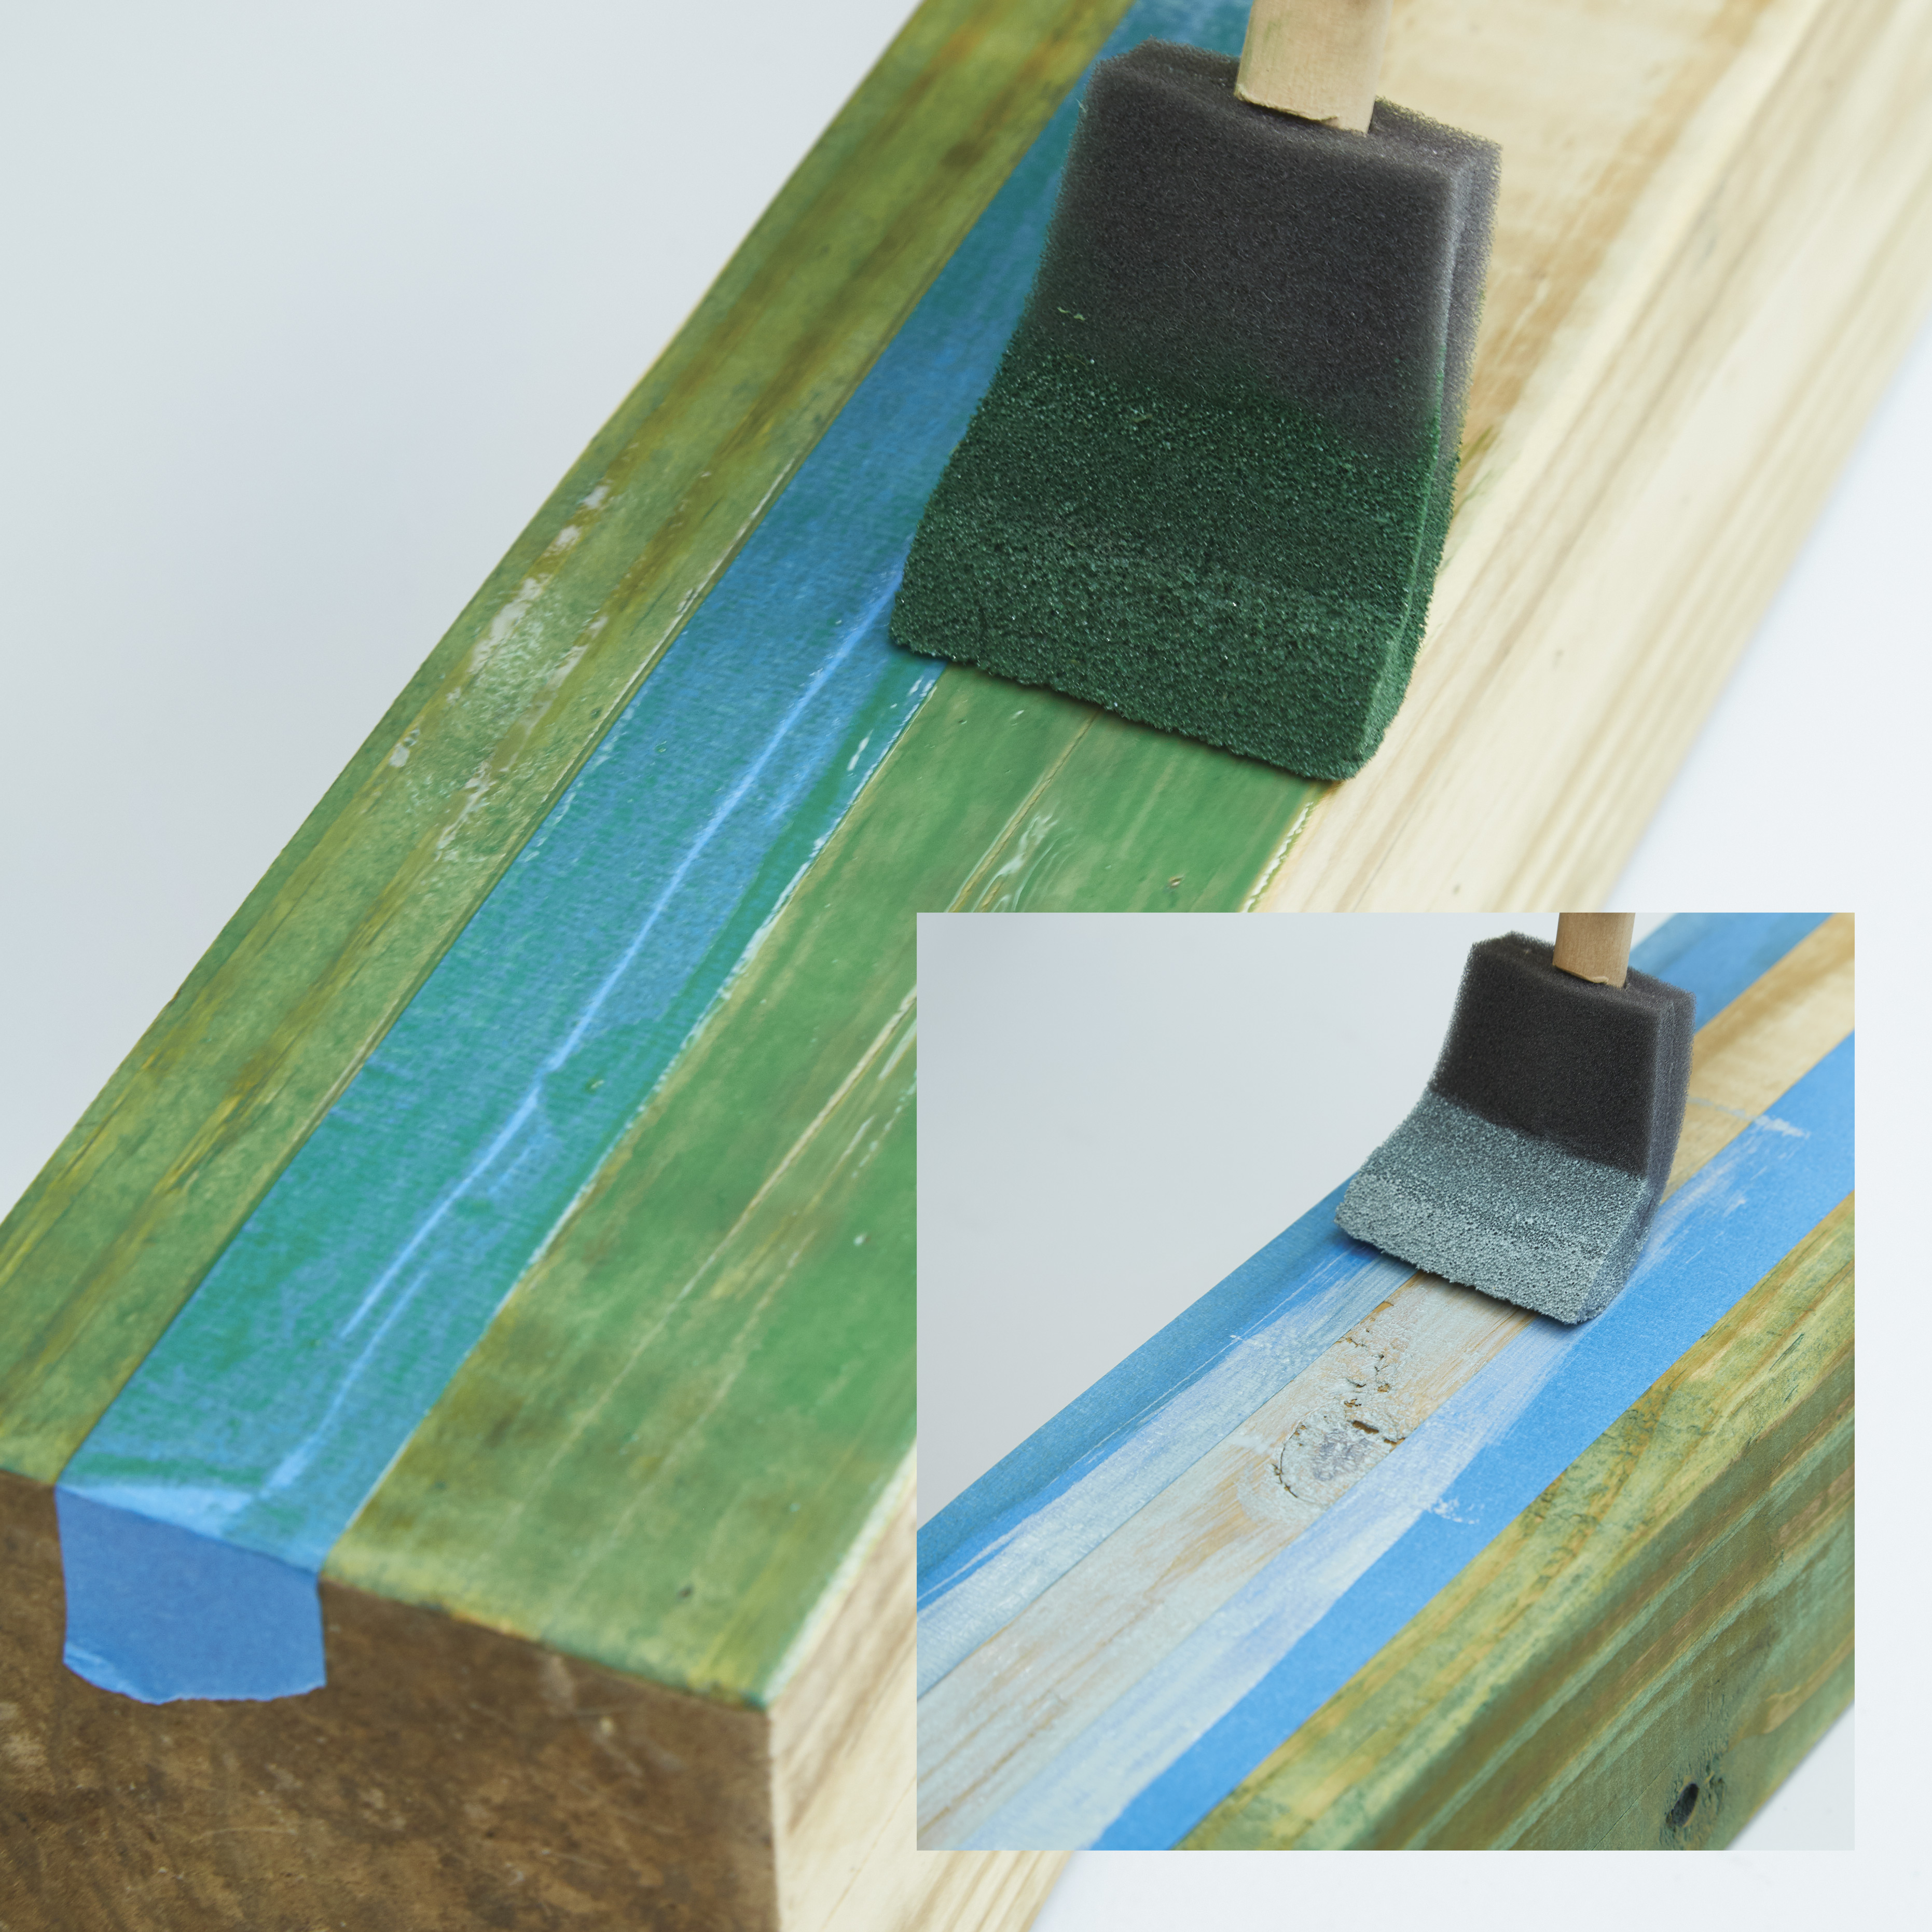
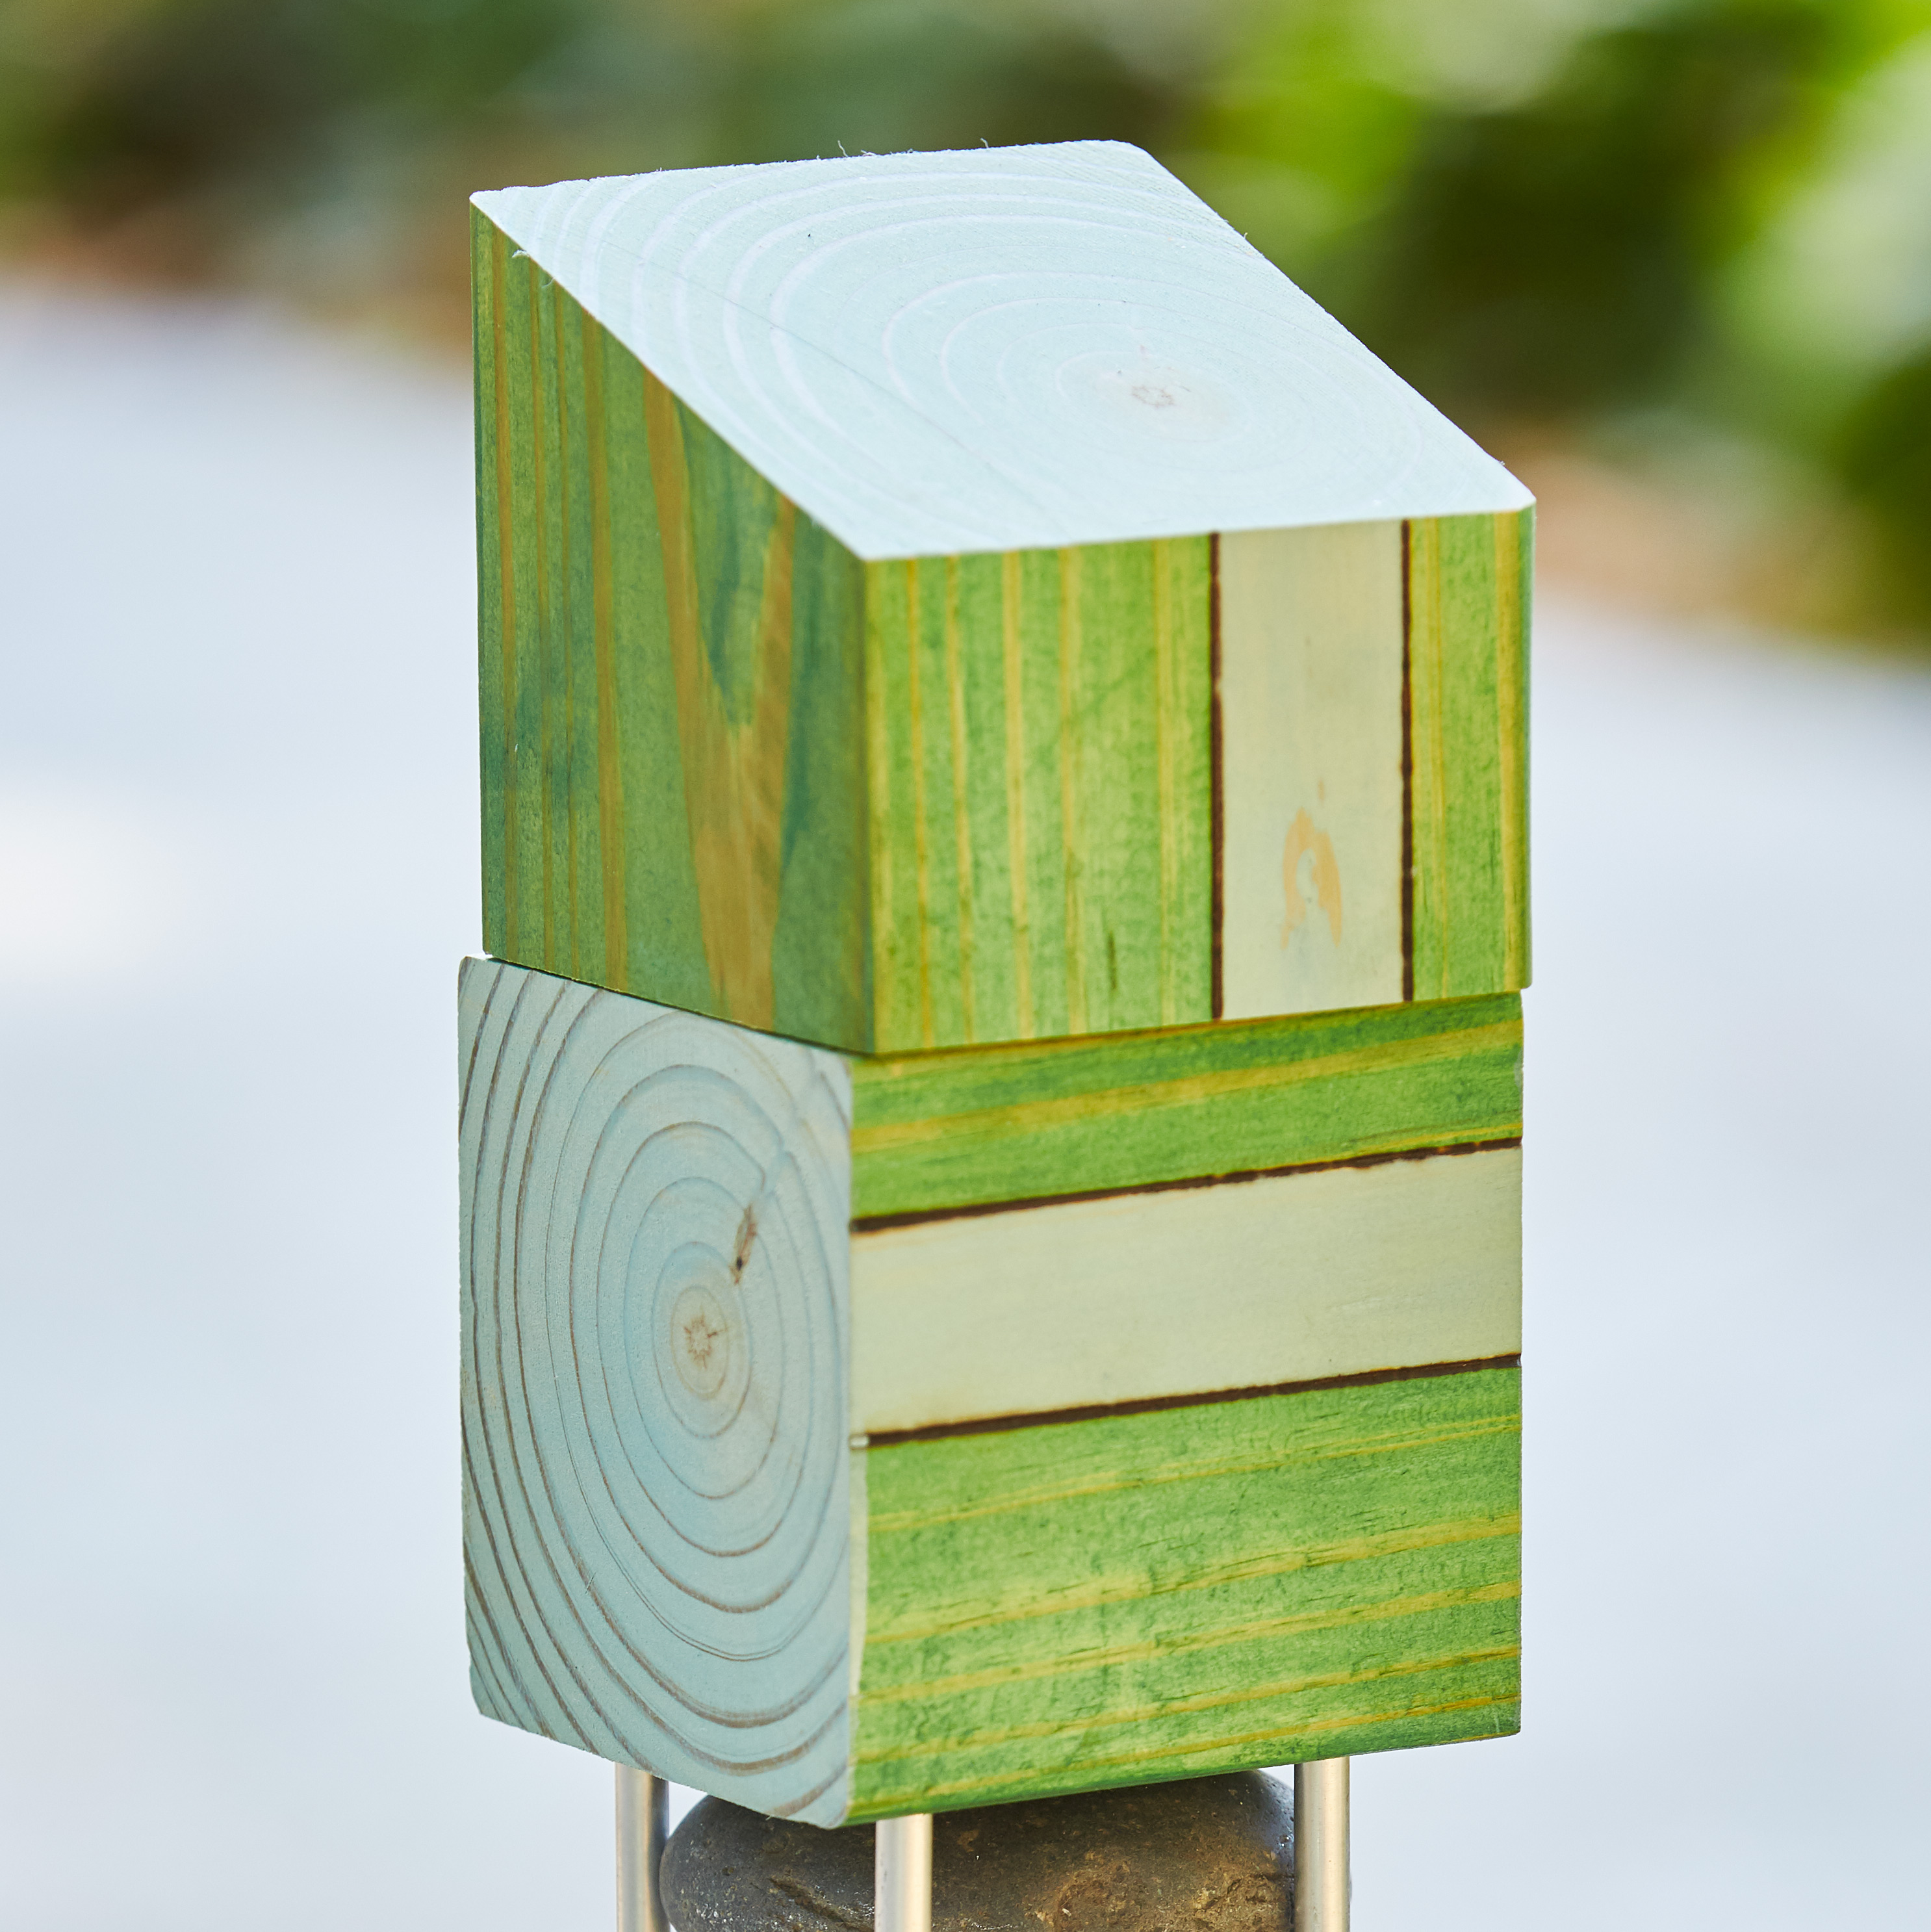
You can create whatever design you want on the blocks (or leave them plain — wood grain can be beautiful, too!). For efficiency, I did this process first, then cut my 6-foot-long wood posts into blocks, but you could decorate each block individually. I’ll show you how I decorated my blocks in “Block Decor” below. Once the blocks are cut, stack them in different combinations until you find a design that appeals to your taste.
Block Decor
Prep surfaces by lightly sanding with 80-120 grit sandpaper. To get these stripes, I ran a strip of painter’s tape along opposite sides of the post, applied the green semi-transparent stain on all four sides and let it dry. Then I peeled the tape off, masked the edges of the unstained stripes and stained the stripes light blue.
Get creative
I chose to emphasize the stripes with a wood-burned line on each side using its groove tip. You could also use a black or dark brown paint marker to achieve a similar look.
Prestaining saved me time and after cutting the lumber into the blocks, it was easy to play with the arrangement and see the final pattern appear.
Once the blocks were cut, I stained the exposed sides light blue.
Start constructing at the bottom
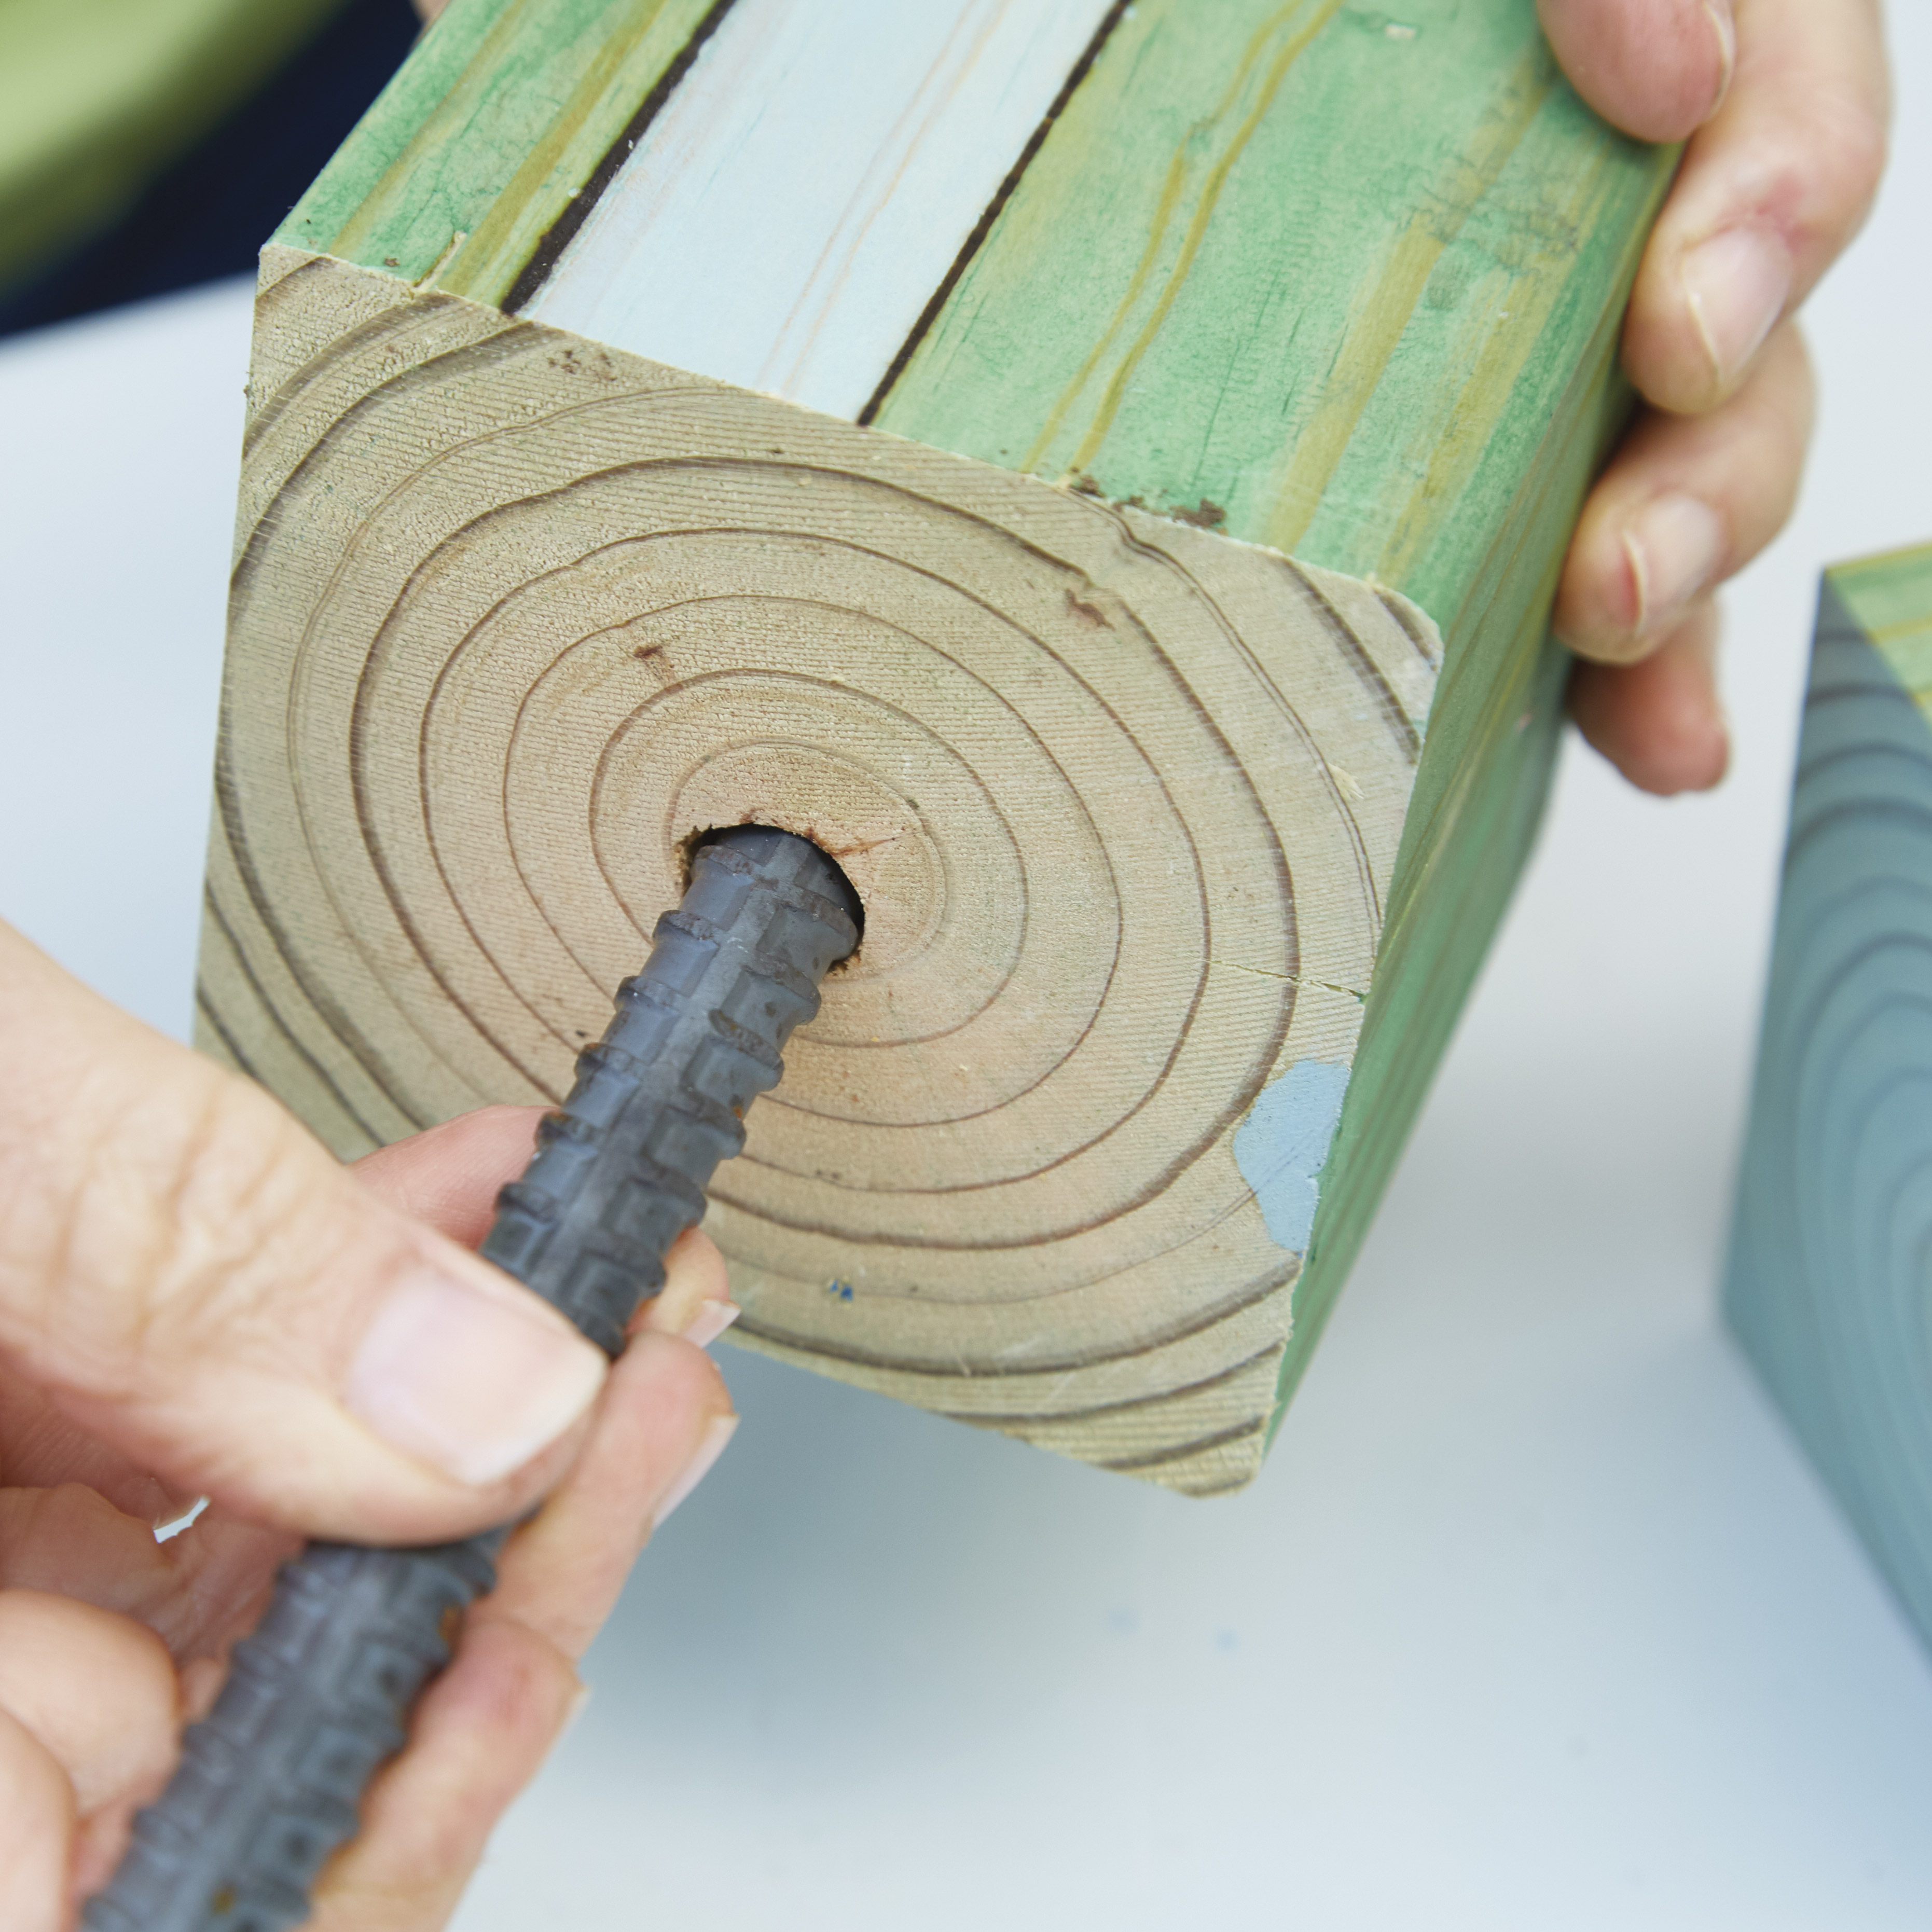
These poles stand around 32 inches tall, each using seven blocks along with one or two stacks of river rocks. To start assembling, drill a 2-inch-deep hole with a 1/2-inch drill bit in the bottom center of the base block. Insert a 12-inch length of rebar in the hole as in the photo above. This will allow you to leave the remaining 10 inches of rebar to push into the ground and secure the garden pole in place.
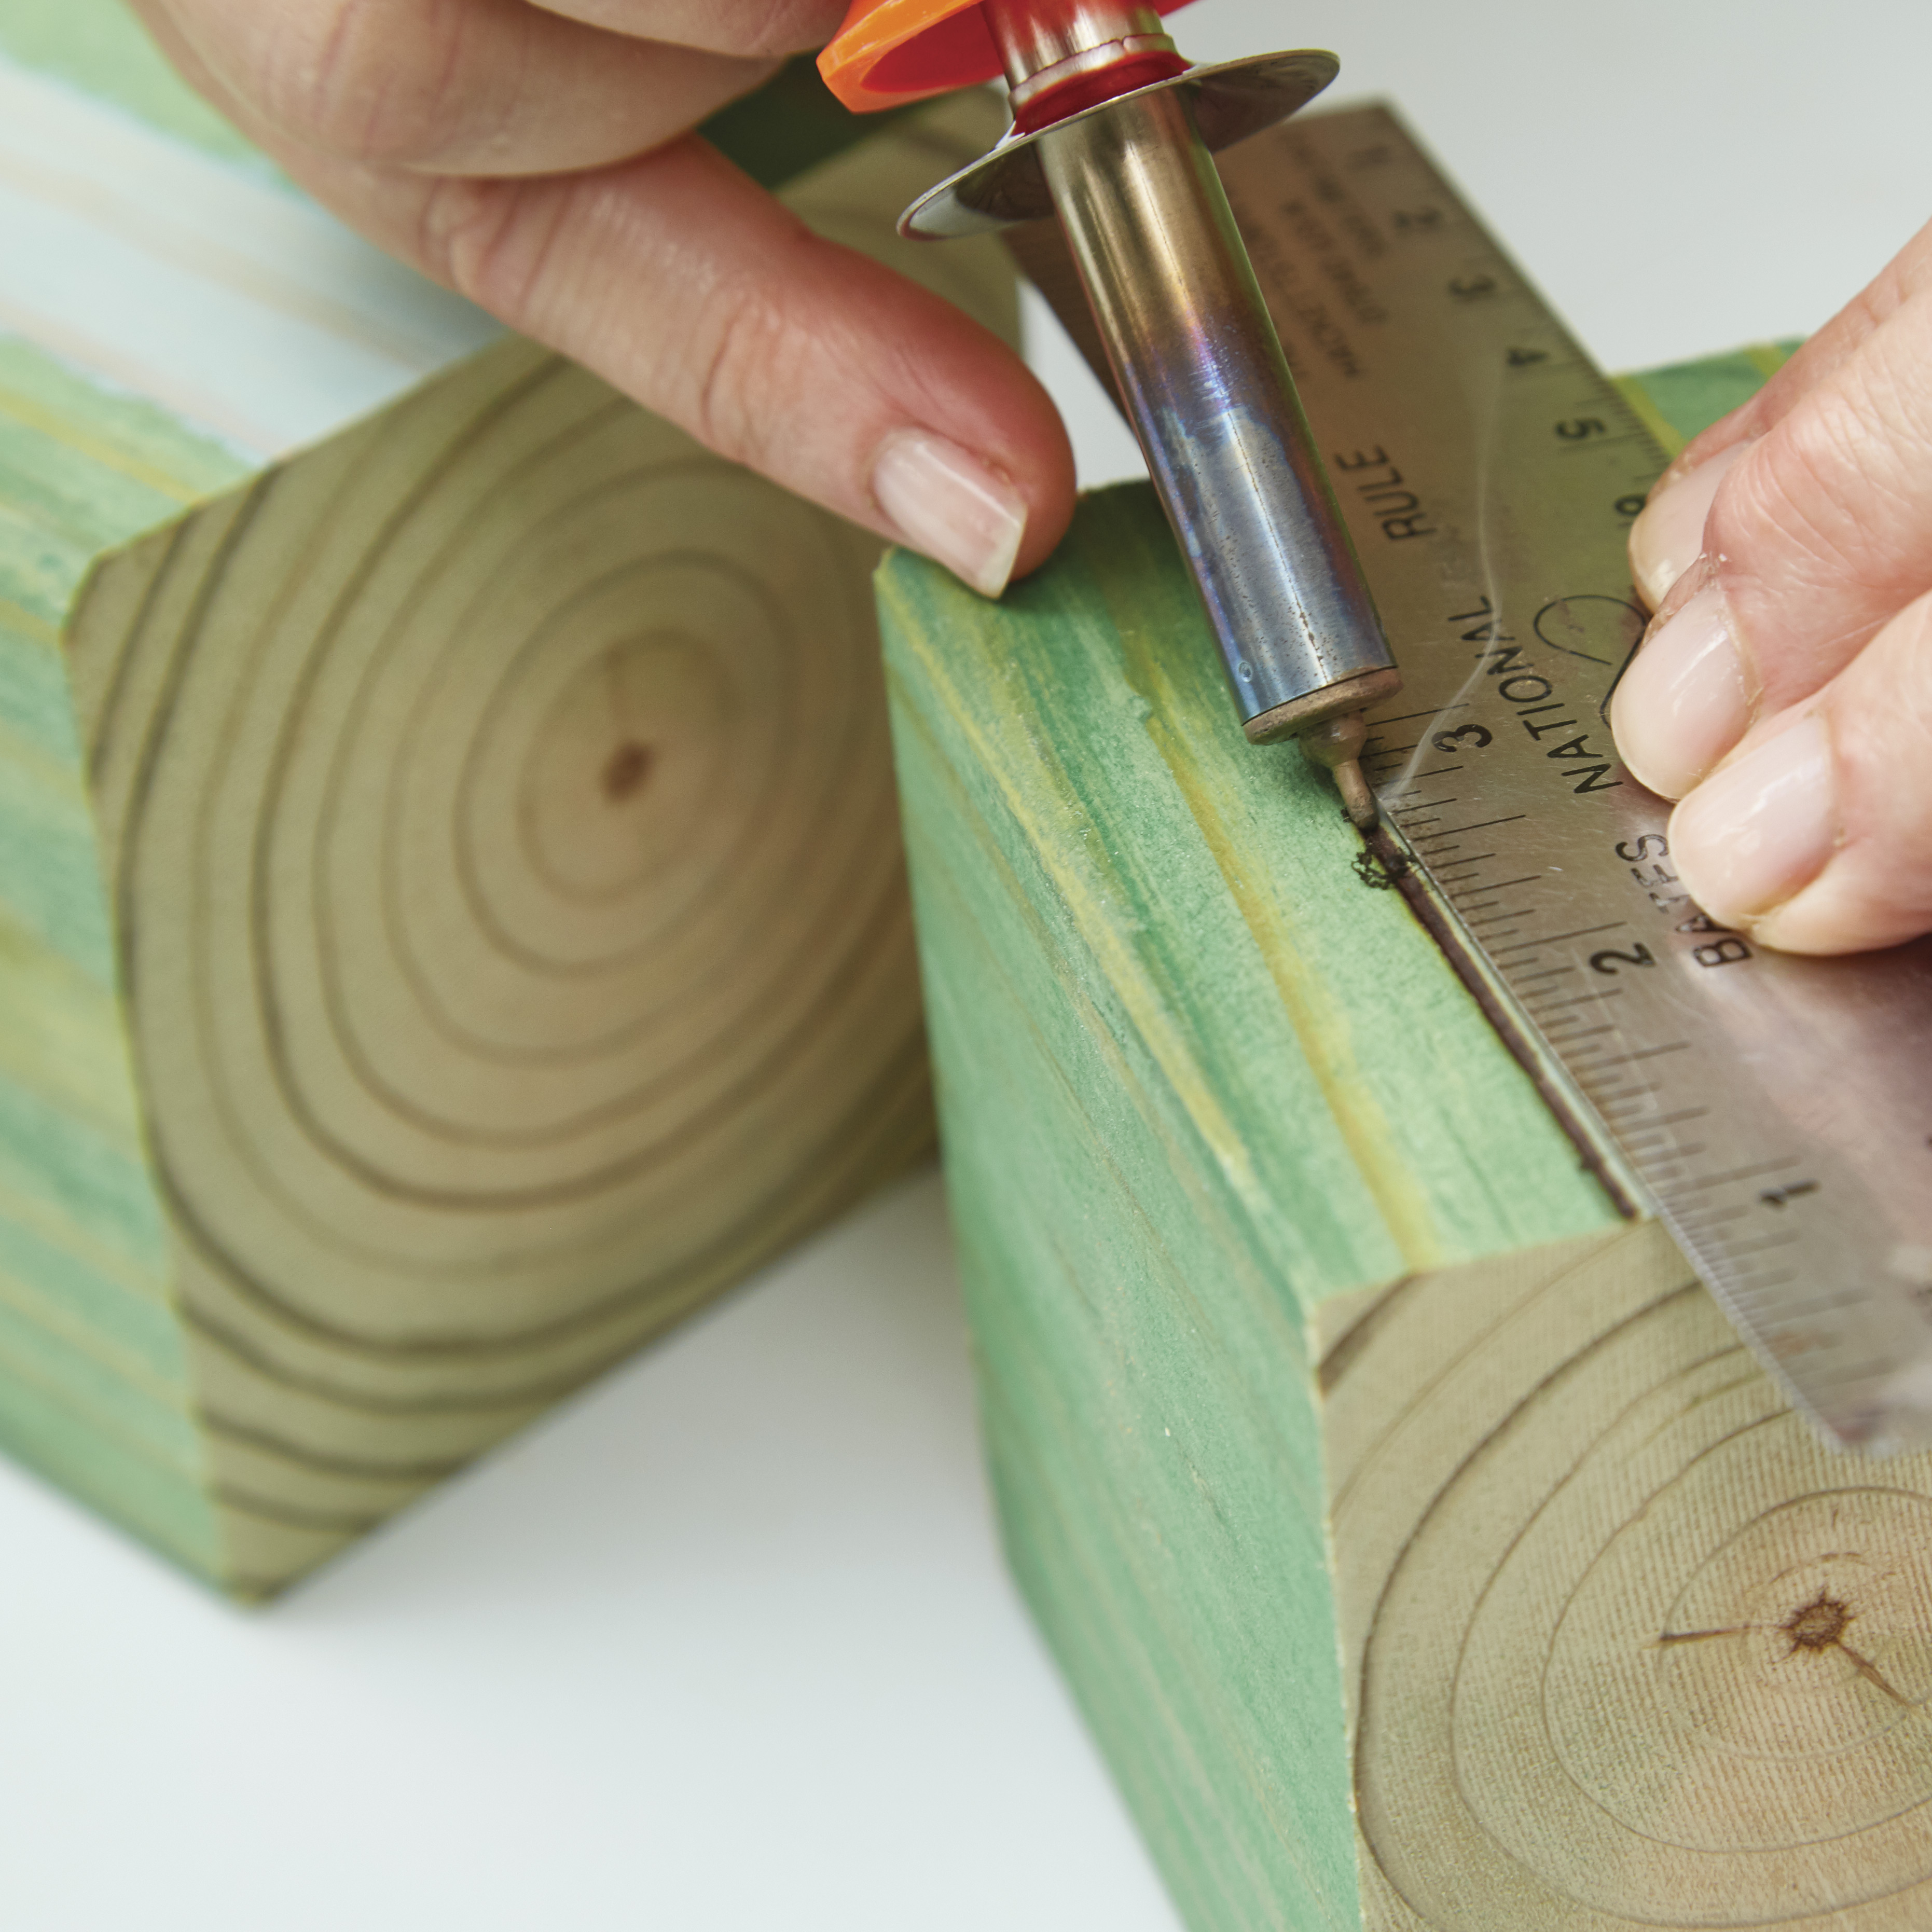
Connect the blocks
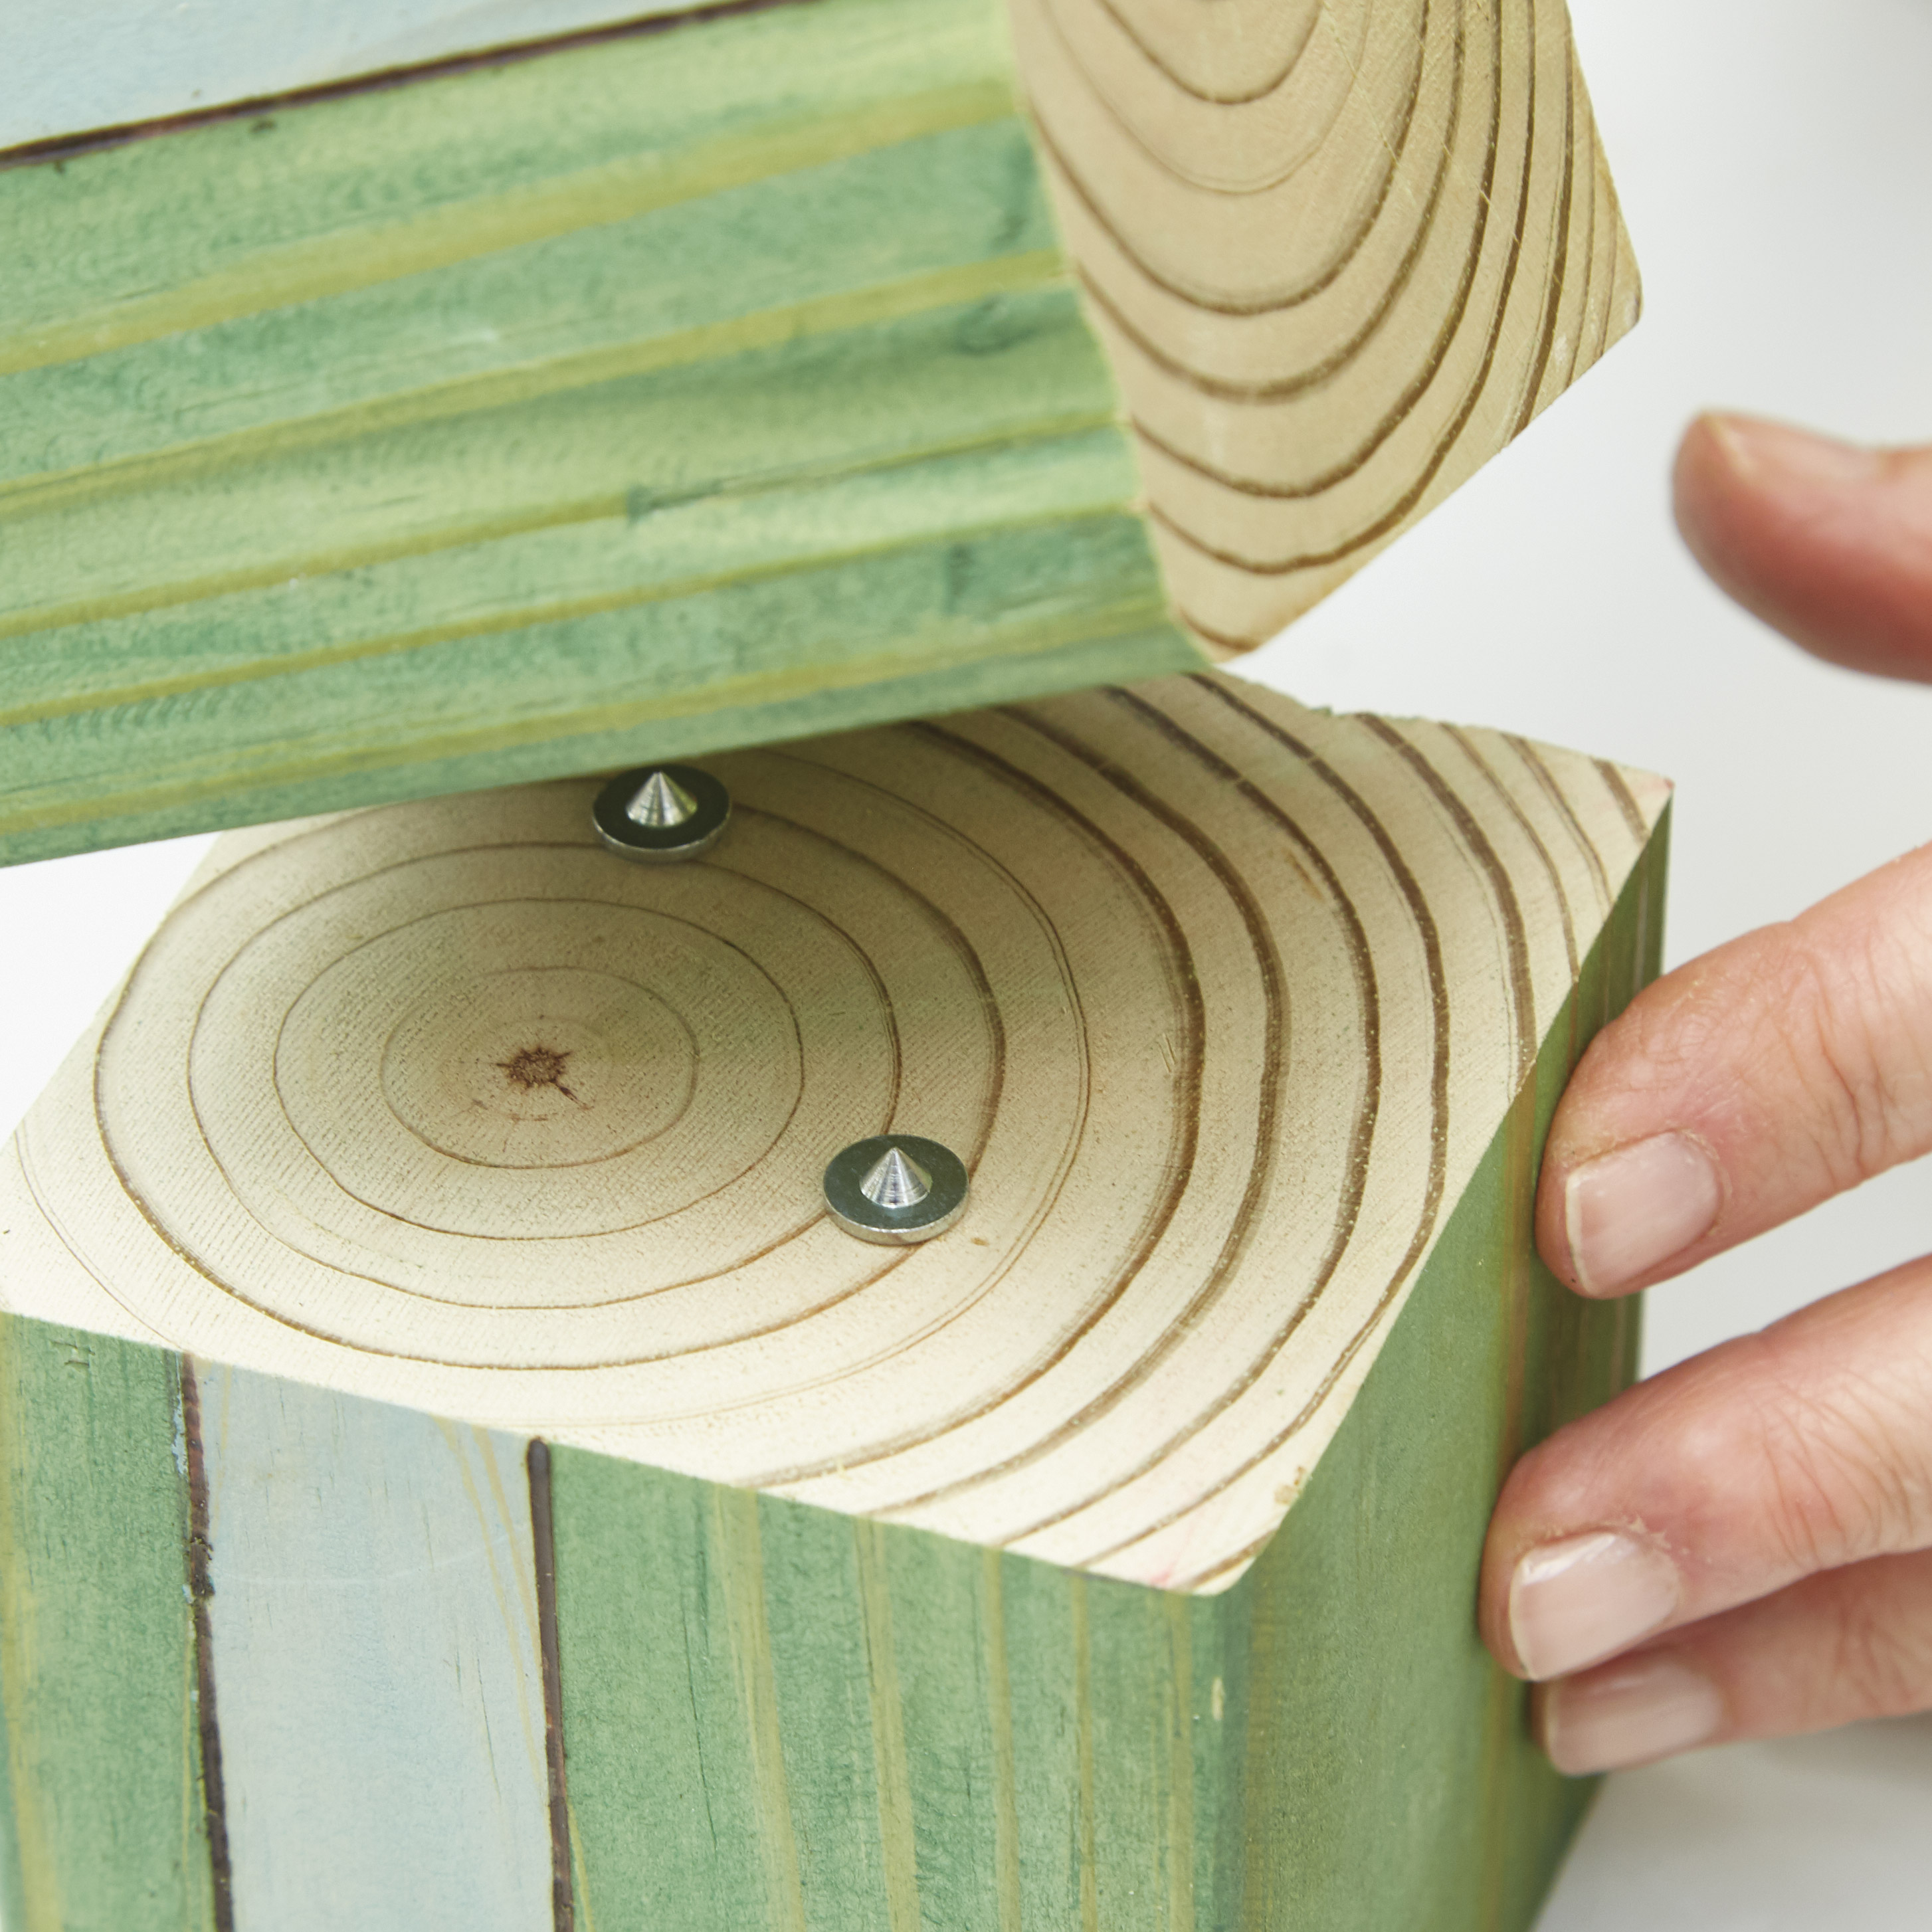
For a more stable garden pole, I connected my blocks with dowel pins. Drill two 1/2-inch-deep holes in two corners 1-1/4 inches in from the edge on the top of the base block with a 1/4-inch drill bit. The photo above shows how to use dowel centers to transfer the location of one set of dowel holes to the corresponding place in the block above it. Repeat this on each pair of connecting blocks and lock them together with the dowel pins (a little bit of exterior wood glue or epoxy will make it even stronger).
Add river rocks
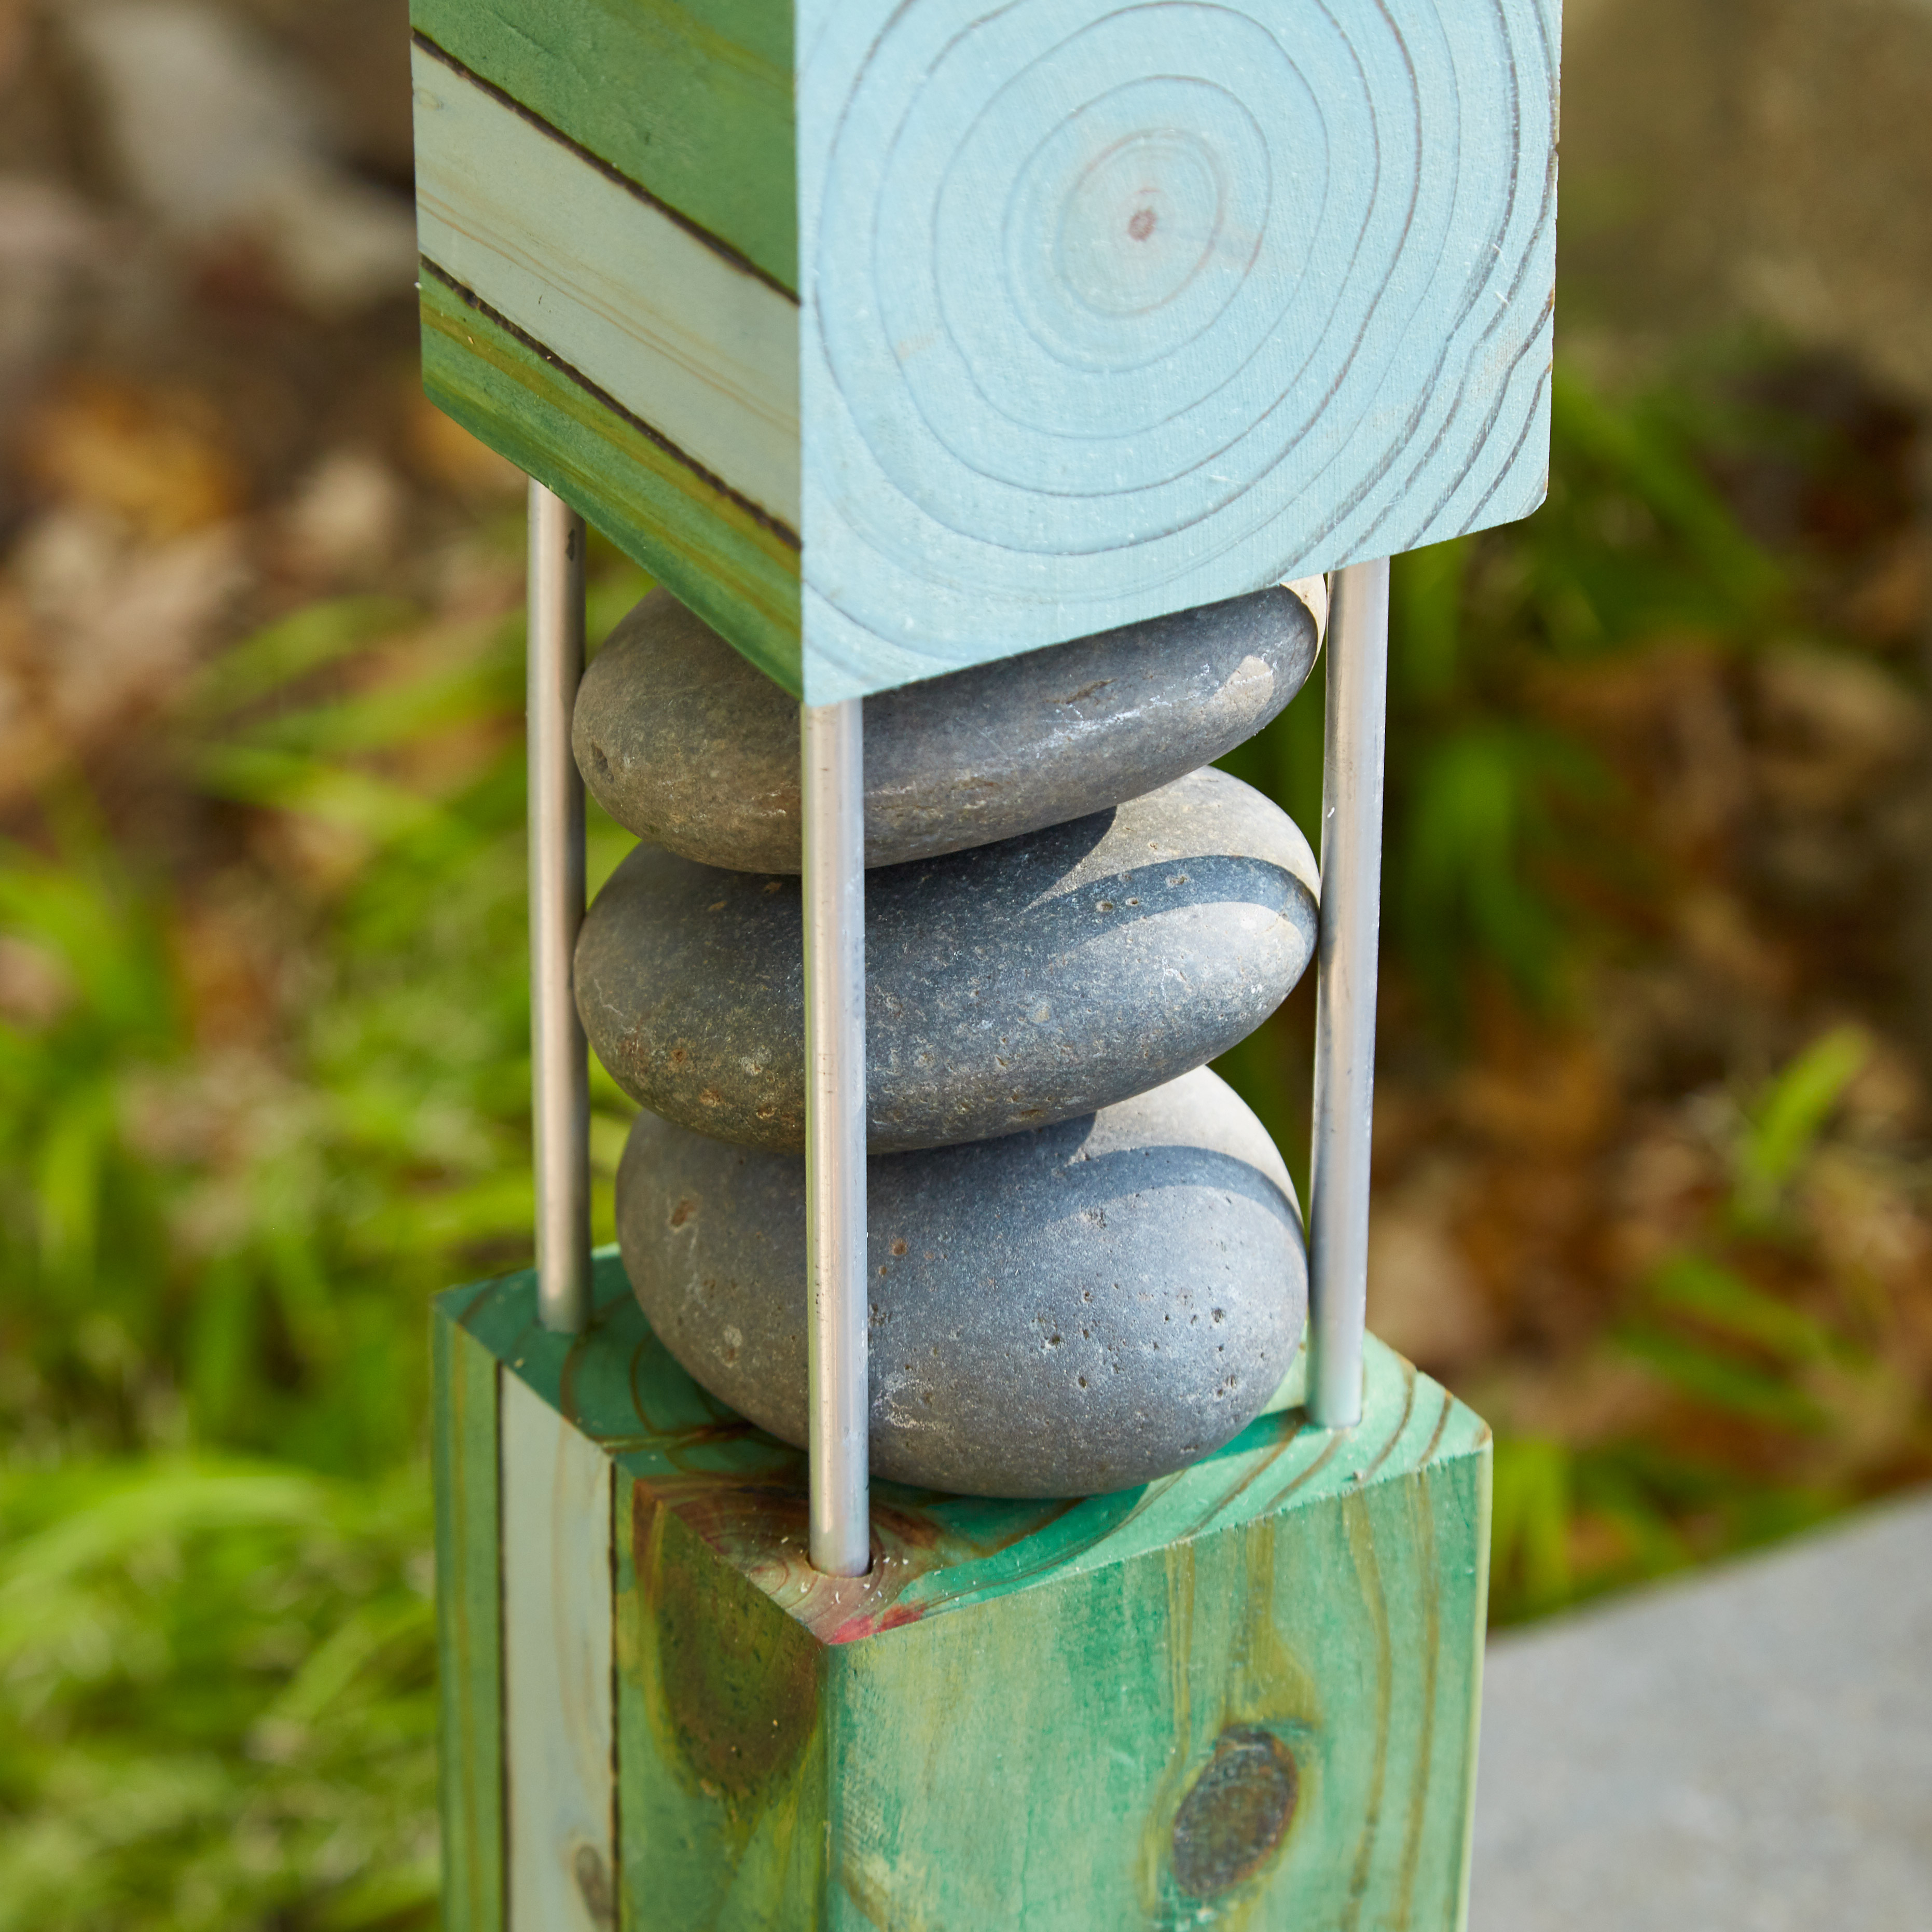
I like the mixed materials look, so I used 1/4-inch aluminum rods to create a cage for stacked river rocks within each garden pole. With a hacksaw, I cut each rod 2 inches longer than the stack was tall. See how those fit in the pole in the photo above.
Top off the garden pole
I used a block cut at a 20-degree angle as a decorative topper for these garden poles, but you could also use 4×4 post caps from the home center for a finishing touch. That’s what I love about these garden poles: Once you have the basic process down, you can mix and match materials to fit your style easily!
You Might Also Like:
Bird-Feeding Obelisk
DIY Spiral Topiary
How to Make Wine Bottle Garden Lights