DIY garden edging
Like everything else in the world, garden hoses have a limited life. While your first thought may be to haul your old garden hose out to the dumpster, you may want to hang on to it. Using upcycled garden hoses and cable ties, you can transform all those old garden hoses into a great-looking edging that will last for years. Before you begin the project, allow the hose to lie in the sun to soften for several hours to make it easier to work with. Our garden edging features both standard rubber hoses and soaker hoses for a color-coordinated look. But you can opt for a solid color theme or create a patchwork effect with a variety of different colored hoses. Let your hoses be your guide. Watch our video above to see how it all comes together!
Materials
- 20 ft. of 1-in. thin-wall conduit pipe (2 10-ft. lengths)
- Fiberglass garden stakes (4 4-ft. lengths)
- Worn garden or soaker hoses
- 8-in. black cable ties, 60 total
Tools
- Hacksaw
- Miter box
- Clamps
- Garden pruners
- Tape measure
- Permanent marker
- Pliers
- Rubber mallet
- Metal cutter
- Metal file
Cutting list
- (10) 24-in.-long thin-wall conduit pipe
- (14) 12-in.-long fiberglass garden stakes
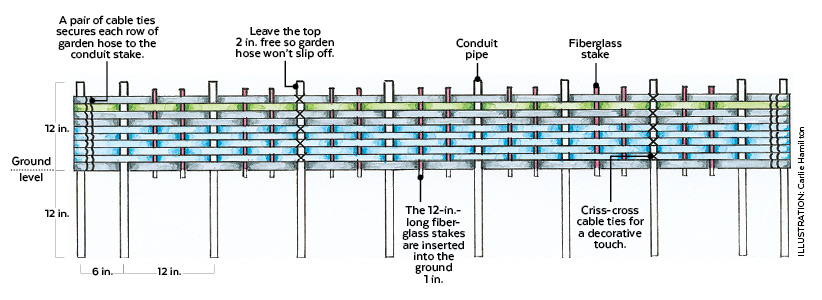
Garden hose edging construction diagram
- On each end, a pair of cable ties secures each row of garden hose to the conduit pipe
- Leave the top 2 inches free so garden hose won’t slip off the conduit pipe
- The 12-inch long fiberglass stakes (purple) are inserted into the ground 1 inch, just enough to keep them upright
- Criss-cross a pair of cable ties around a few conduit pipes for a decorative touch
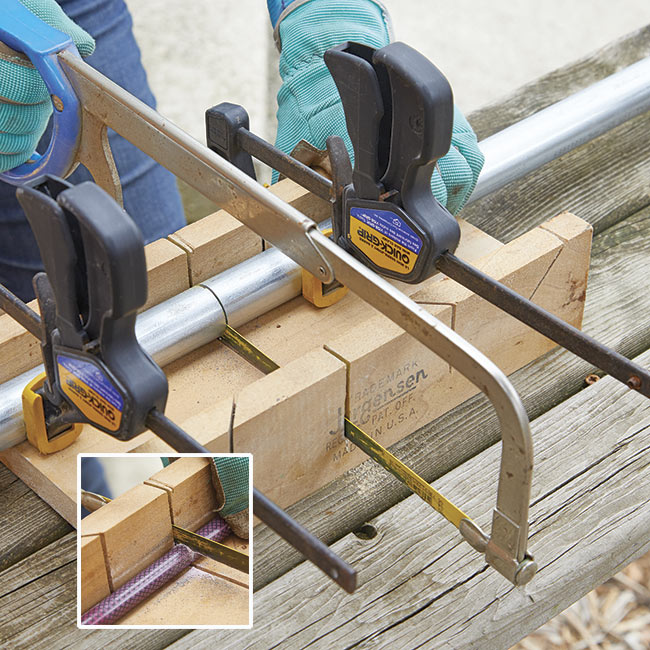
Step 1: Cut conduit pipe and fiberglass stakes
Cut conduit and fiberglass stakes to the lengths shown in the materials/tools list above using a hacksaw and miter box. Hold them in place with clamps for cutting, and if needed, file edges of the conduit pipe to smooth any sharp edges.
You Might Also Like:
How to Build a Raised Garden Bed
DIY Potting Bench
Wood-Working Garden Projects
Create Your Own Spiral Topiary
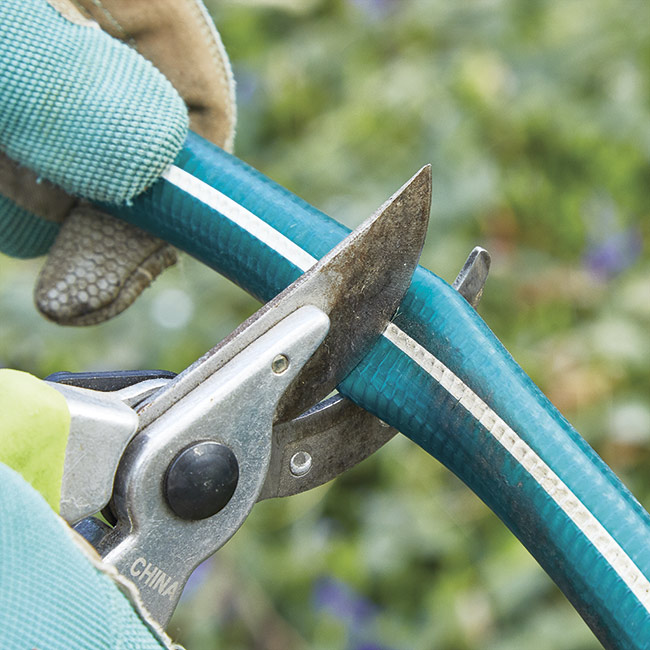
Step 2: Cut garden hose
Using garden pruners, cut 10 lengths of garden hose 108 inches long. This 10-row pattern measures 10 inches tall and 8 feet long, but you can customize yours with more or fewer garden hoses.
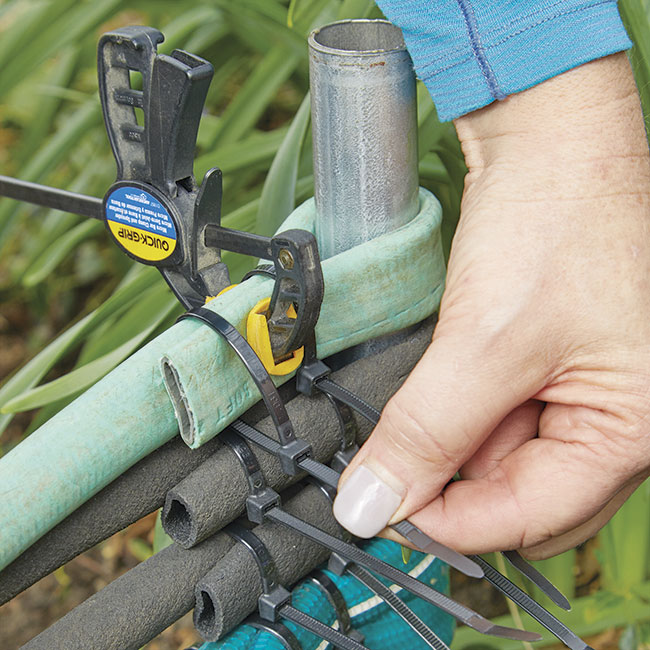
Step 3: Secure ends of garden hose
Use a mallet to pound the first conduit pipe into the ground so 12 inches remain above ground. This height will be the same for all other conduit pipe. (Note: A rubber mallet keeps the top edge of the conduit uncurled while a hammer will roll the edge.) Working from bottom to top, begin securing each garden hose with a pair of cable ties. We used an overlap of 6 inches of hose at each end. Flatten the end of each garden hose around the conduit before securing the cable tie. A small clamp helps flatten the garden hose tight and keeps it snug. Once all rows are secure at one end, lay them out and repeat this step at the other end of the edging. This design curves, which means you’ll need to eyeball it as you go and leave slightly more slack in the line than if it were taut and straight.
You Might Also Like:
DIY Privacy Screen
Upcycled Garden Design Ideas
DIY Garden Chandelier
Make Your Own Rain Barrel
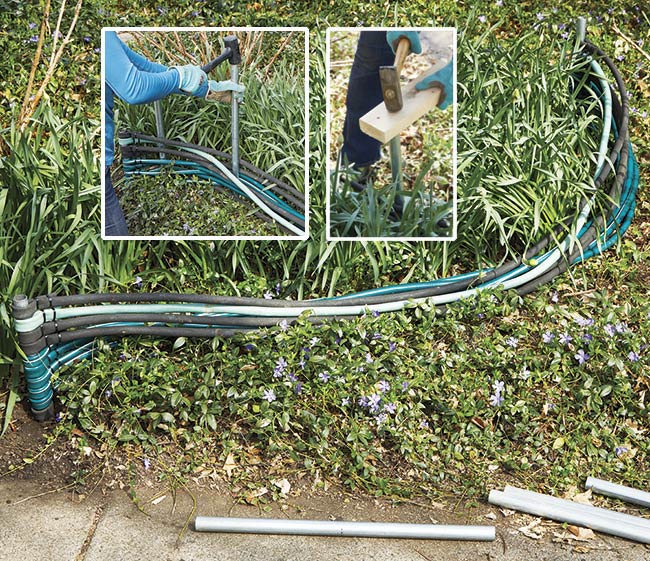
Step 4: Pound conduit pipe into ground
Begin weaving by threading the remaining conduit through the alternating hoses. Partially pound each pipe into the ground a few inches to secure it and to establish the spacing. Once you’ve established the edging’s shape, pound in the pipes until about a foot remains above ground. This will leave the top couple of inches free of garden hose to prevent it from slipping off.
Project tip
Placing a scrap piece of wood on top of the pipe and hitting it will give you a larger surface to strike and help prevent the pipe edge from curling.
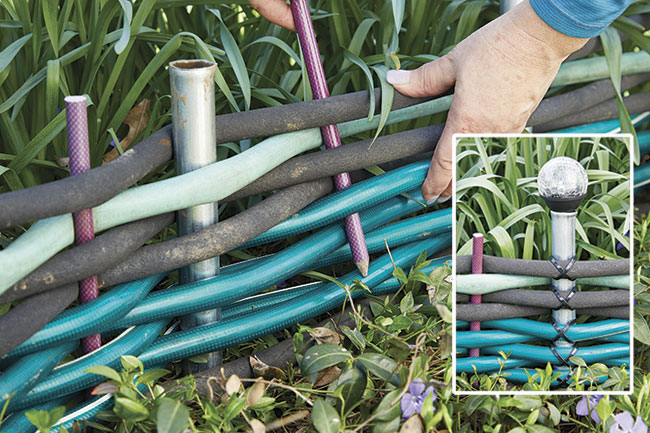
Step 5: Weave stakes and add details
Repeat the process by weaving two fiberglass stakes between each pair of pipes. Push the stakes into the ground no more than an inch deep, which is just enough to keep them upright. Add personal touches like solar path lights or criss-cross the cable ties like you see in the photo above right for added visual interest.