Add privacy with a DIY screen
Turn any spot in your yard into a getaway with this stylish freestanding screen made of dimensional lumber and lath. A sturdy base makes this screen easy to use on a deck or patio and even in the garden. Or forgo the base and use taller side posts set in concrete for a permanent solution. The screen I built is 6 ft. tall and 4 ft. wide, but you can modify the size to suit your situation — or build several.
You Might Also Like:
DIY Garden Projects
Watch More How-To Videos on Our YouTube Channel
Woodworking Project Plans
Putting your privacy screen together
Check out the materials list below before you go shopping. Then look over the illustrations for measurements and watch the video above to see how easily the screen goes together.
DIY Privacy screen materials (for one panel 6 ft. tall and 4 ft. wide)
- 2 8-ft. treated 2×4s
- 1 8-ft. treated 1×6
- 2 8-ft. 2×2s
- 2 8-ft. treated 4×4s
- 2 8-ft. ½ -in. quarter round
- 1 bundle of 4-ft. lath
- 26 #9 x 3 ⅛-in. screws
- 9⁄16 staples
- Exterior paint (We used black and cream)
- Cedar stain
Tools
- Drill
- ⅛-in. drill bit
- Staple gun or brad nailer
- Paint brush
- Tape measure
- Saw
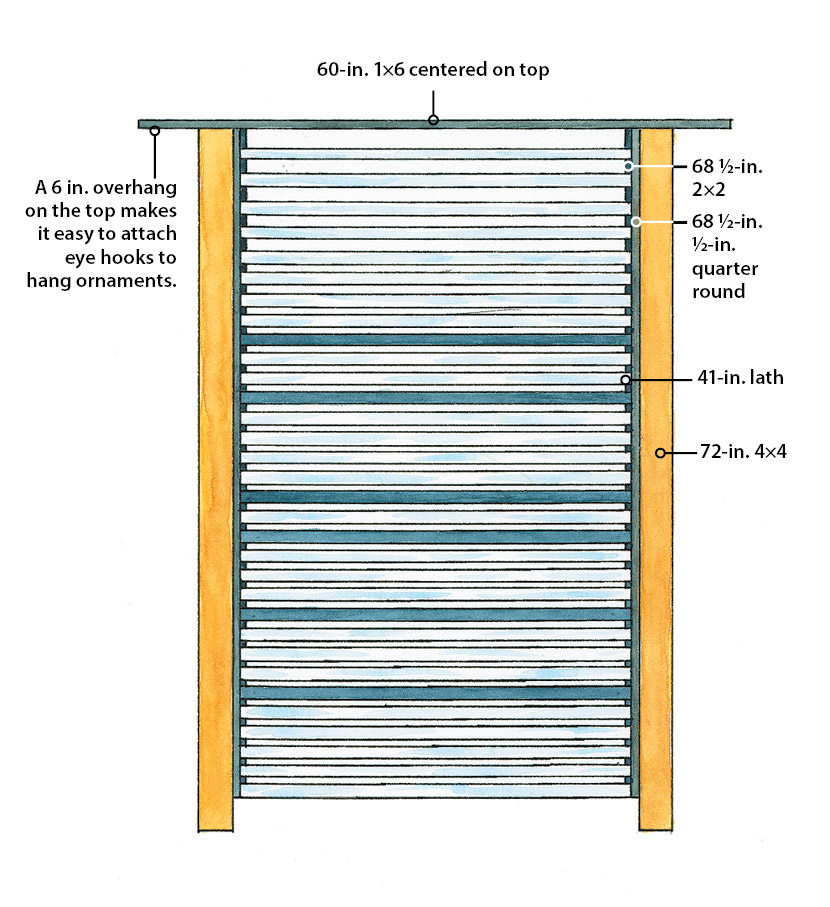
1. Prep lumber for the privacy screen
Start by cutting the lumber to the lengths indicated on the illustration above. Then paint and stain all the pieces and let them dry overnight — it’s a lot easier to do this up front and touch up later, if needed. This combination of paint and stain works well for our casual test garden borders but you can change these to suit your garden’s style.
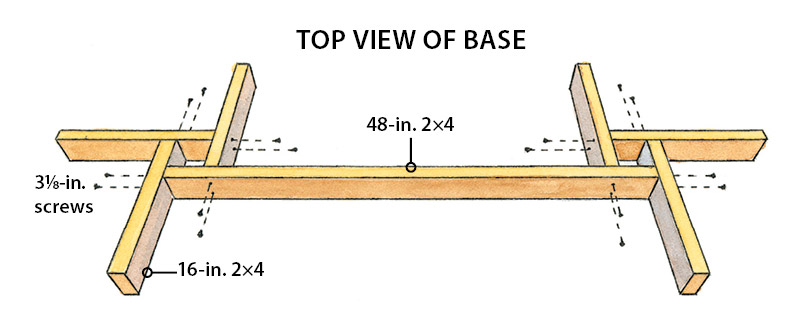
2. Build the base of the screen
What makes this base different from others you may see is that the “feet” are joined at the back with one long 2×4 to provide added stability and keep the screen standing straight.
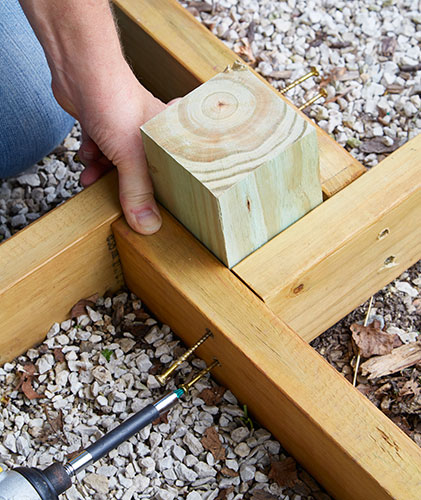
Construction tip:
I found that a scrap piece of 4×4 lumber helps the base go together a lot easier. You can see in the photo above how it keeps the legs positioned correctly as they’re being attached.
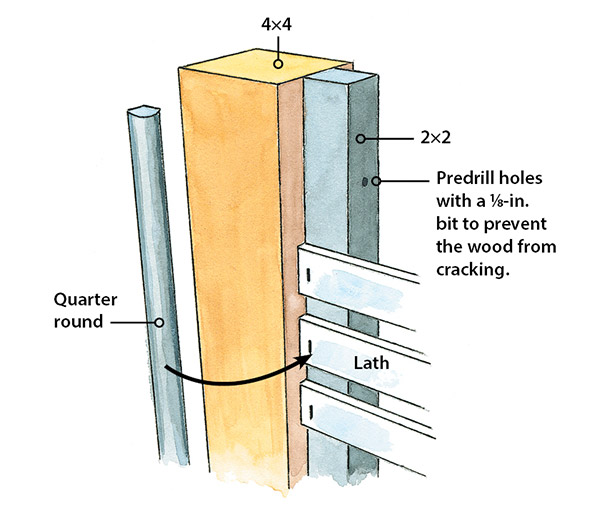
Step 3. Make the frame
Once the base is done, remove the scrap 4×4 and slip in the posts. Center a 2×2 on the inside of each 4×4, as the illustration above shows, and secure it with a screw near the top, another one near the bottom and one centered in between. Then use a tape measure to make sure the 1×6 is centered on top of the posts and attach it with a couple screws to each one.
You Might Also Like:
How to Install a Paver Path
How to Build a Wooden Raised Garden Bed
Garden Design Ideas
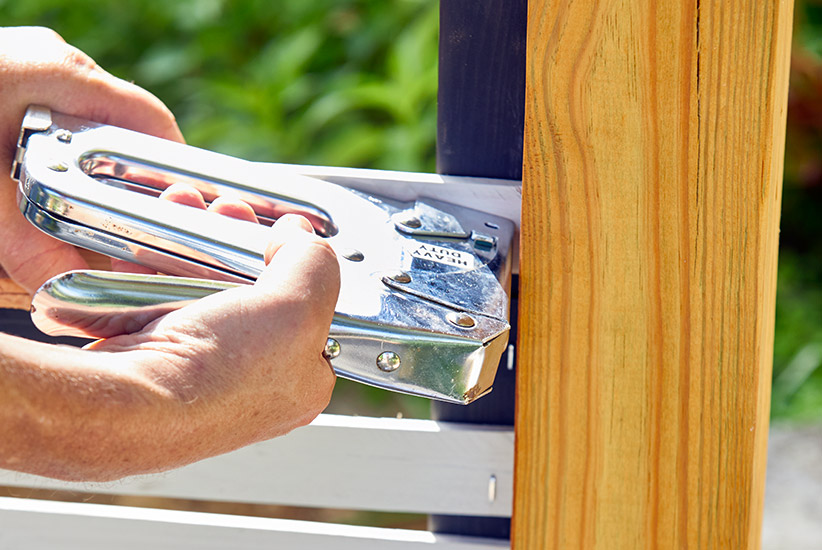
Step 4. Add lath to frame
A bundle of 50 pieces of lath may seem like a lot, especially when the screen only needs 32. But you’ll need plenty of extras—some pieces may be cracked or warped.
With the side posts in place, start at the bottom and begin attaching the lath to the 2×2s with a staple gun (a brad nailer works, too). To get the look of the screen in the photo at the top of the article, gradually increase the space between pieces of lath as you go up.
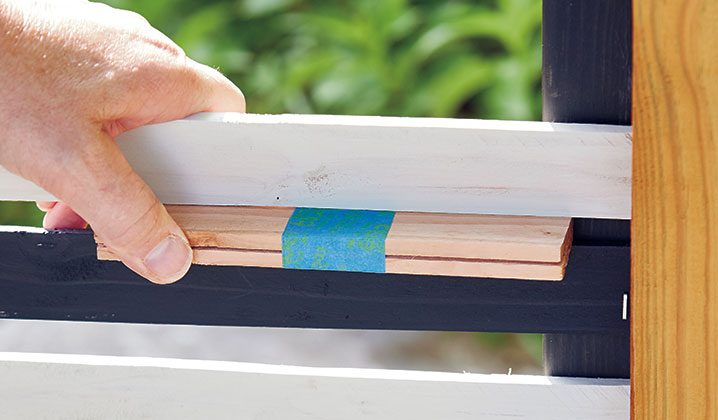
Construction tip:
To keep the spacing uniform, I made the handy tool in the photo above from scraps of lath taped together. I started with two pieces at the bottom and gradually increased the number to five near the top.
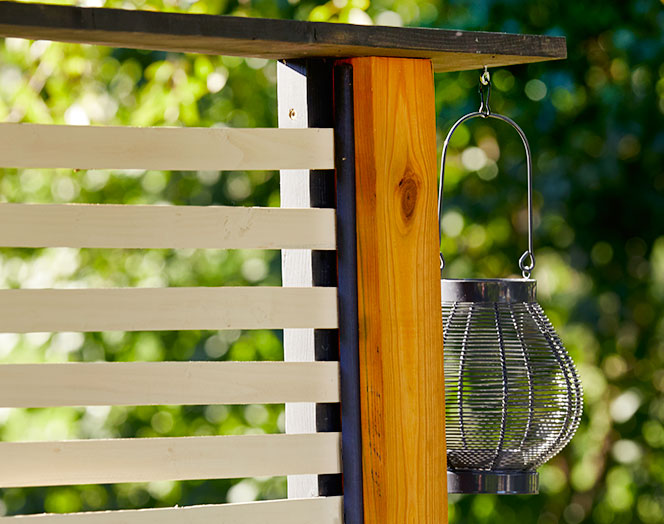
Step 5. Add finishing touches to your DIY privacy sreen
Once all the lath is in place, cover the staples by securing a piece of quarter round on each side with a brad nailer. You can even add ornaments like these lanterns attached to the top overhang for added style. Then stand back and admire your work!