Direct Mount Method
Mounting your new trellis directly to the wall using spacers is the quickest and easiest method of attaching it. Plus it leaves plenty of space between the trellis and the wall for the vines to twine and air to circulate. It’s tightly secured to the wall if you have a windy location, but still easy to take down for painting or other maintenance.
Materials
- 1⁄2-in. diamter PVC pipe
- 4 3 1⁄2-in. coated deck screws
Tools
- Drill with a 3⁄16-in. bit and a phillips head screwdriver bit
- Hacksaw
- Stud finder
- Level
- Pencil
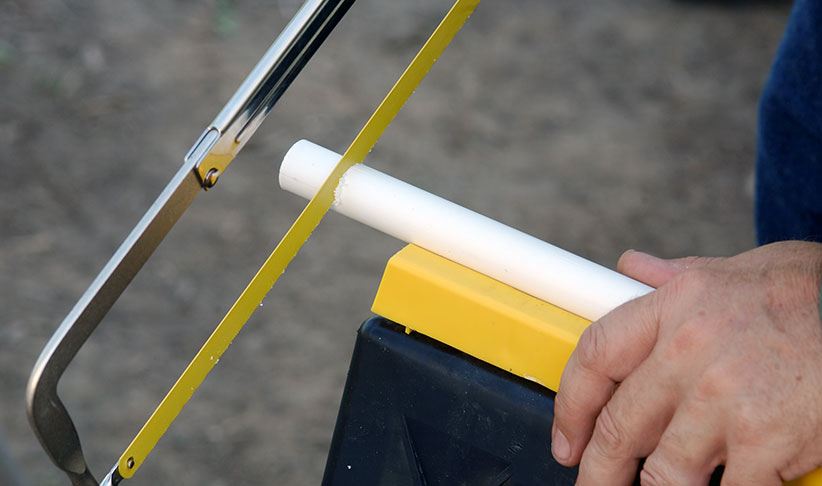
Step one—Cut the PVC
Cut the PVC pipe with a hacksaw into 4 sections each 1 1⁄8-in. long. You can make them longer if you want to keep the trellis further away from the wall, but you’ll need longer screws. Now's a good time to paint the PVC pieces to match the wall or the trellis, if you want.
Step two—Locate the wall studs
Attaching your trellis to studs will make it more secure. Use a stud finder, available from home improvement stores, to find and mark the locations on the wall with a pencil. Line the edges of the trellis up with these marks as best as you can. Then mark screw locations on both the wall and trellis. They may go through the side or through the top and bottom edges of the frame — it all depends on where the studs are in the wall. Be sure to check that your trellis is level as you mark the spots where you're going to put the screws.
Step three—Predrill the holes
Take the trellis down and predrill all the holes. Then, while holding the trellis in position on the wall, predrill the holes through the trellis into the wall. Start with one of the upper corners first. Put the screw in and tighten it part way. Then hold the trellis up to the pencil marks, make sure it’s level and predrill the hole in the opposite corner. Drive that screw in part way, too. Now you can predrill the holes for the rest of the trellis, but don’t put the screws in yet.
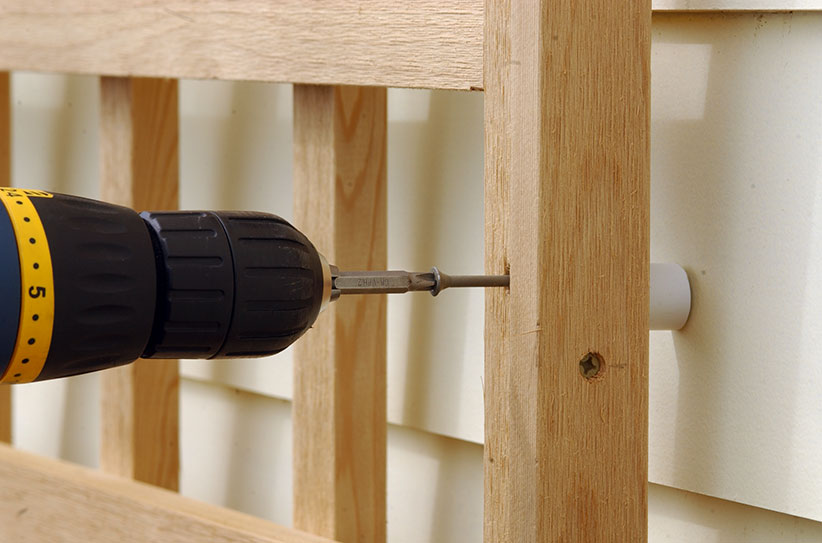
Step four—Add PVC spacers
Back the top two screws out and insert a piece of PVC pipe between the trellis and the wall. Then put the screws back in through the trellis and the spacer into the wall, but don’t tighten them completely yet. Repeat this for all the other holes and then tighten all of the screws.
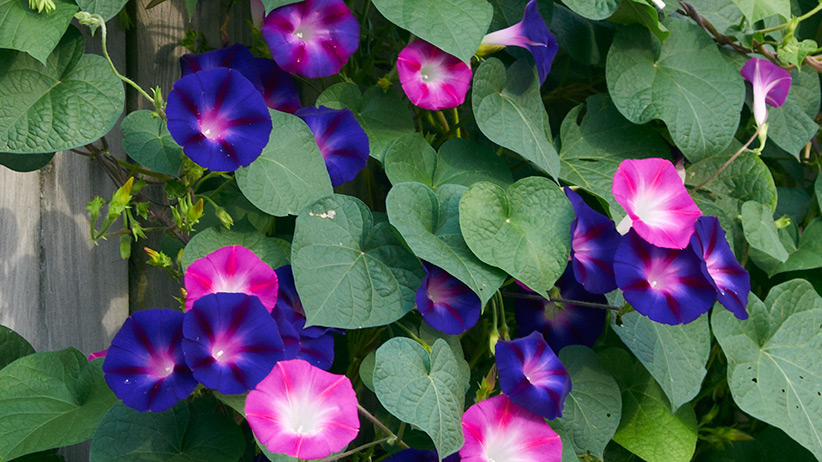
Now your trellis is firmly attached to the wall and there is enough space for vines to wrap around the wood.
Hinge Method
If you like to take your trellis down from the wall for cleaning at the end of each season, this attachment method will make it quick and easy. It also allows you to paint the wall behind the trellis without taking it down completely. The frame stays attached at the bottom and folds down away from the wall. It’s fastened with two 1 1/2-in. hook and eyes at the top.
Materials
- 2 1 x 2 cedar ledger boards the width of your trellis
- 2 2-in. leaf hinges with screws
- 2 1 1⁄2-in. screw eye and hooks
- 4 3 1⁄2-in. coated deck screws
Tools
- Saw
- Pencil
- Level
- Tape measure
- Drill with a 3⁄16-in. bit and a screwdriver bit
- Stud finder

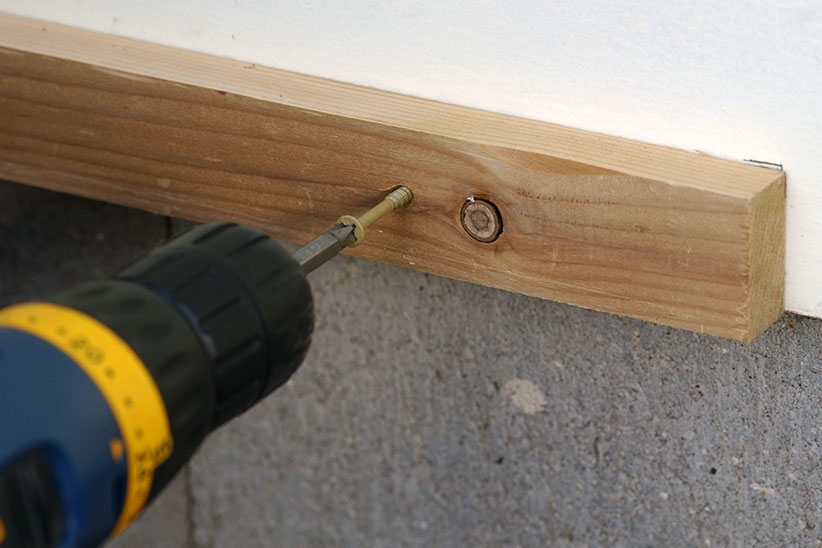
Step one—Attach the ledger board
The 1×2 cedar board is your ledger board, or the stable piece where the trellis is attached.It should be as wide as the trellis. To attach it to the wall find the studs where you want the trellis to hang and mark their location. Center the ledger board over the location of the studs and make sure it's level. Use the pencil to mark the ledger board's position on the wall and the locations of the studs on the ledger board. Take the board down and predrill the marks you just made indicating the location of the studs — this prevents the wood from splitting. Now you can attach the ledger board to the wall with the 3 1⁄2-in.-long screws.
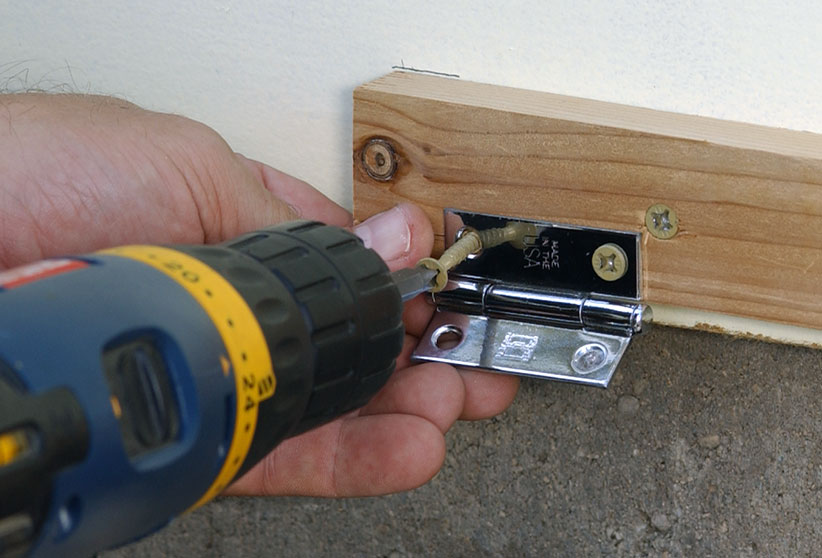
Step two—Attach the hinges
Fasten two 2-in. leaf hinges to the ledger board about 1 in. in from each end.
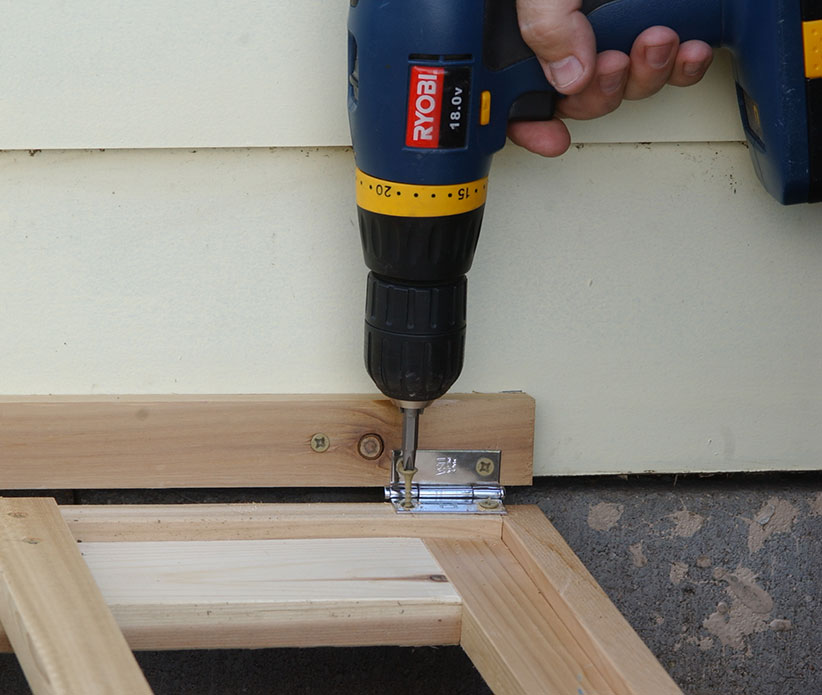
Lay the trellis face down in front of the wall, supporting it on blocks. Now fasten the other half of the hinge to the back of the trellis frame.
Once the bottom of the trellis is secure, you’re ready to fasten the top to the wall. Swing the trellis up into position. On the wall, mark the top outside edges of the trellis and then lay it back down.
Screw your second ledger board to the wall just as you did the bottom. Make sure it’s level and a couple of inches below the top edge, so it’s hidden behind the trellis frame.
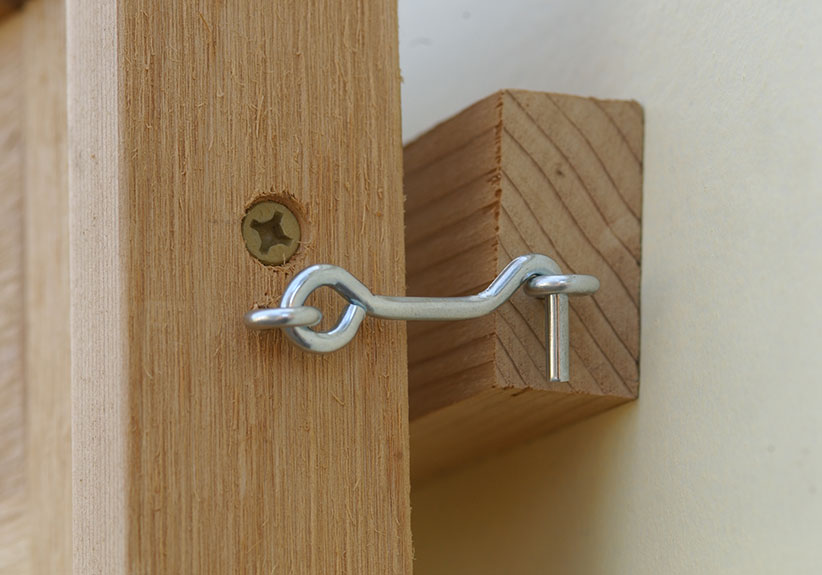
Step three—Install the hook and eyes
Put the trellis up again and screw one of the hooks into each side of the trellis frame. Screw an eye into each end of the 1×2 for the hook to fasten into.
Hook the trellis in place and you’re set to plant. When you need to clean off the trellis, or paint the wall behind, just unhook the two top hooks and lay the trellis down.