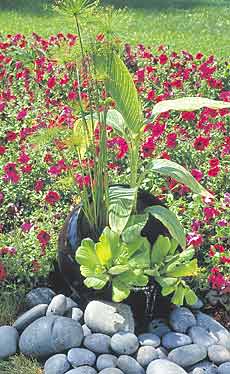
For a weekend project, why not add a container water garden to your landscape? This simple design incorporates a glazed ceramic pot that you place at an angle so you hear the sound of flowing water. We’ve listed a few plants, but if you have other favories, you can incorporate those instead. Before you get started, check out the materials and tools list so you have everything you need.We’ll show you step by step how to make this water garden fountain.
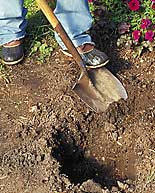 Step one — Pick a spot for your pot. To build this water feature, choose a location that has easy access to electricity for the pump. Then dig a hole just deep enough to allow the pot to sit at a 45-degree angle — 2 to 6 in. deep should work nicely. Next dig a hole for the reservoir in front of the pot so the water can run into it. We used a 5-gallon bucket as the reservoir, but a big tub would work well, too. Fit the bucket into the hole so its top is flush with the ground.
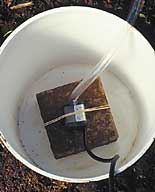 Step two — Place the pump. Set the pump mechanism in the bottom of the reservoir on a brick or other heavy object, and hold it in place with a sturdy rubberband. Use enough 1/2-in. diameter tubing (or whatever size fits your pump) so that it can run from the pump into the pot. We used a pump that runs 75 gallons per hour. You can buy the pump and tubing at any local home improvement store or garden center that carries water garden supplies. Start with a length of 8 ft. and make sure to leave a little slack.
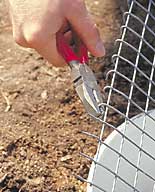 Step three — Cover the reservoir. Use a piece of galvanized chicken wire or another non-rusting mesh over the reservoir so you have a place to put the decorative rock. Using a sturdy pair of pliers, bend down any sharp wire edges that could poke unsuspecting feet or paws. Lay the mesh cover over the top of the sunken reservoir. Be sure to run the cord and tubing up through the mesh. You may need to cut a larger hole in the mesh so the cord and the tube will fit through.
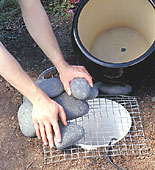
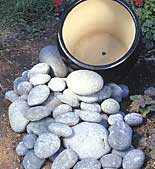 Step four — Place the pot and the rocks. Place the tubing so that the water will fill the pot. Then cover the mesh with a layer of rocks (and soil around the edges) to cover the mesh, as in the top photo. Keep adding rocks until the mesh, tubing and the pump cord are hidden, as in the lower photo.
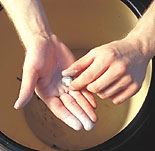
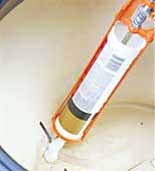 Step five — Seal the pot and test the waters. If you are using a planter as your container water garden, you’ll want to seal up any drainage holes. Plug them with plumber’s putty held in place with silicone caulk. First, put the tube from the pump through the drainage hole. (In this pot, the drainage hole happens to be on the side.)
Then add a piece of plumber’s putty, which is like Play-Doh® — you can mold it with your fingers into the shape you need, like I’m doing in the top photo. Press it in place and hold it there with silicone caulk. Use a caulk gun to help you with this like the one in the lower photo.
Clay pots need to be waterproofed before you add water. Spray the inside of the pot with two or three coats of a clear acrylic sealant that’s safe for clay pots. Be sure to let the sealant dry between coats so you’re ensured a watertight seal. Let the final coat dry for 24 hours before filling with water. The pot I used doesn’t need to be sealed since it’s glazed on the outside.
Fill the reservoir and tilted pot with water. Plug in the pump to start the water circulating. Then adjust the rocks so the circulating water can trickle gently from the tilted pot into the reservoir. You’ll have to play around with the position of the rocks to make sure that the water all goes back into the reservoir from the fountain and doesn’t splash out onto the soil. Otherwise your reservoir will eventually run out of water and your pump’s motor may burn up.
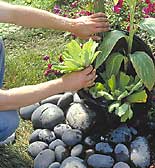 Step six — Plant the pot. After you’ve tested the water, unplug the pump and let the water sit for a couple of days. That lets the chlorine in the water dissipate. Then you’re ready to plant! Place the marginal aquatics, such as the canna, in some heavy soil. Let the water lettuce float in the water. When you’re done planting, plug in your pump and enjoy your new garden.


