Saving tomato seeds
If you want to grow your own heirloom tomato variety every year, you will need to know how to save tomato seeds at the end of each season. While you can simply scoop out the seeds and dry them, it’s better to use this fermentation process for "wet" seeds.
Does this process work for other seeds?
While I'm showing you how to ferment and dry tomato seeds here, this is also the best process to use for other "wet" seeds, such as cucumbers and melons.
You Might Also Like:
Best Heirloom Tomatoes
2 Easy Ways to Preserve Tomatoes
Vegetable Garden with Curb Appeal
Save tomato seeds with fermentation
Tomato seeds are encased in a gel that contains a germination inhibitor. In nature, this ensures the seeds don’t sprout prematurely. A fruit that has fallen to the ground will naturally ferment and dissolve that gel. When you collect seed you have to artificially create those conditions. Let’s look at the steps needed to do this.
Choosing the right tomato to save seeds from
First, select a ripe tomato with a flavor, shape or size you like. Most old-fashioned heirlooms, such as Brandywine Pink and Brandywine Yellow, are good choices for seed saving because they are open-pollinated. Open-pollinated plants need wind, insects or water to perform the pollination among flowers on the same plant or variety. The fruits produce seeds that grow to be like the parent, as long as pollen from another variety didn’t fertilize the flower. Since tomatoes aren’t easily cross pollinated, you can prevent this by planting cultivars at least 25 ft. away from each other.
If this isn’t possible, to be sure you have an open pollination, seal a cluster of unopened tomato blooms in a paper bag. Every morning, give the bag a shake to move the pollen inside from flower to flower as they open. Once they’ve withered and fruit begins to form, remove the bag and label the cluster. Later, use the ripened tomatoes to collect the seed.
Avoid cross-pollination
In contrast to an open pollination, seed from cross-pollinating two different varieties is a hybrid. Seeds from a hybrid may grow into a plant completely unlike the parent, with a mix of traits from each side of the cross. These plants are usually less vigorous, as well, so you wouldn’t want to save those seeds.
Now that you have your tomato picked out, learn how to save and dry the seeds with the steps below.
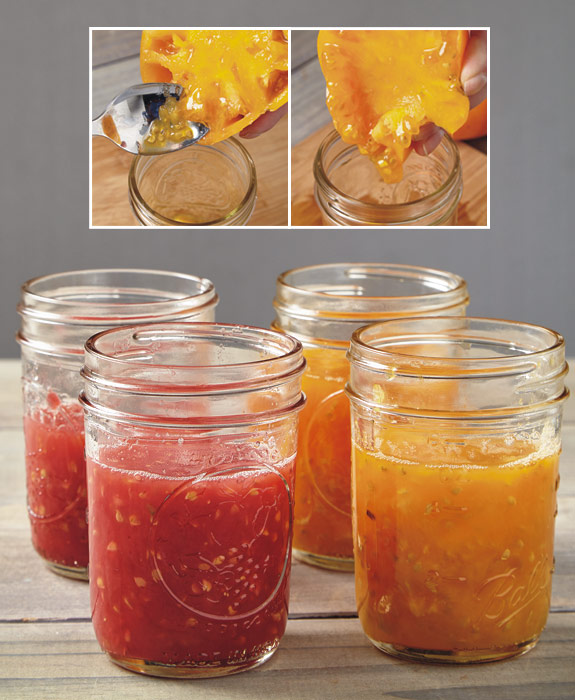
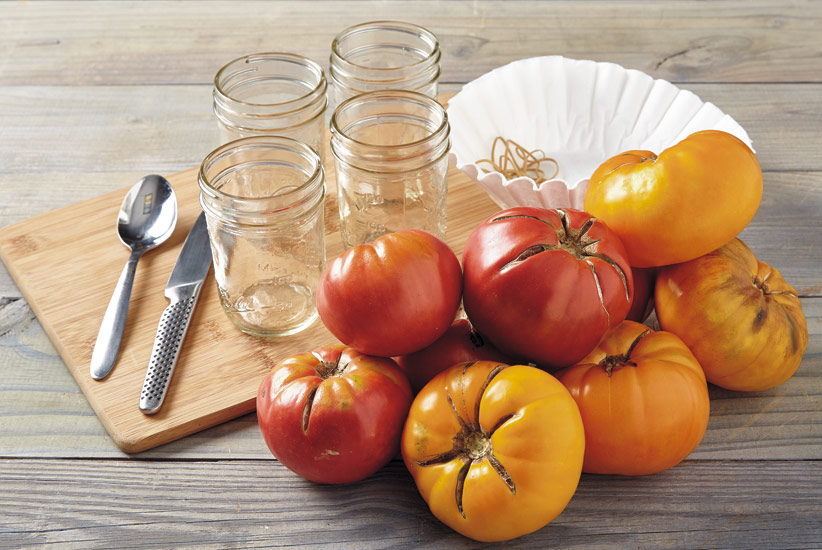
Step 1: Scoop out the tomato
Wash the tomato then use a sharp knife to cut the tomato in half. You can scoop out the gel that contains the seeds with a spoon, or simply squeeze the tomato half to push out the pulp. If you don’t mangle the fruit too much, you can eat what’s left. I was able to fill each half-pint jar two-thirds full with seeds, gel and pulp from two tomatoes, which was a perfect amount to work with. Any less liquid and the pulp dries out and won’t ferment.
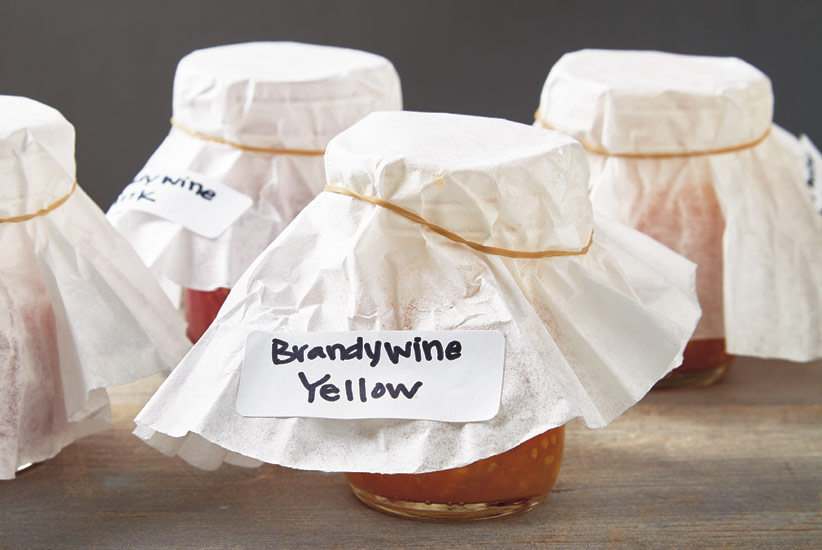
Step 2: Let the gel ferment
The tomato gel will need to sit indoors at about 70 degrees F out of direct light to ferment. You can leave the jars uncovered, but I used a coffee filter held on with a rubber band as a lid. This shaded the tomato gel, kept out contaminants, fruit flies and curious pets, plus allowed air and gas exchange during the fermentation process. It also provided a place to write the variety name — don’t forget to label your seeds so you know what you have!
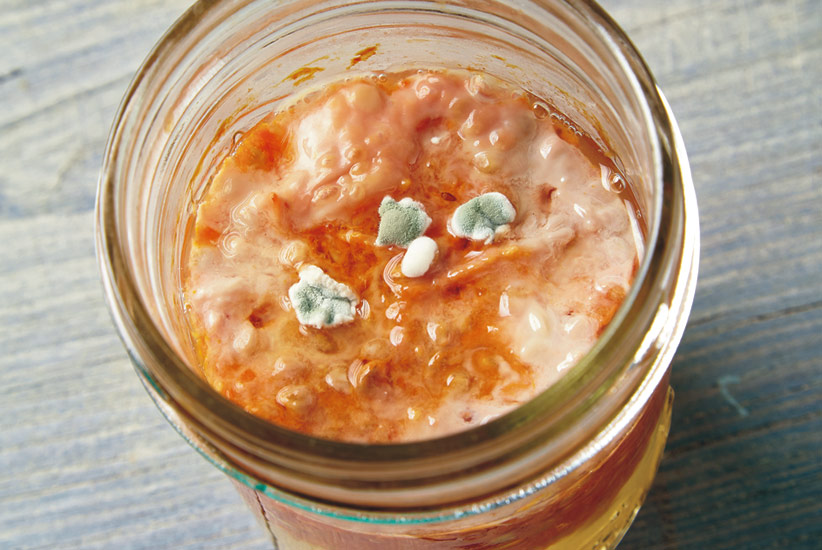
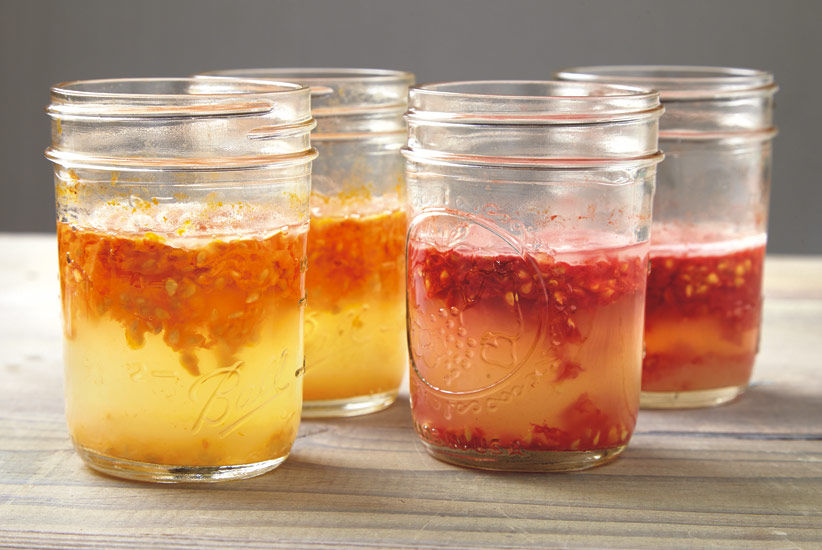
Step 3: Separate the good seeds from the rest
Let the solution sit for up to three days. Any longer and the seeds may start to deteriorate. At that time, you’ll see a distinct separation, with pulp floating at the top, while good seeds have sunk to the bottom in the clear liquid. A layer of mold is nothing to worry about — that indicates the fermentation was successful. The photos below show you how it will look, and it may also smell a bit funky.
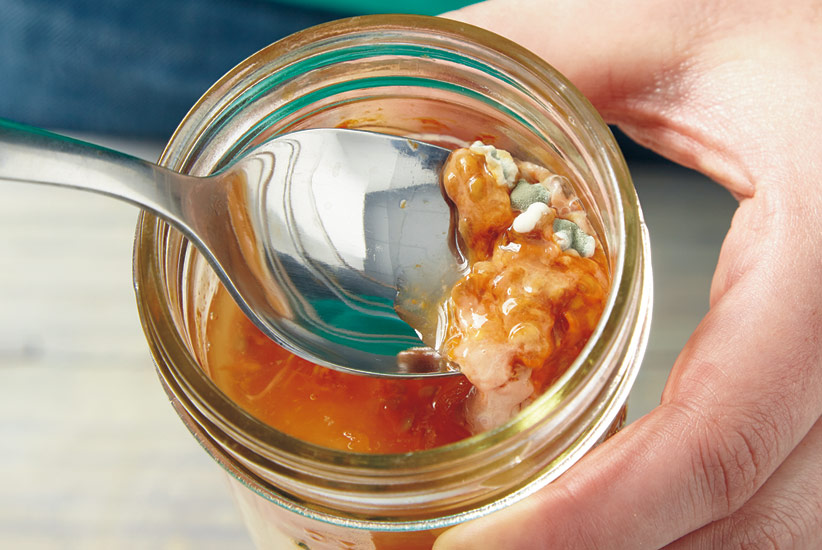
Step 4: Remove the scum
With a spoon, carefully skim off the top skin of mold and throw it away. As you do that, some of the viable heavier seeds that were tangled with the pulp will sink. Nonviable seeds will remain floating. Try not to disturb the tomato matter too much by shaking or bumping the jar so those bad seeds won’t get mixed in with the good.
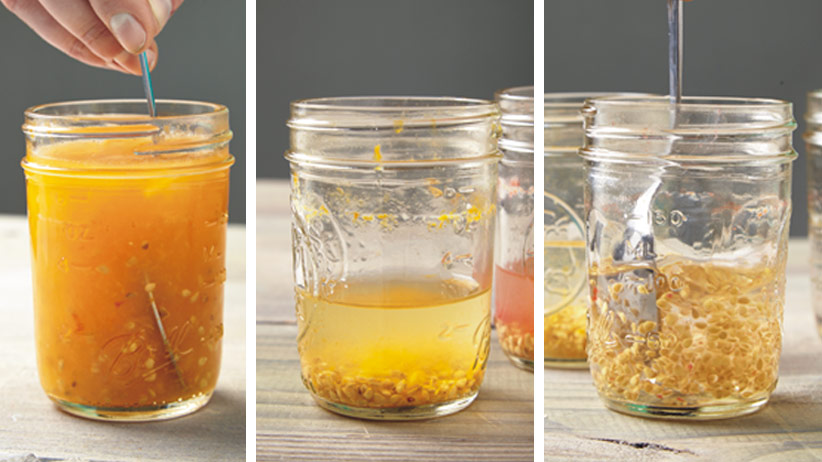
Step 5: Rinse & repeat
Next, add ¼ to ½ cup of water to the remaining liquid with seeds and stir, as at far left below. Let it settle a few moments so good seeds will sink again. Pour off the top half of the liquid and floating seeds, leaving what you see in the middle photo. Repeat this two more times until the water is clear when you rinse and seeds are clean, as in the third photo. Pour them into a kitchen strainer to drain. You could also rinse them under running water in a strainer but nonviable seeds would be retained.
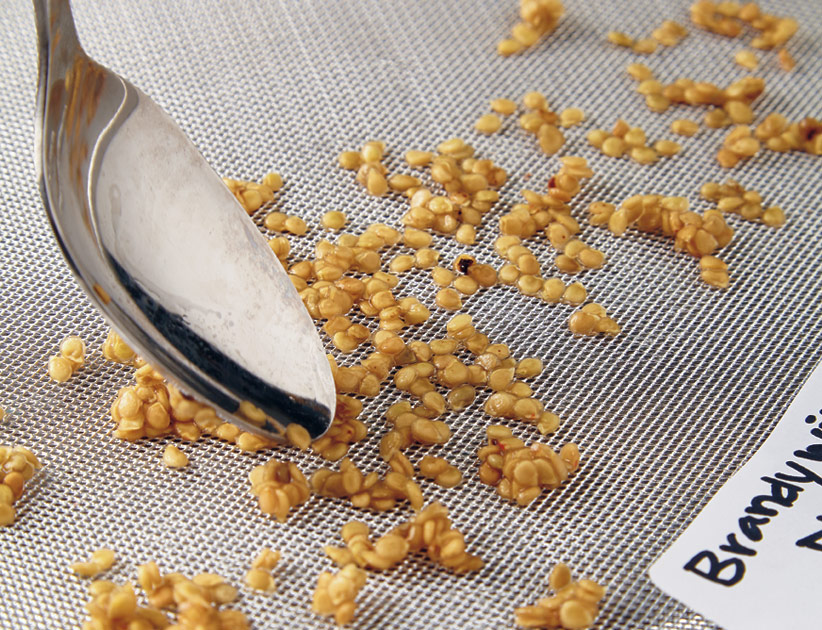
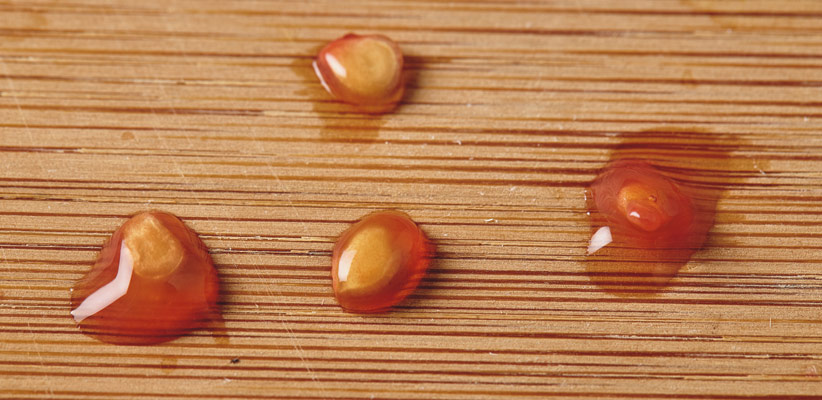
Step 6: Set the seeds out to dry
Spread the wet seeds out on a paper plate, coffee filter or screen to dry, scattering them as much as you can. Don’t use paper towels because the seeds will stick to that material like glue. They’ll cling together as well, so check them every day or two and rub the clumps of seeds between your fingers to separate them.
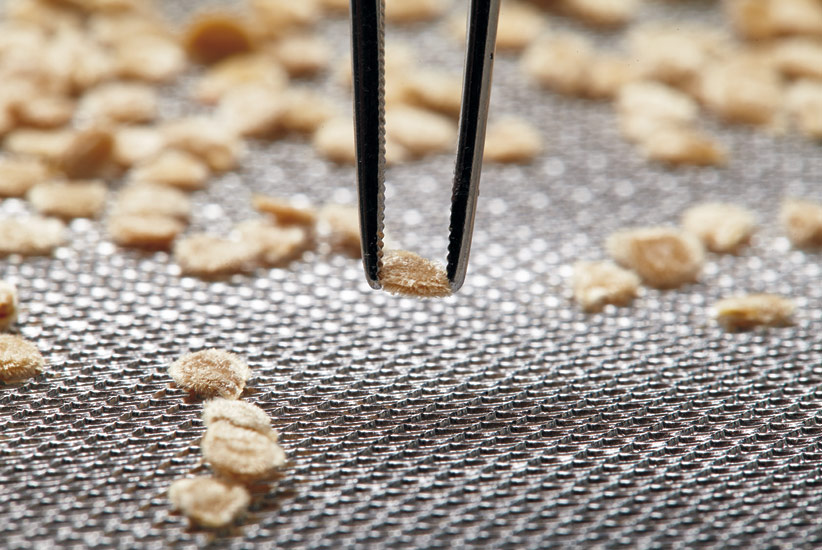
Step 7: Store the dry seeds
Leave the seeds to air dry for seven to 14 days in a warm, out-of-the-way spot, like on top of the refrigerator. When they’re dry, the seeds will appear a bit hairy or furry. Look closely to make sure that’s not mold, which would be white and damp. A properly dried seed will snap when bent in half. You can use a pair of tweezers to test this. Once they’re dried, place the seeds in a labeled envelope in a cool (40 to 45 degrees F), dark, well-ventilated place. You can also store them in an airtight plastic container, but be sure they are totally moisture-free to prevent mold from forming. Fermented and dried seeds will have a long shelf life — four to six years versus only one year for simple air-dried seeds.
You Might Also Like:
How to Store Seeds
7 Plants Easy to Start from Seed
Helpful Products for Vegetable Gardening