Sand-cast creativity
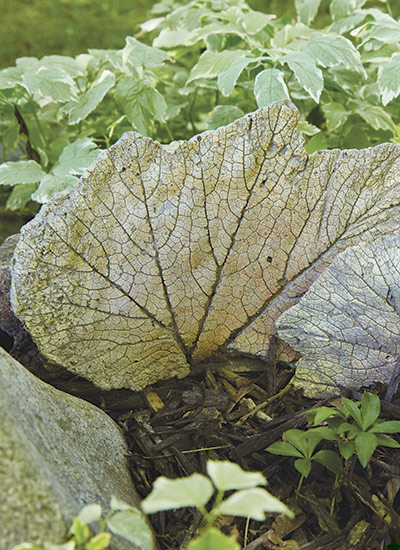
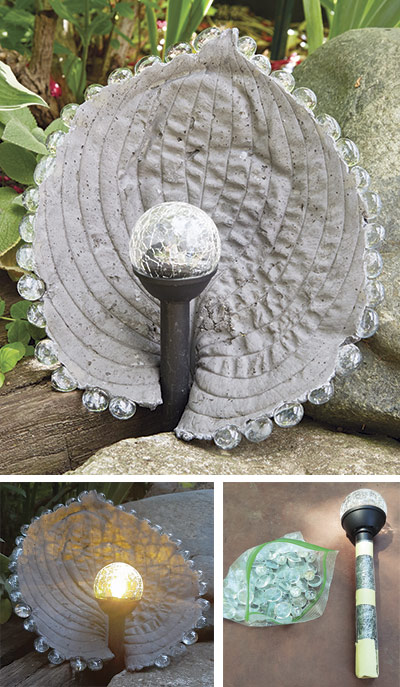
This DIY sand-cast birdbath is easy to make, works with any large leaf and it can be finished lots of different ways. For a large birdbath, like the one in the photo above, use plants like rhubarb (Rheum rhabarbarum), gunnera (Gunnera manicata) or ‘Sum and Substance’ hosta (Hosta hybrid) work best. This one’s rhubarb.
You’re not limited to big leaves either. This process will work with just about any type and there are lots of ways to use them throughout your home and garden. Check out the gallery of sand-cast ornament ideas below for some inspiration.
You Might Also Like:
DIY Potting Bench
Garden Gate's Best Hostas
4 DIY Vegetable Garden Trellises
Sand-casting tips
- When it comes to concrete, even though its more expensive, I like Quickcrete® Vinyl Patcher. When it’s dry, its fine consistency preserves the details of the leaf clearly. Less expensive concretes are just as strong, but they look coarser.
- You can do this project on the ground, but I’d recommend using some kind of table — it’s easier on your knees and back.
- Leaves can wilt quickly so keep them in water until you're ready to use them.
Who’d have guessed that with just a few hours of work, you could have such a unique garden ornament? Are you ready to make your own? Let’s get started.
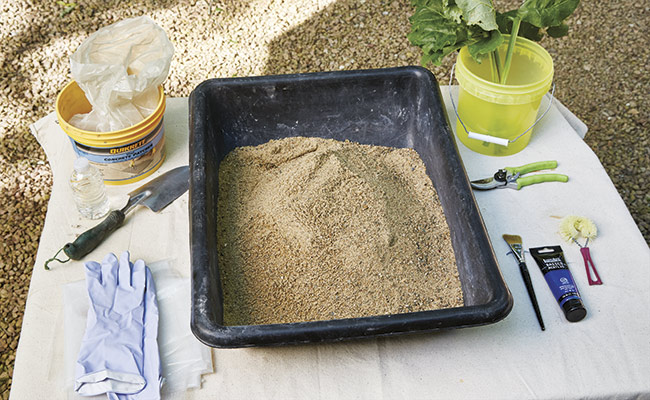
What you’ll need to make your sand-cast birdbath
Materials
- 1 medium to large leaf
- 1 50-lb. bag of sand
- 1 10-lb. bucket of Quikrete® Vinyl Concrete Patcher
- Water
- Paint or concrete dye
- Eco-friendly sealer, such as AgraLife Kennel Seal
- A sheet of plastic large enough to cover sand and concrete (we upcycled an old shower curtain liner)
Tools
- Mixing tray for concrete
- Garden trowel
- Disposable gloves for mixing
- Garden pruners
- Plywood or large tray for holding sand
- Stiff-bristled brush
- Paint brush
How to make a sand-cast birdbath
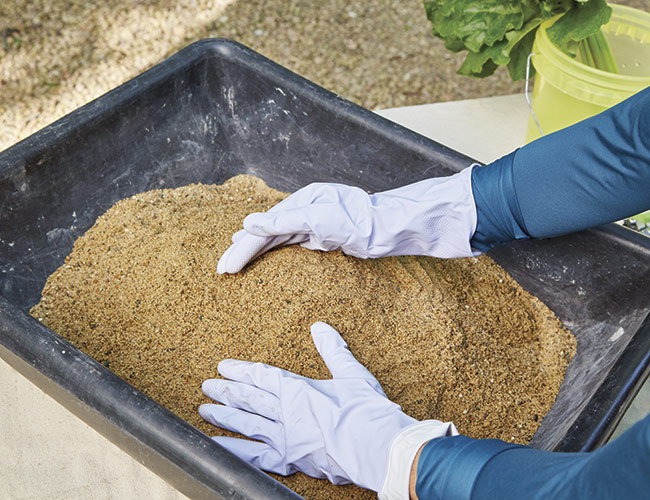
Step 1: Start with sand
Start by making a dome-shaped pile of sand that’s big enough for the entire leaf to rest on plus a couple of inches to spare. This rhubarb leaf used all of a 50-lb. bag of sand — any type will do. Covering it with plastic keeps the mess down and prevents sand from sticking to any concrete that might leak through or run over the edge of the leaf but it's not essential.

Step 2: Bring in the leaf
Many leaves wilt quickly, so wait to harvest yours until you need it or keep it in a bucket of water until you’re ready. Lay the leaf face down on top of the sand like the one above. Cut the stem off close to the base of the leaf. If the leaf you want to use has a hole or a tear, no problem. Just cut a piece from a different leaf and use it as a patch.
You Might Also Like:
How to Make a Kokedama
Homegrown Lavender Sugar Scrub
6 Plants Birds Love
DIY Bird Feeder Wreath
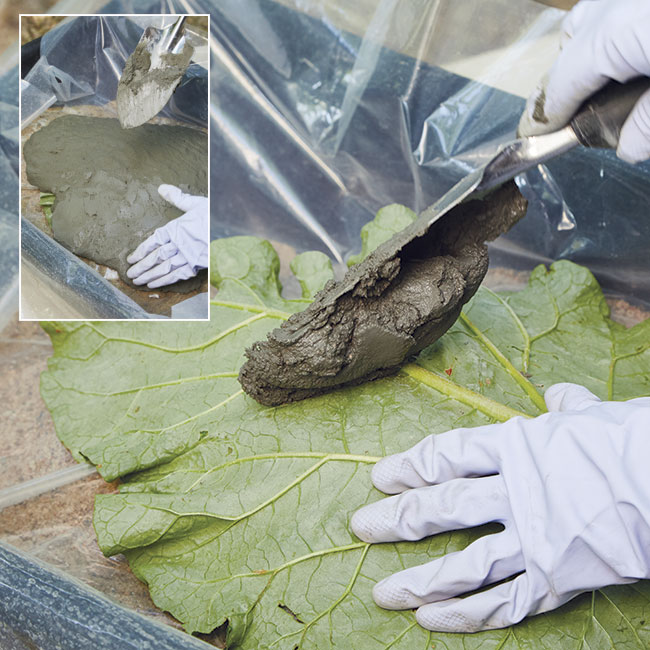
Step 3: Time for concrete
Pour the dry concrete into a mixing tray and add water until it’s the consistency of a thick brownie mix. Scoop some concrete onto the center of the leaf and begin working it toward the outer edges as in the photo above. Make it about ¾-in. thick in the middle (or whatever it takes to cover the leaf veins) and taper it to ¼-in. at the edge. Once the leaf is covered with concrete, cover it with plastic. If it’s really hot outdoors, a piece of moist burlap on the plastic can help the concrete dry evenly. Give it at least 48 hours to dry.
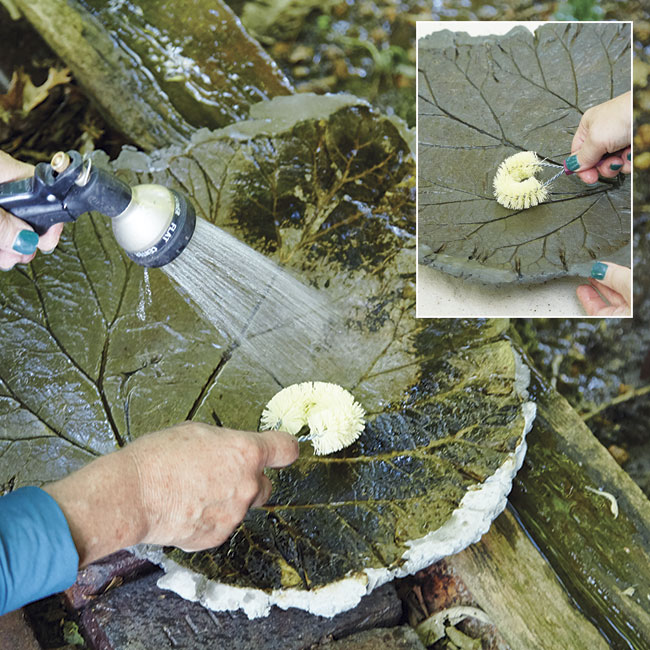
Step 4: Cure & clean
After at least 48 hours, you can remove the plastic and turn your concrete leaf over. In my experience, if it hasn’t dried thoroughly, a chunk along the edge is the most likely part to break off as you pick it up. To be on the safe side, have a friend help you turn it over or work your hand through the sand and lift it from the center.
You can start pulling out the leaf now or wait a few more days if you're concerned it's not completely dry yet. Most of the leaf comes out easily, but as you can see in the photo, you may have to scrub a bit with a stiff brush. Even though the concrete is dry, it needs to cure for a week, so wait to paint or apply sealer.
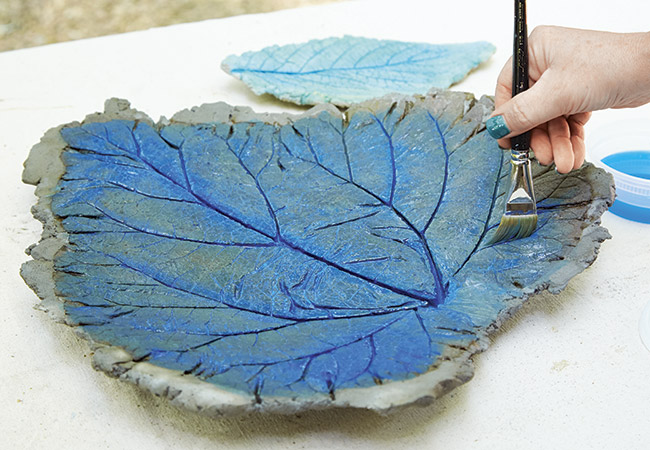
Step 5: Paint your sand-cast leaf
To use your leaf as it is, just add a coat of eco-friendly concrete sealer, such as AgriLife Kennel Seal, for protection. In the photo, I’m painting on several coats of a thin wash of acrylic paint. This wash was about three drops of paint to two cups of water. It dries quickly and you can begin another coat almost as soon as you finish the first to create a layered look with different colors. By keeping the paint thinner, you preserve the finer details, such as slender leaf veins. You can also use concrete dye or spray paint. Whatever you use, finish it off with a coat of sealer.
You Might Also Like:
Garden Woodworking Projects
A Cozy Small Space Garden
10 Plants to Attract Hummingbirds to Your Garden
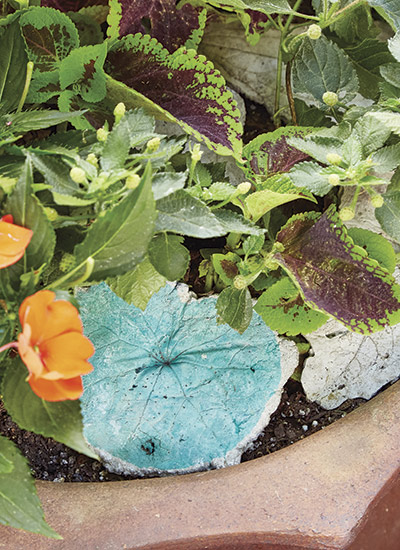
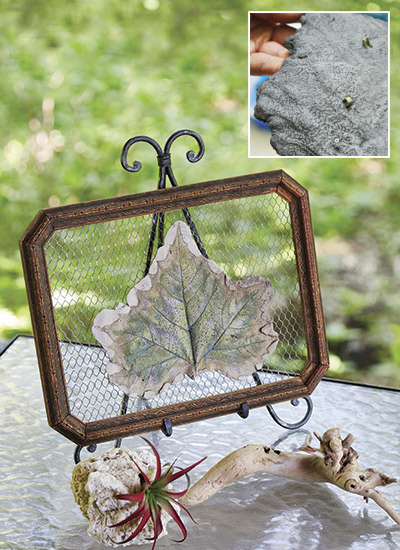
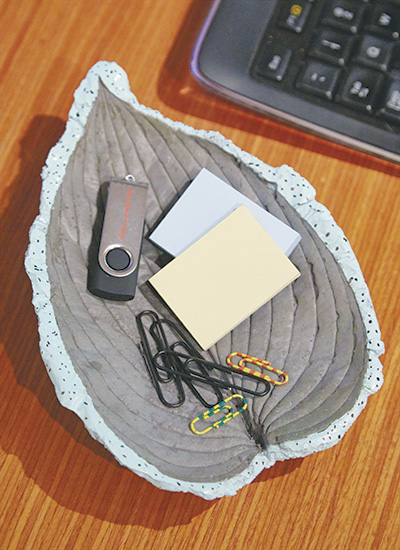
Get creative with your sand-cast creations
There are a lot of other cool things you can do with sand-cast leaves to add color or show them off. Here are some of our favorites. Share your sand-cast creations with us on Facebook and Instagram using the hashtag #GGSandCastProjects